No, they are now two completely different software with different features designed for different task.
Someone could use the ideas in the programs and try to build one complex all-in-one software. In my option my opengrade3D programming is not good enough to be used as a base.
I will test both this summer and probably build a completely new opengrade3D from AGO v4 or v5 some day.
It would be nice to incorporate Ntrip to OpenGrade, I am using the Lefebure and Ardusimple bluetooth but I always have disconnection problems.
That’s awesome!
Do you use a proportional or on-off valve?
How good does the automatic control works?
Do you see improvement(or difference in reaction) when you change the “overshoot redc” value in the valve tab? The best value for your setup?
Its proportional
Well i would say the auto control works really good.
overshoot reduction? its hard to say. I think maybe my PWM min might be to low.
Do you know what the MAX PWM should be set at so that it can run up to the 12 volts the coils are rated at?
What about MIN PWM do you have any idea at what voltage it would start to open at (techinically)
I toke a quick look at your coil.
They are rated 400 to 1400 mA.
So flow begin at 400mA and full flow at 1400mA
The coil Resistance(12V) in 5.6 Ohm at 20 deg C
The Ohm formula is: Resistance(Ohm)= Voltage (V) / Current (A) → Ohm x A = V
So the absolute min voltage would be: 5.6 Omh x .4A = 2.24V
If the coil get warmer (more resistance) and a little more current:
7 Omh x .5A = 3.5V
The max voltage:
5.6 Ohm x 1.4 A = about 8.4V
To calculate the PWM:
PWM(0 to 255) = coil voltage / tractor voltage x 255
so there is some variation if you have 12, 13.5 or 14.5 V at the cytron!
This give PWM values:
Min: 2.24/14x255 = 41 to 3.5/13x255 = 69
Max 8.4/13.7x255 = about 156
Overshoot Reduction:
Well, if it works as expected if you put a higher value it should slow more when near from the line giving just short pulses.
If the value is to low it would not brake before the line and go back and forth over the line as there is some delay between the gps reading, the valve actuation and the result reading from the GPS.
I still didn’t tested it extensively, hope can work with by the end of April!
A lot of interesting calculations there. So I think the default Max PWM was 180 That should have gotton the max gpm that the valve has. Or should i try to set it exactly at the max that is needed does it make a difference?
I had the min PWM as low as 30 for a while. After thinking about it i decided that it was starting to move soon enough. Which makes sense i guess.
Is there a range on the overshoot Reduction?
the range is 0 to 100
at 0 there is no derivative effect, it will probably overshoot the line.
at 100 it will have a huge derivative effect, ie only short pulses near the line to approach it very slowly.
from what I tested around 20 gives good results for me.
180 or 156 both are probably fine, I think even 255 will not hurt the coils? Since they are 12v coils?
Can someone confirm this?
It’s not gonna die from the voltage, as its just cutting the supply on/off real fast in PWM. So if you occasionally hit high PWM values probably OK, if you have constantly full PWM you start to heat the coil and that’s what probably kills it.
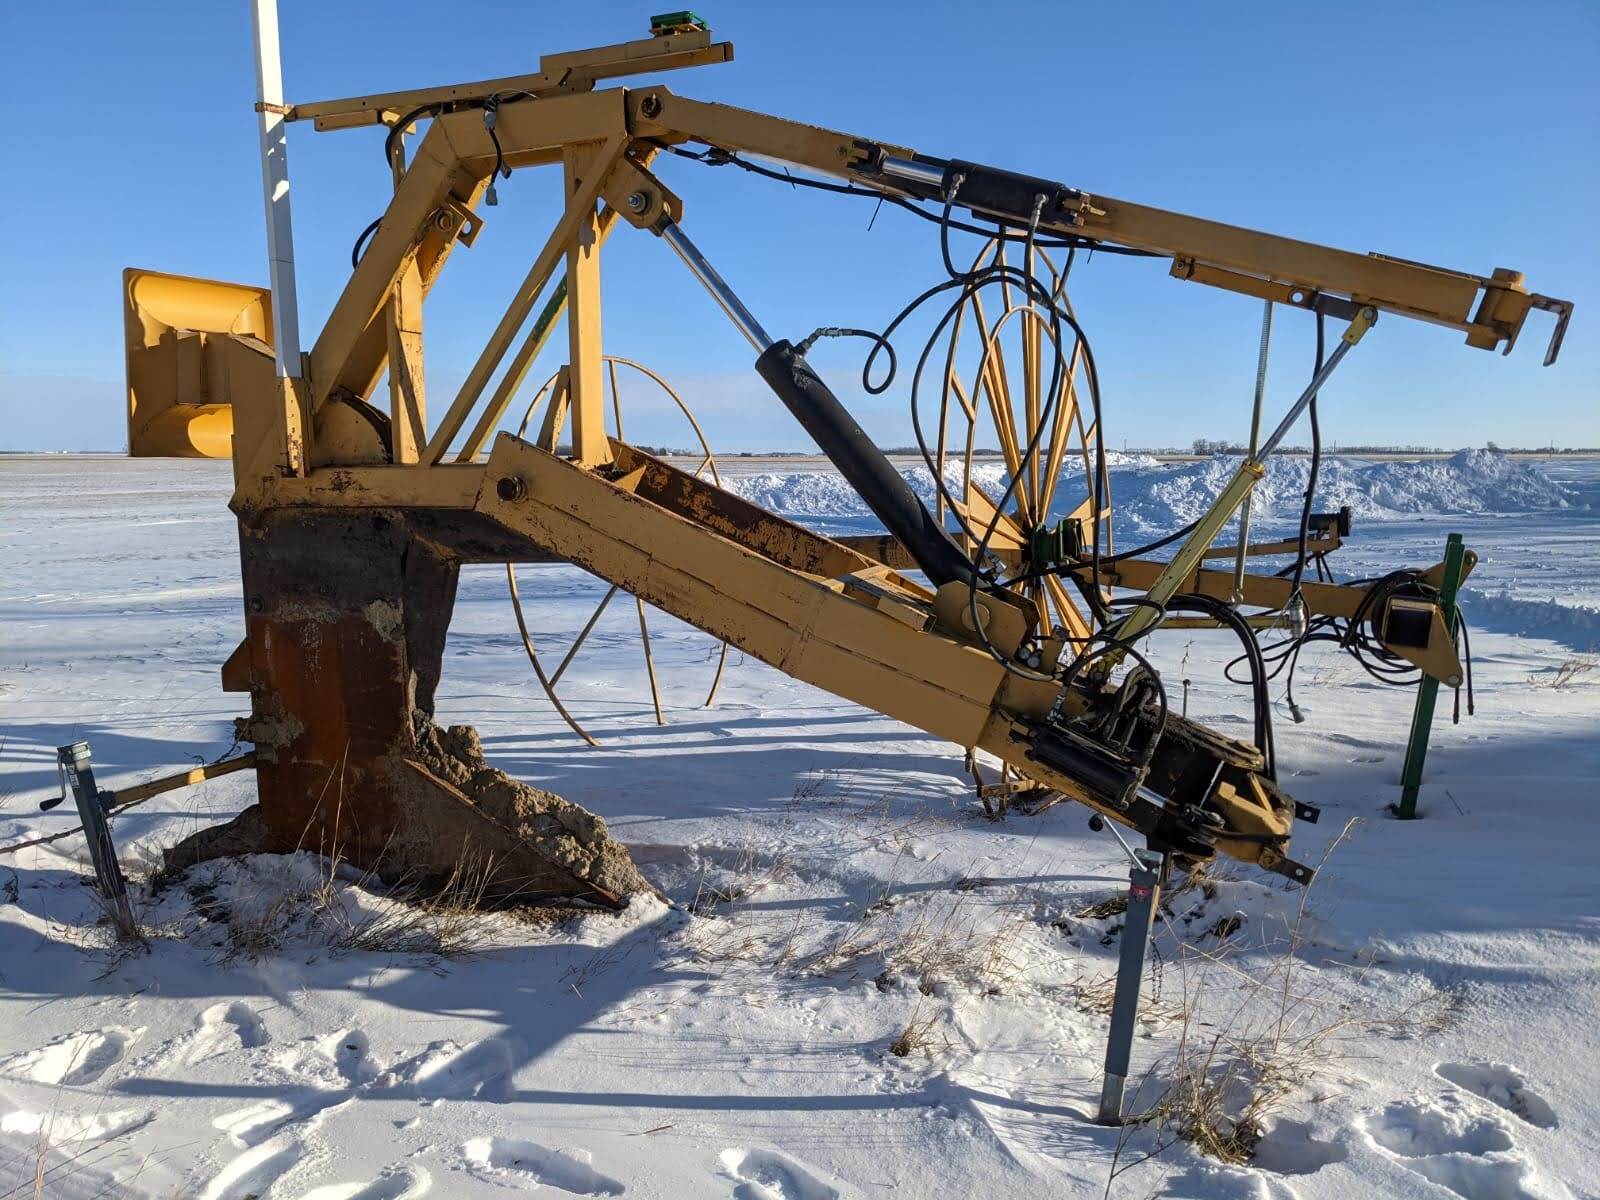
Yeah, it seem a lot of plows are controlled with the tilt.
I think to go this way there could be an IMU on the plow and OpenGrade should also output the desired slope and actual speed.
With some calculation on the arduino this could work, I think.
The main height cylinder works in parallel with the 3rd arm length adjusting cylinders to tilt the shoe together with the up/down on the same valve, at least that’s how he ran it. I’m thinking it would be nice to have individual control of the angle at times so I might run them on their own valves but with the same PWM signal. That way I can control the tilt manually for starting each run or during auto mode if I think it needs help. The swinging cylinders are there just to help alignment at the start of each run, during operation they are on float.
My uncle used his JD 2630 with i-grade (surface leveling control) to autosteer his JD tractor and control the built-in electro-hyd valves for height control. From talking to him, it sounds like he had to manually toggle the recording/logging for each run and sometimes he forgot, it would be nice if it was automatic recording, maybe always record while in auto mode but are there times when you switch to manual but would still want it to record? Maybe a height threshold below which it always records, that way when the shoe/blade is close to ground level (compared to tractor antenna) it turns on/off recording automatically.
How many guys lay out the tile ahead of time vs mounting a reel on the plow? I’m thinking dual reels (one on each side), that way whenever there’s an empty reel at the start of a run, refill it and then we should have enough for that run. It looks like the pros use hydraulically controlled reels to match ground speed.
My uncle also never surveyed the next run while returning to the start position, instead he drove on the freshly tiled path to pack the dirt back down. Then he usually just set a 0.1% slope and nudged it higher as needed. He said sometimes if the previous run needed a lot of nudging, he’d set a slightly higher slope. I like the idea of surveying the run before hand and setting an ideal slope instead of all the constant nudging.
Has anyone been steering and leveling/tiling with the same tablet?
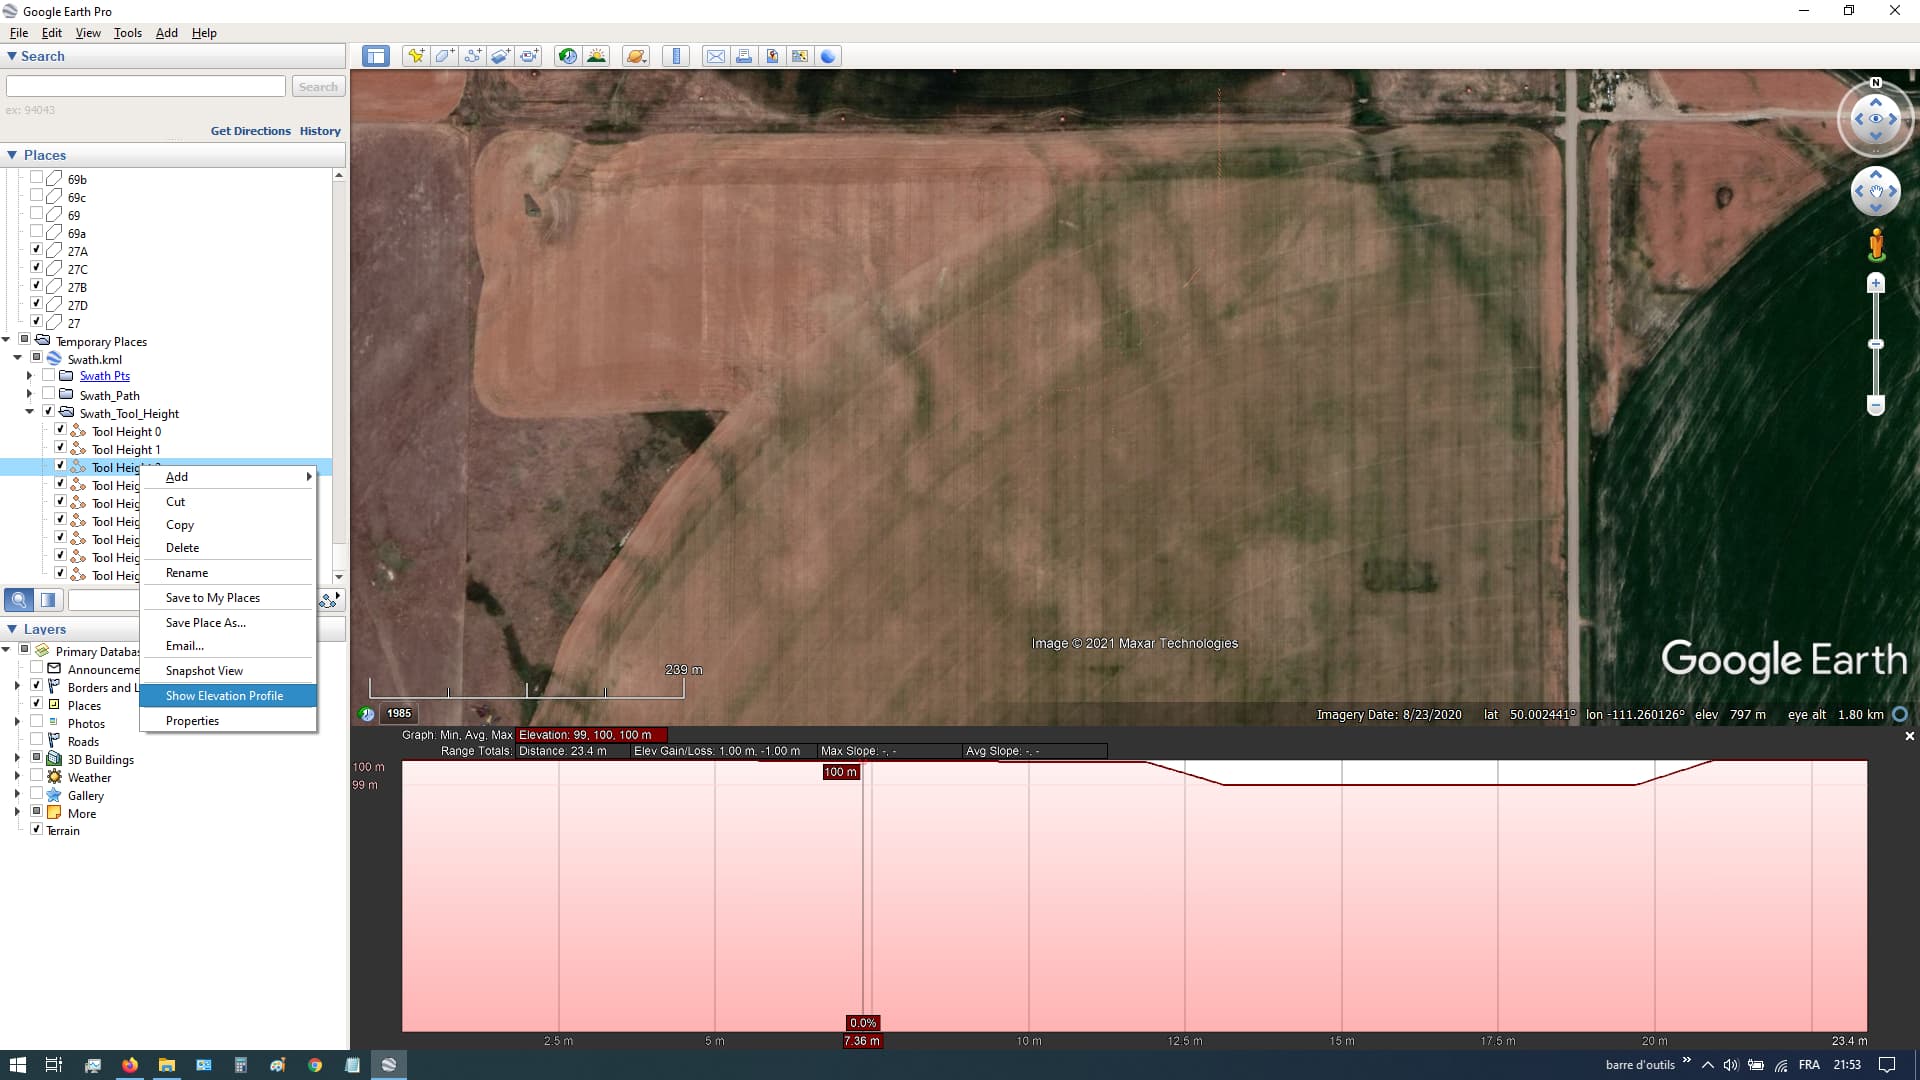
So how should a guy get started with tiling software? Who’s version of OpenGrade should I look at? What software works well for planning? I have basic text files from mapping while doing fall tillage (several years old already but shouldn’t change much) from which I generate 3d maps using old software called Surfer GPS. @BlackAce How’s your software coming along?
Yes, works no problem. Only issue is swapping between the windows, might be more convenient to have two displays.
OptiSurface also does tile design, haven’t tried yet though. But you can basically get the profiles from the 3D mapping up front. Maybe needs some work to integrate into OG to pick the correct path. I can test out on some data and report back.
You can look at my last here, to test on simulator. It have the ability to save the swats, But still have to add the autorecord, the auto-slope-draw and the tilt(pitch) control.
With @BlackAce s version, I’m pretty sure there will be a good working app by spring.
I only made my tile designs by myself, always had a contractor to make the work (so far!)
If I would tile at home I would make the plan “by hand”, have a paper plan for the layout and flag the lines in the field.
Then I would run 2 tablets (or one with both AOG and OG) one with AOG with the antenna on the tractor and autosteer to make and drive the AB lines, And the other for OpenGrade to plow and record the paths.
I would drive each line to survey the height then plow it.
Here we always lay the pipe one swath ahead, on ground, 15 ft from the line. Tile lay out on Youtube
I’m not sure what is all involved with tiling as we don’t do it in our neck of the woods. What is a typical depth and do you start the inlet at surface or does it begin underground at a target depth?
I think @Pat version may be the one to use m now as mine has been geared a lot more to surface work and ditching. It also only currently only connects into our New Holland tractors to control the SCV. I think it may be a good idea to merge all projects into a common base and then start forking off If it. I will look at getting it up onto GitHub soon.
Around 3-5 feet, starts underground and then you run with a given slope. I’ve only used a contractor, ran the mapping with RTK myself and they made the tile plan according to that.
")