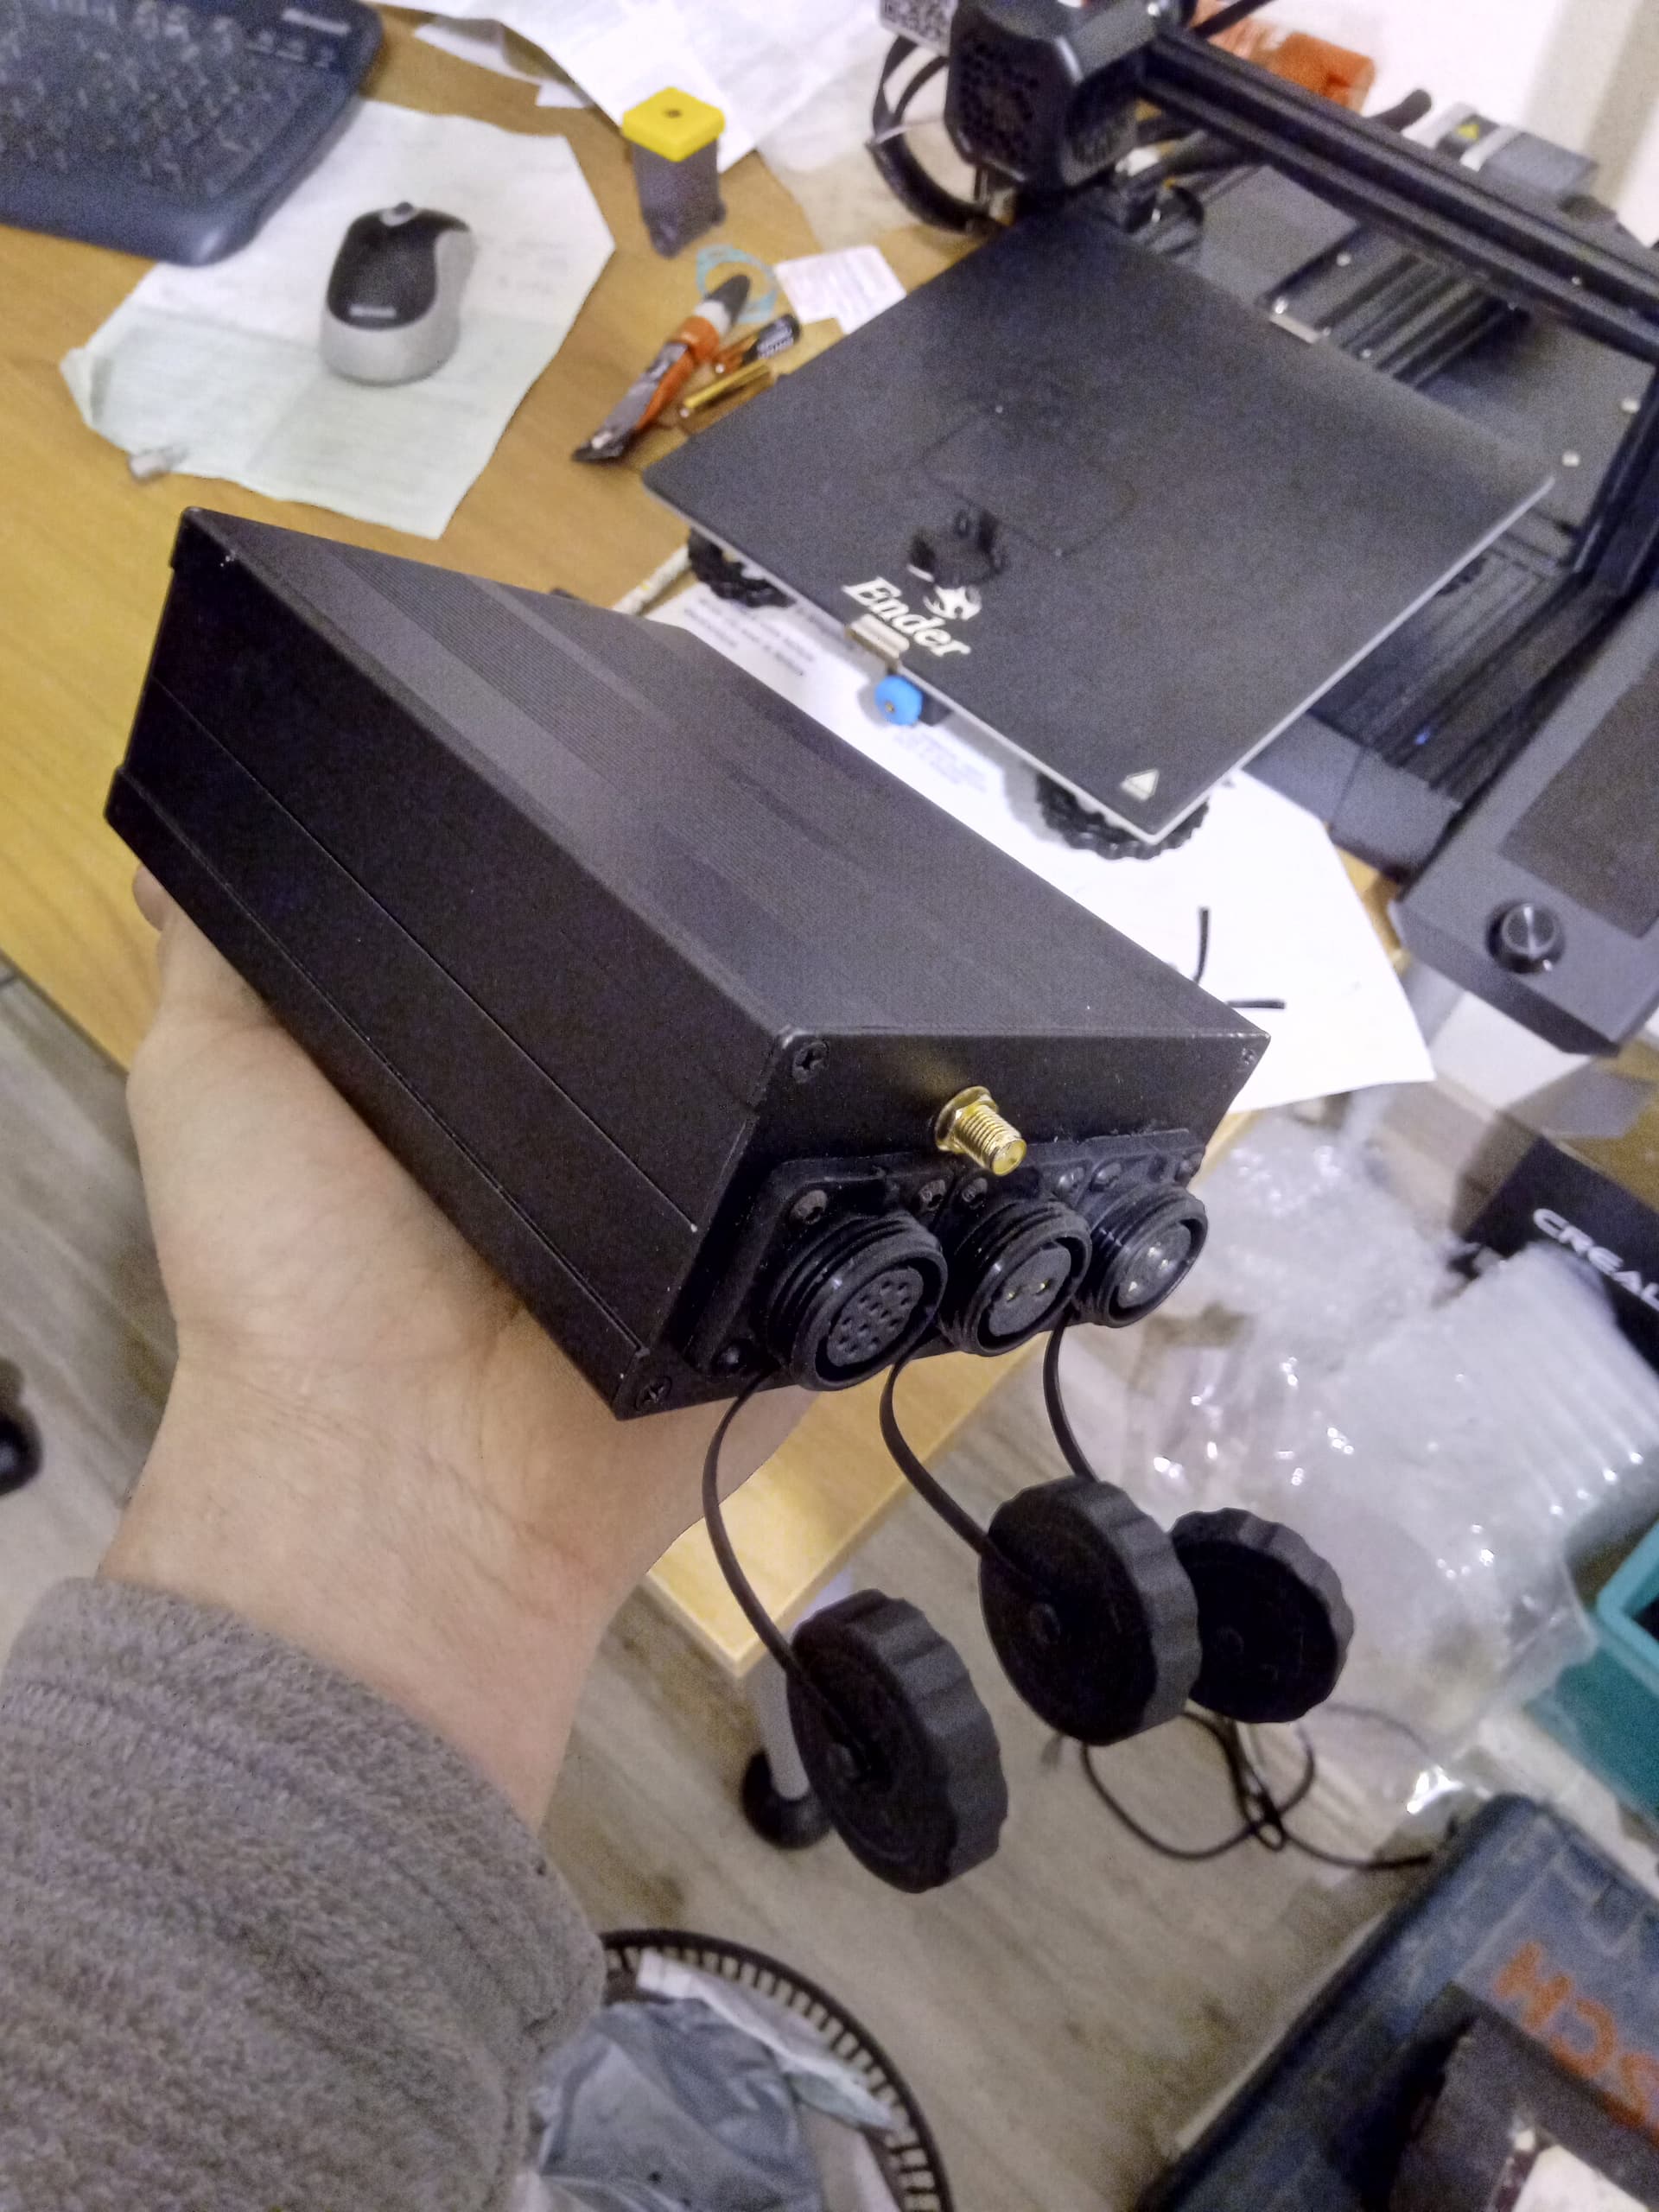
Here are some pictures of my assembly on a CVX. Nothing special with all that is already done, except the modified PCBv2 which I share for those who are interested.
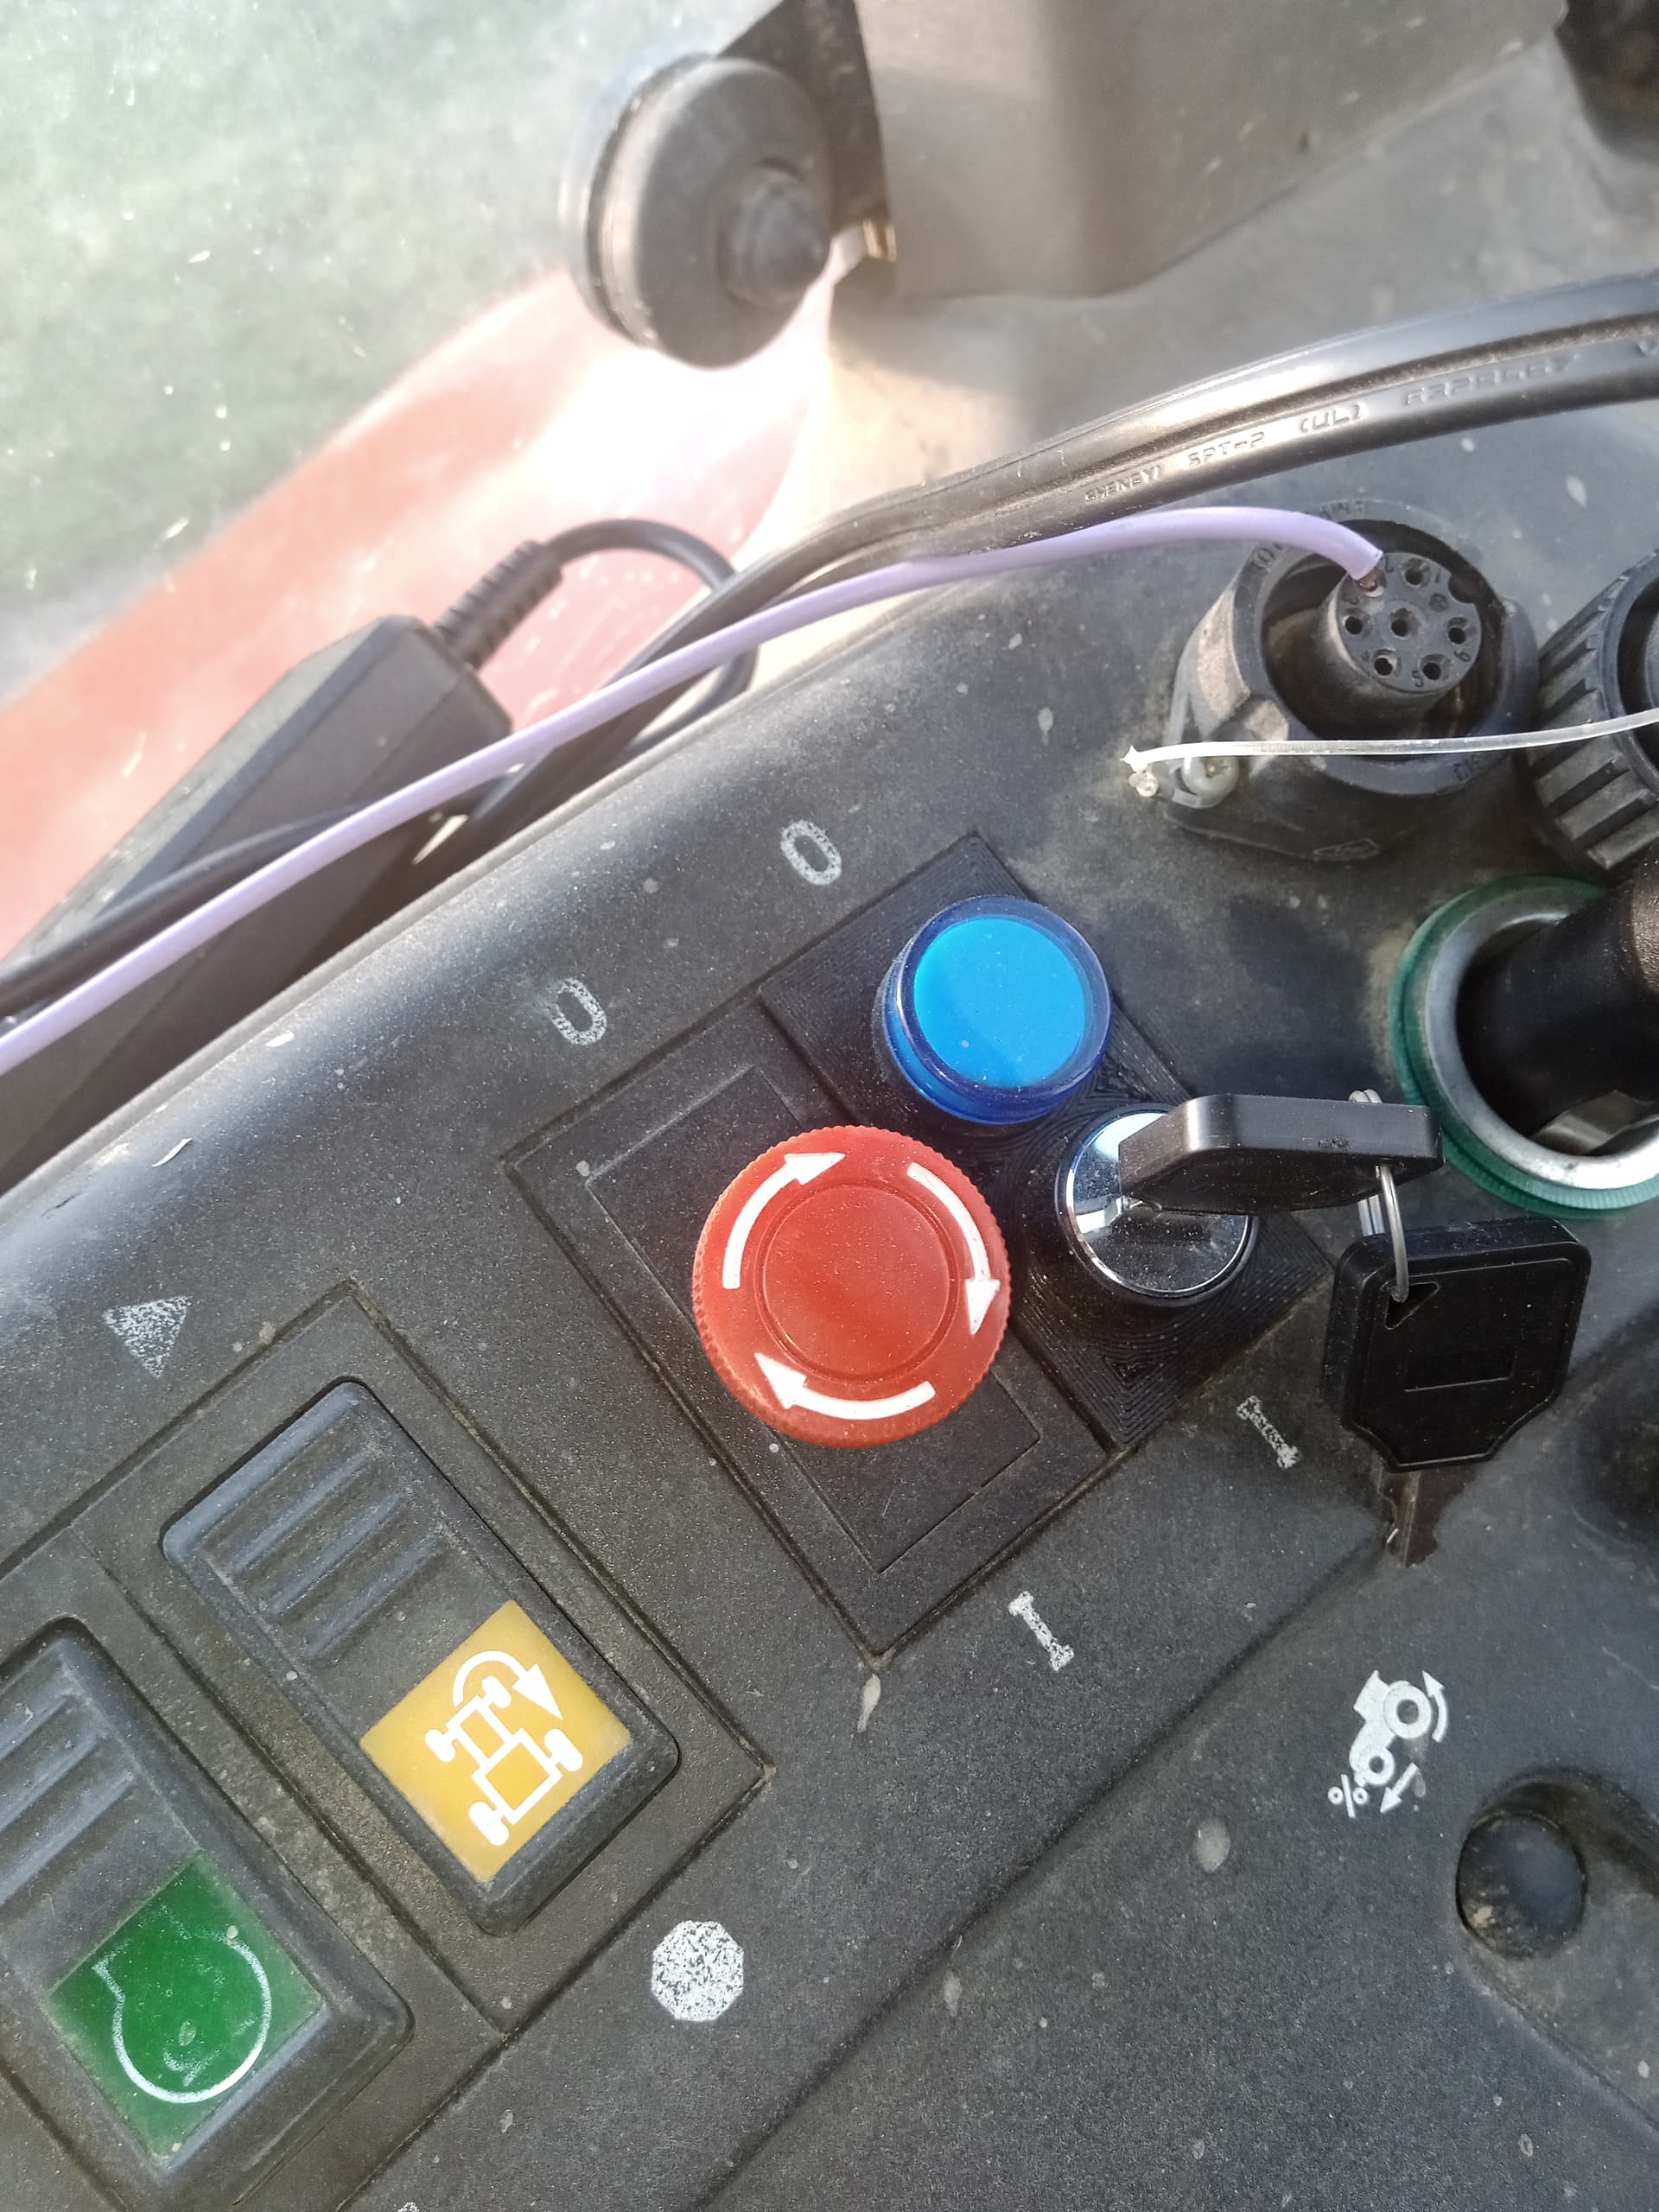
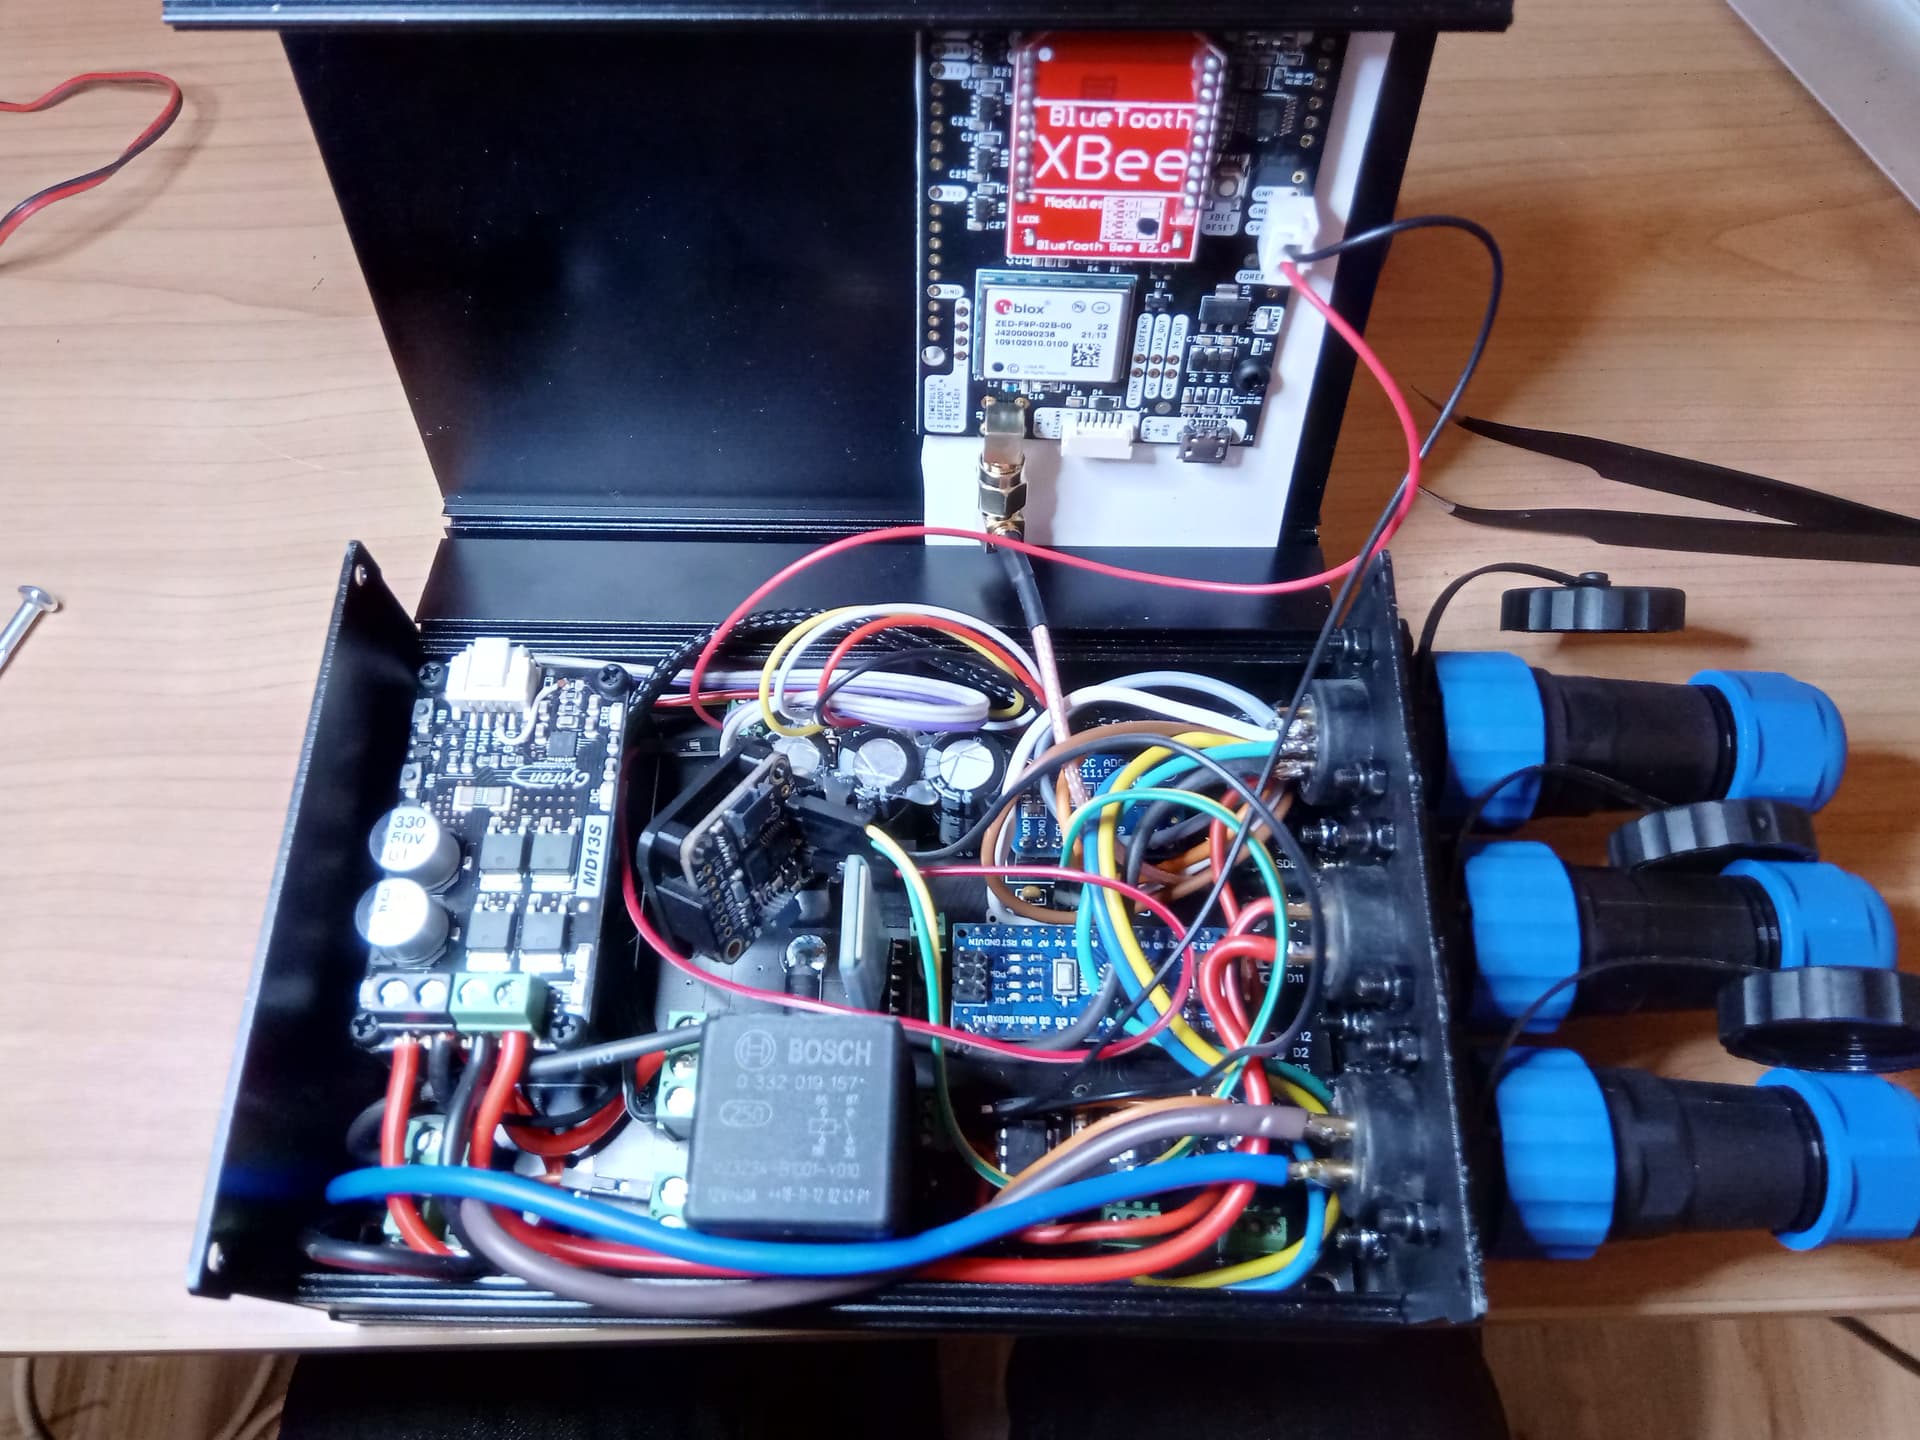
the PCB box is Bluetooth and completely integrated into the padding, nothing sticks out, no wires, just a few buttons for security. The PCB connected to the + contact starts and stops at the same time as the tractor.
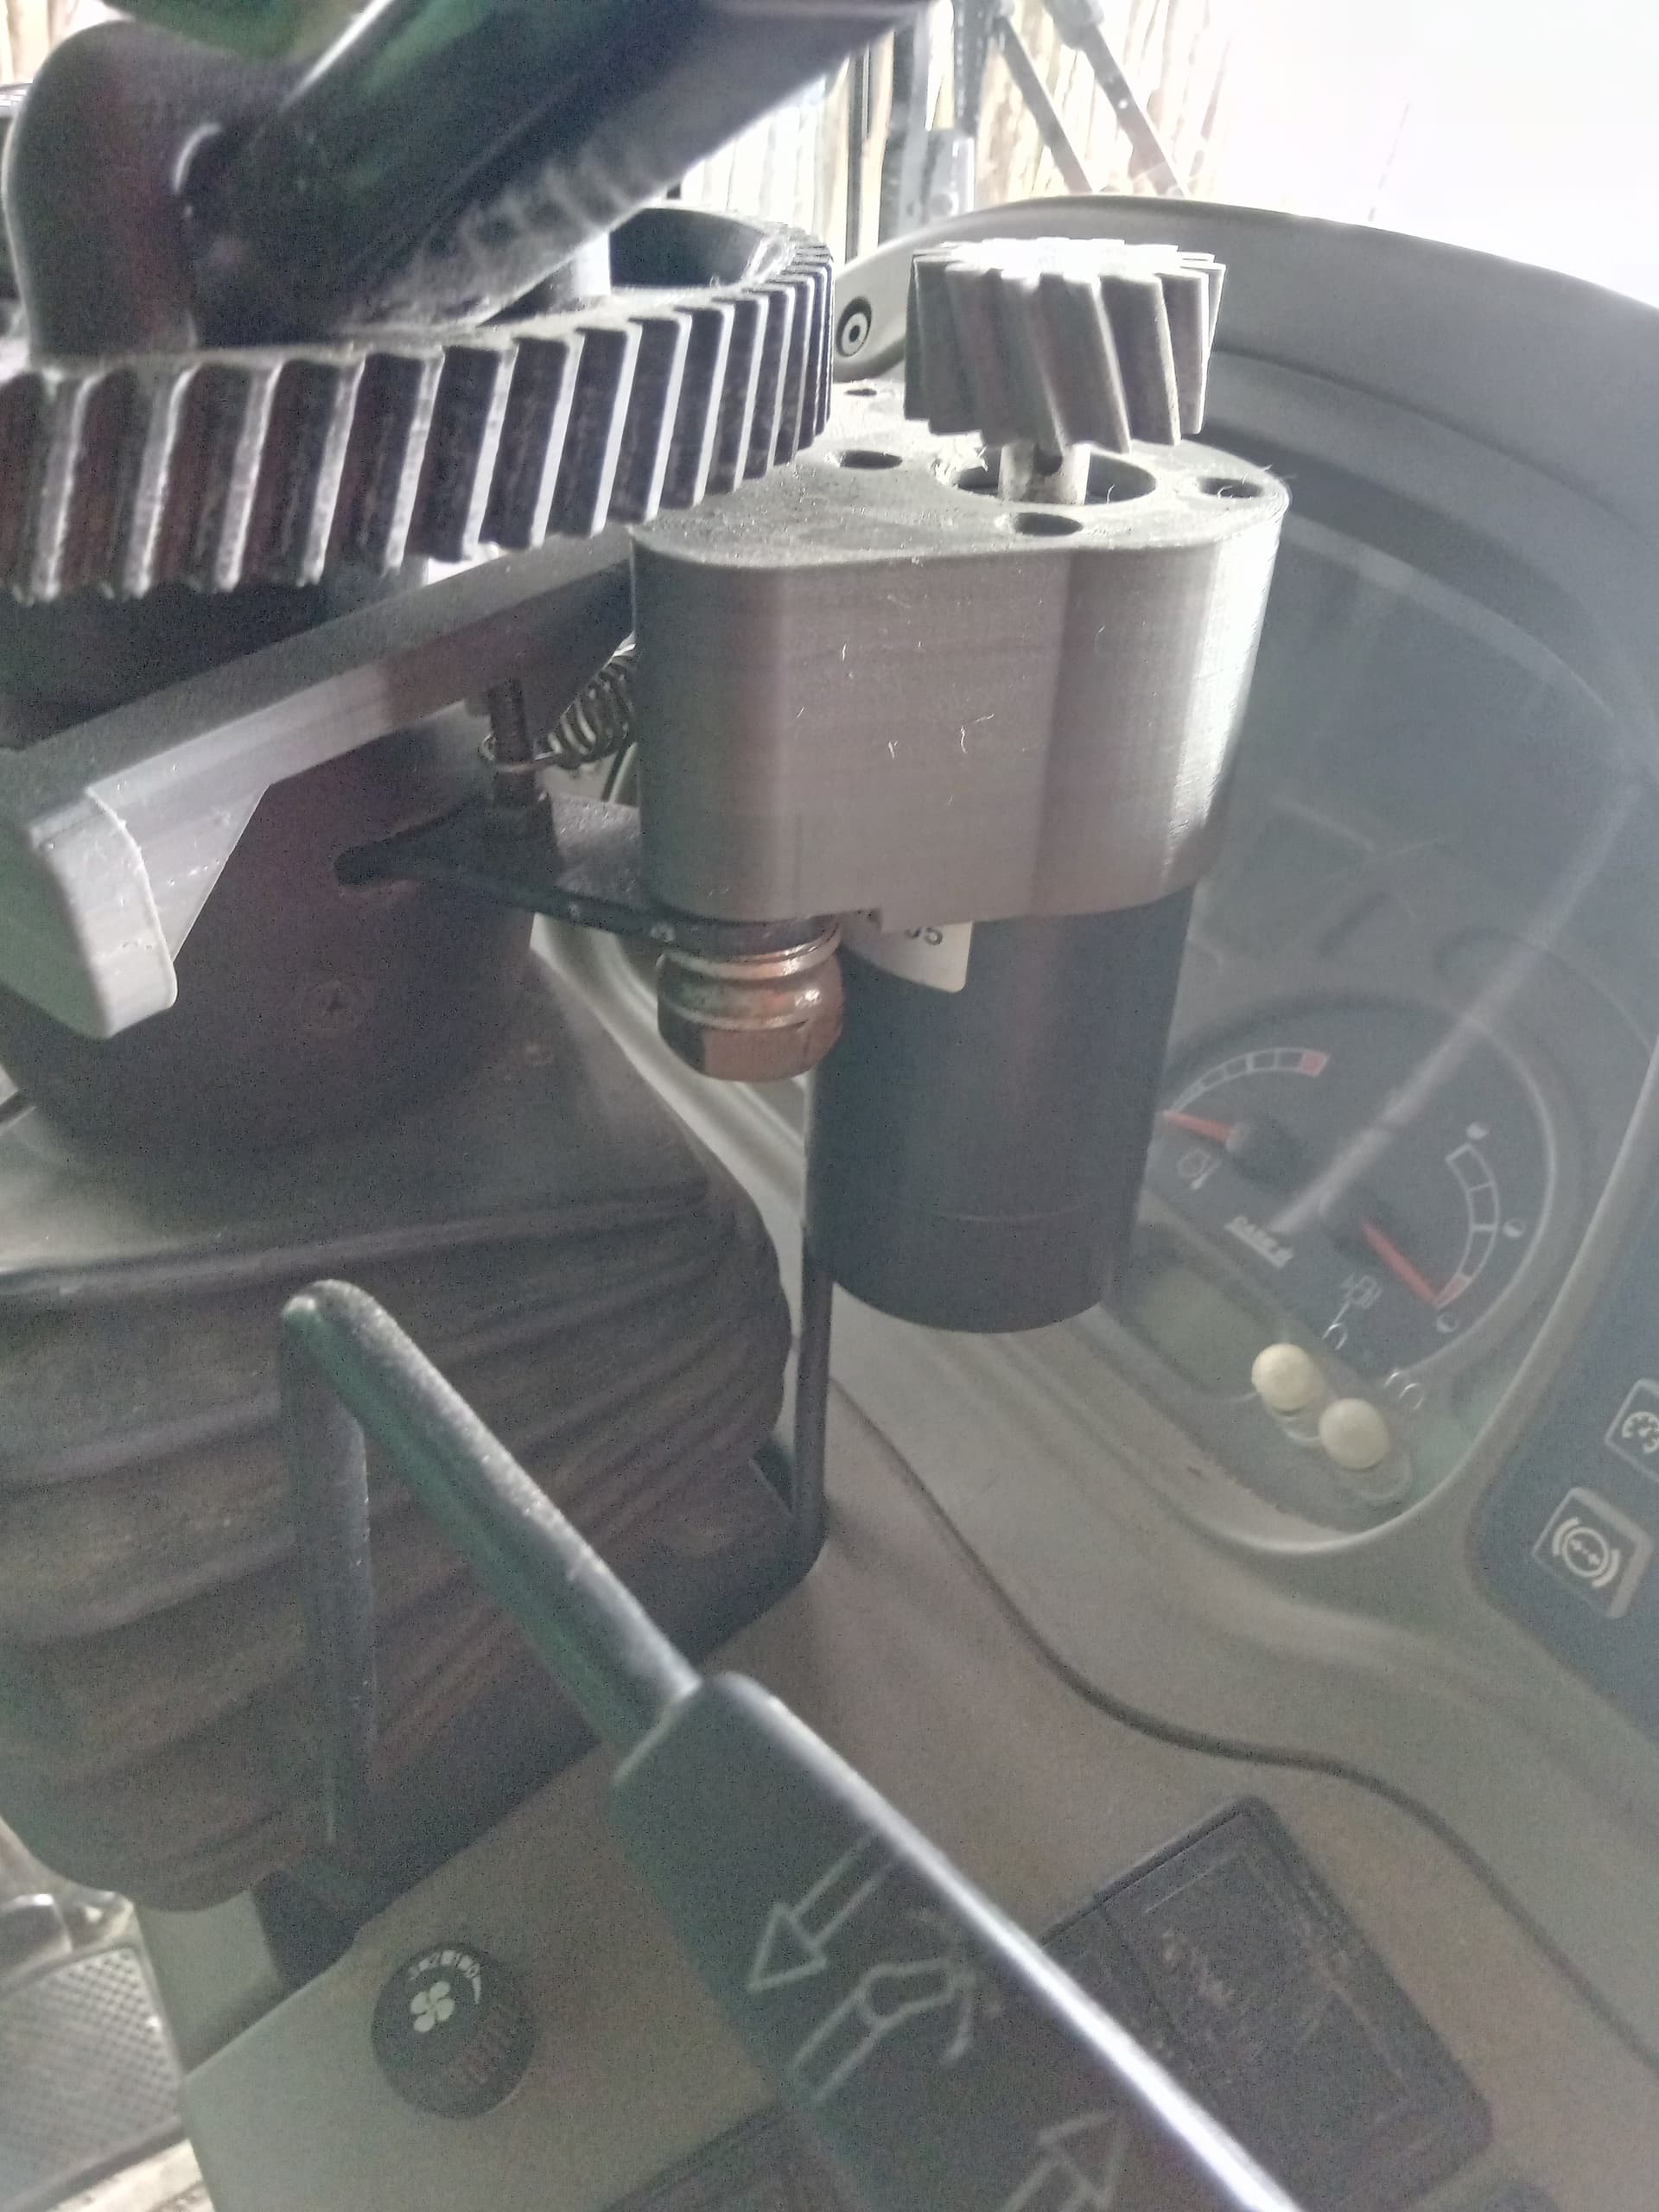
for the WAS I use a linear sensor on this suspension bridge, hard to do otherwise.
On my github you can find the modified pcb as well as the details of the modifications. you will also have access to the list of equipment that I have used successfully!
Hello, nice work, there is something I don’t understand, you connect the PCB with the HC-05 to the Tablet, but how do you connect the F9P to the tablet? the tablet can only connect as BL master to only 1 slave, how do you generate 2 communications?
And as for the delay? don’t you have that problem?
The F9P is also in bluetooth thanks to the Xbee BT module. the connection to the PCB and F9P remains separate.
No problem of delay, it is necessary to configure the F9P so as not to saturate the Xbee module.
I know how the BL Xbee works, what I’m saying is, does your tablet allow you to connect 2 devices via BL at the same time?
tablet = master
F9P+Xbee=slave1
PCB+hc-05=slave2
I added on the git the model of the support (motor.zip)
I kept the metal bracket I made to hold the trimble motor. put a screw in the hole. the support is simply fitted onto this screw. It can be easily removed, although it was not my original idea.
bonjour. superbe réalisation. j’ai moi aussi un cvx 1145 pour le mien. Peux partager les fichier stl de la couronne et pignon comment sont fixer les bride sur la couronne??
Merci d’avance
Bonjour, le support est disponible sur le lien 1er post. La couronne et le pignon sont simplement les engrenages universel trouvé sur le forum cerea. Cependant les bagues de serrage aux branches du volant sont trop longues. Il faut dans votre logiciel d’impression 3d, faire un déplacement en Z négatif, pour diminuer la hauteur de la bague. De souvenir il faut bien enlever 10mm. Je ne peut pas être précis sur la taille à enlever m’a carte sd à fondue il n’y a pas très longtemps malheureusement.