The machine control on github branch v4.1.01 has section control and hydraulic lift. See the schematic in the docs folder
Can I use this code to control 7 sections with motor valves just like Deistho in the post: Müller Spray Controll with motor valves? And also connect the manual switches of my sprayer and an auto / manual switch to Agopengps? I can do the output, but not the input.
the code and the suggested pinout should work for 7 sections. If your motor require +/- to open and -/+ to close, you can put DPDT relais to do so (2 pol Wechsler). If you don’t have automatic rate control, the easiest thing might be to build a new box with PCB, switches and wires to your valves. So you can build and test and if all is working good you can replace the original box.
Thanks for the reply.
I do have automatic rate control, so building a new box is not really an option.
My main problem is giving input to Agopengps over the position off the switches from the original control box from my sprayer.
Is it possible to give input from 7 switches to Agopengps using Arduino nano V3?
Workswitch is through autosteer PCB.
In 2018 I have successfully added AOG to a Delvano – EAKS(33m) is a 9 section sprayer.
Then I used the AOG V2. In that version the arduino sends back SectSWOffFromArduinoLo(Hi), SectMainSWFromArduino, RelayFromArduinoLo(Hi),… This was send from Arduino to AOG.
Now I have bought simular sprayer and whant to do the same but now with the latest version of AOG.
Version 4.3.10 can we still send the sectionswitches back?
Like I read in the comments before the Mainswitch is send back by the Autosteer – Arduino?
The auto/manuel switch …
Can I find somewhere find the layout (.xlsx) of the bytes that we can send back to AOG?
For UDP it’s the same as it has been, for USB you must add the PGN 127 249 as first 2 bytes (10 Bytes sentence) when you use it with AOG V4.
How do you like the magnetic WAS I ordered it by mistake and was wondering if I should reorder a different one.
@JoshWilsonFarms if you use an @ symbol before the name it will send a notification to @Mdmcurt
1 Like
The magnetic worked all spring on 4wd. Biggest issue was mounting, the distance of separation has to be pretty small so you need a good mount.
1 Like
Thank you sir I might give it a try.
Hello, where can i find the WEder circuit Layout?
Regards, Peter
Hi Bada,
the WEder files are on GitHub or on the old Wiki.
Andreas is planing to design a new relaly board, that might be usefull for section control by the end of january.
greetings Matthias
http://agopengps.gh-ortner.com/doku.php?id=section_controll:start
Hello, is it possible to use the Code without the fllow and rate Option, is it just to Set it to false in the Code? Or do i have to deleted it? I need Just auto off/on and 5 section Switches and the All section switch on/off like in your Video but without the rate topic?
Are there Gerber files available for the Weder circuit?
Regards, Peter
Hi Peter,
the rate option can simply set inactive.
You need the 5 section switches, an auto/manual switch and a (ON) - 0 - (ON) toggle switch for the main switch.
For the circuit I don’t have gerber files. WEder is coffeetrac. Maybe you can contract him via GitHub.
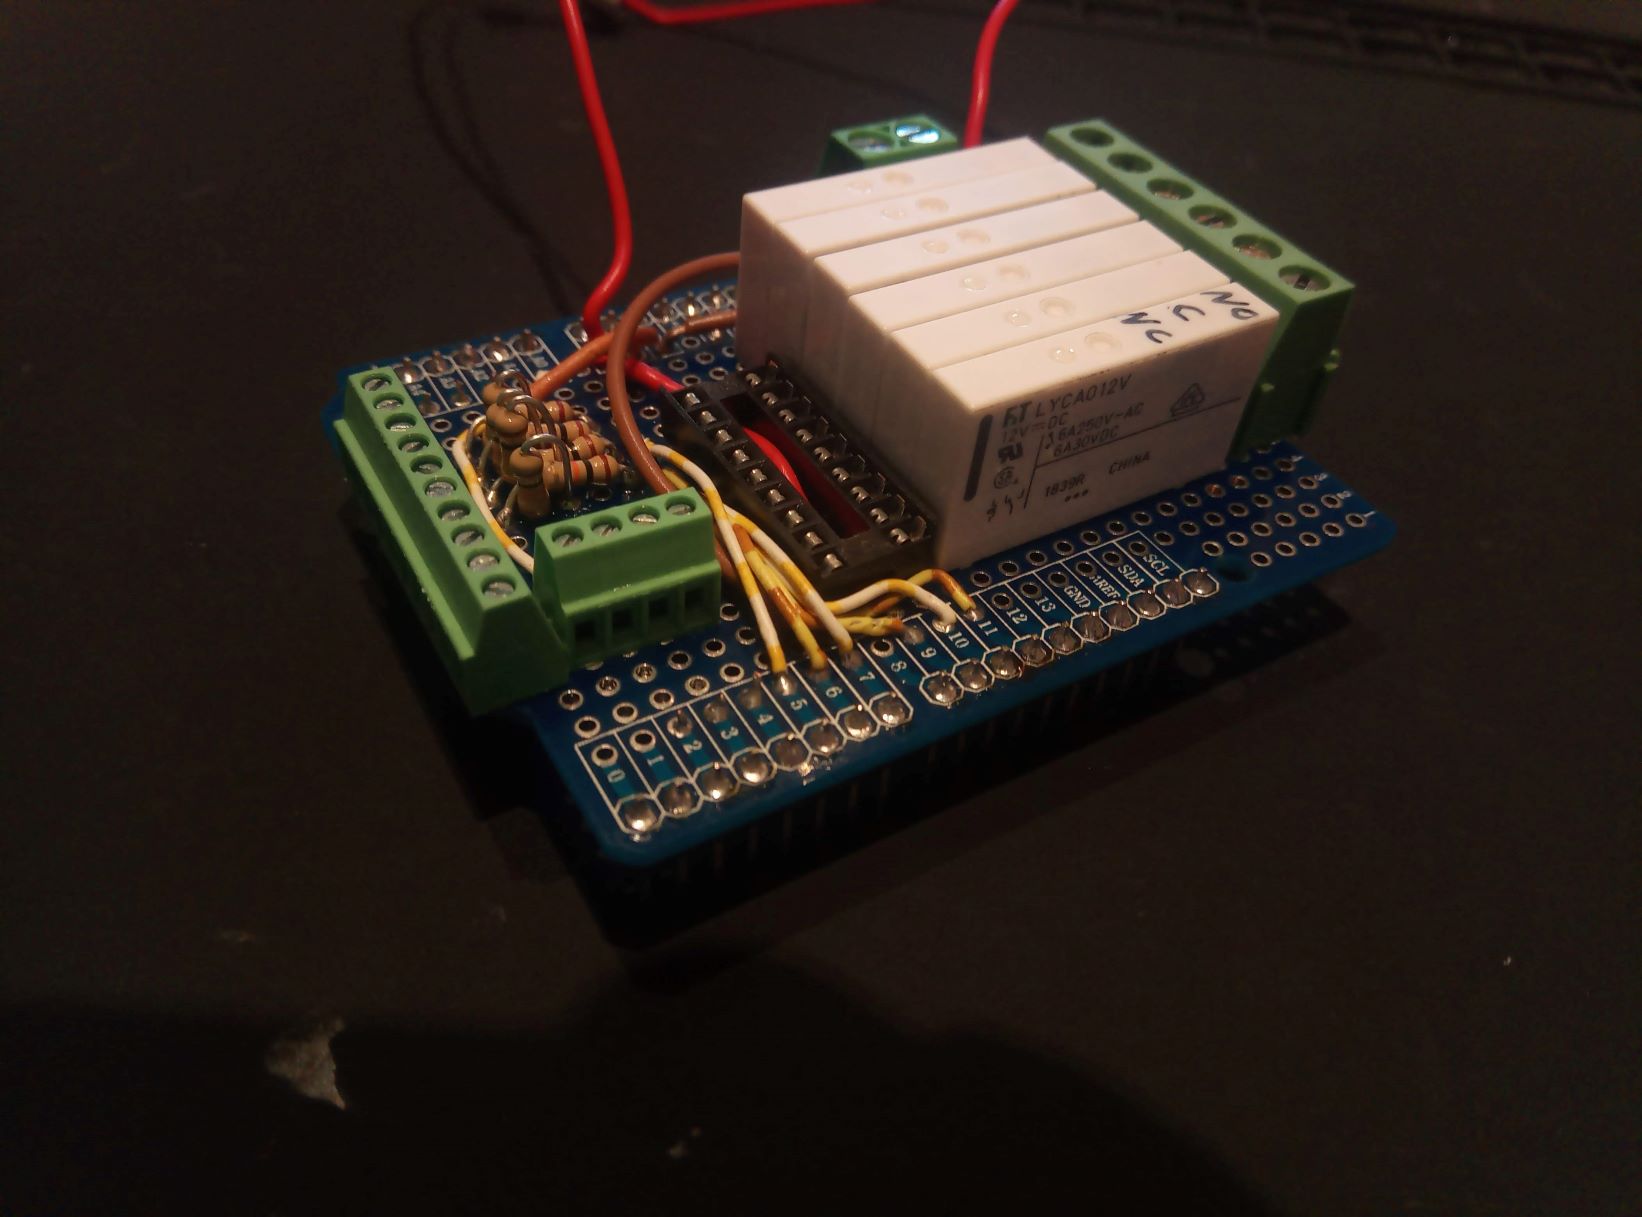
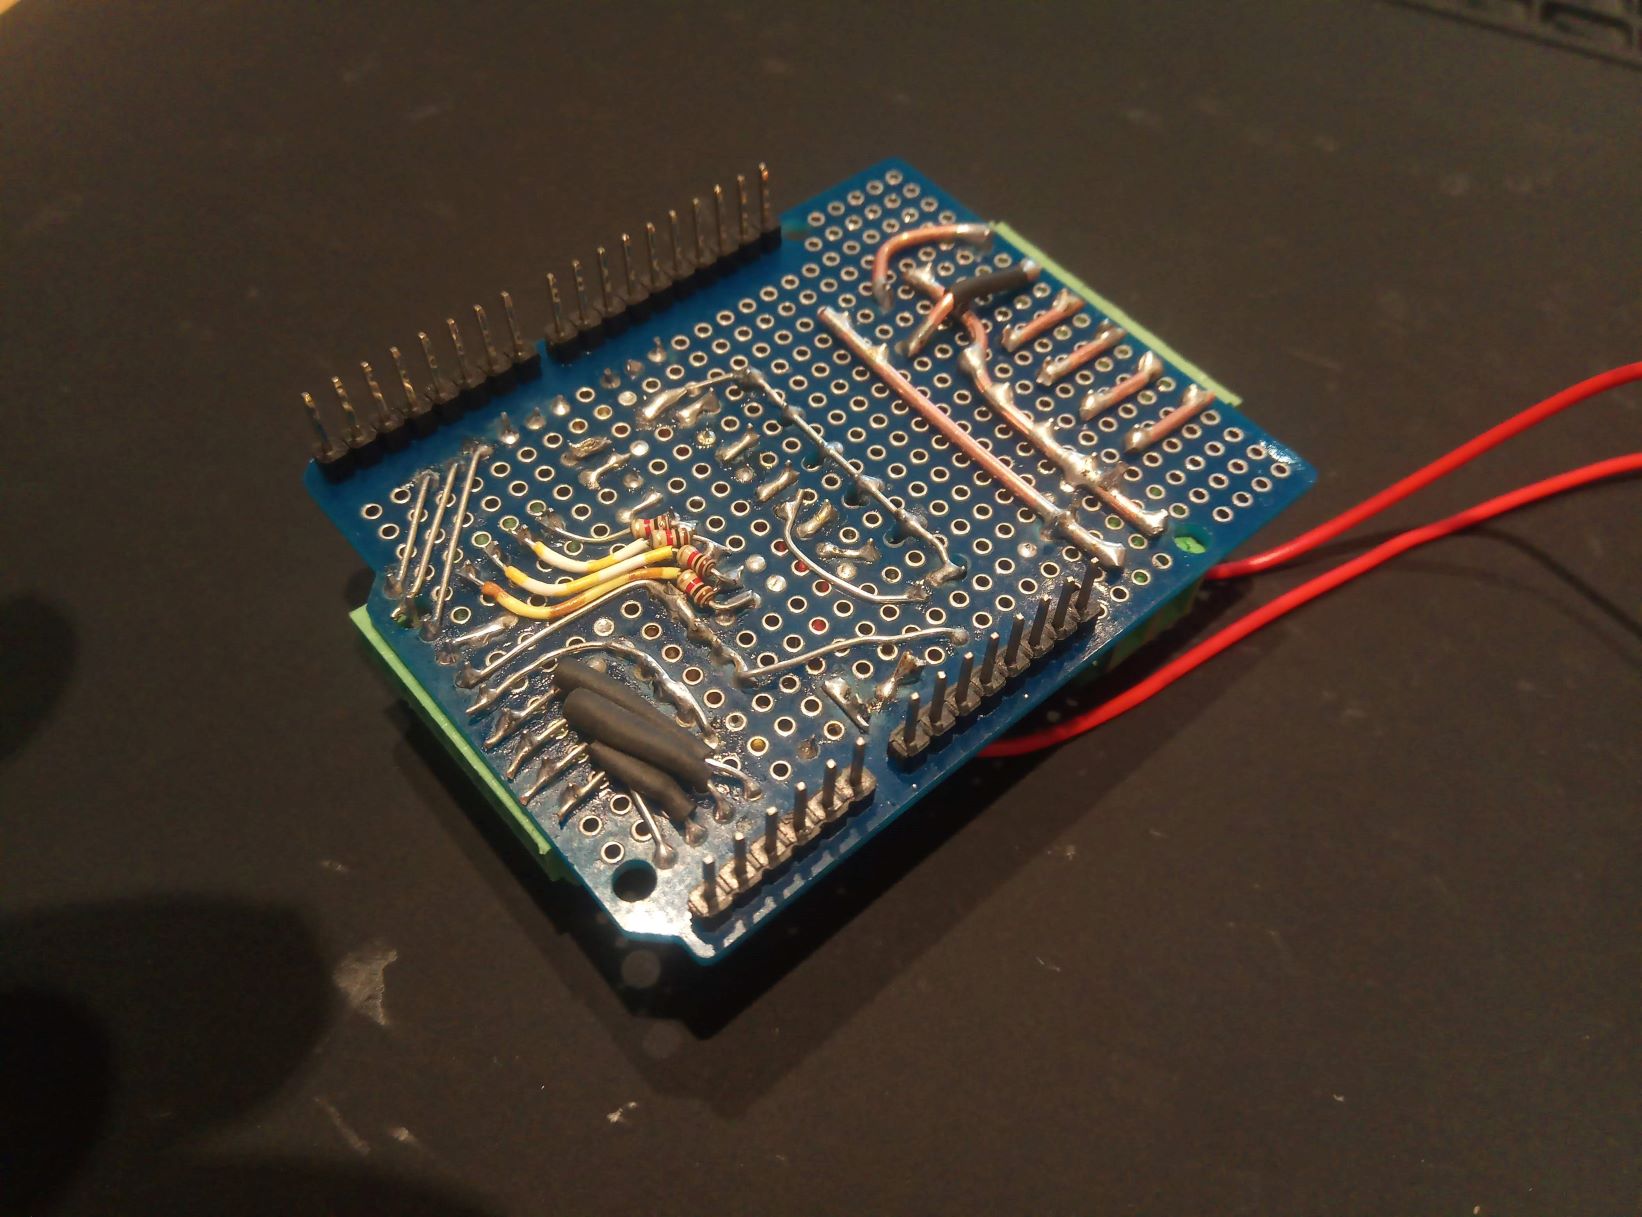
Another option is to put everything on a breakout board. I did this for a vineyard sprayer with 4 sections and motor pressure control. It is for ESP32 in UNO shape ESPDuino
Greeting Matthias
Uploading: IMG_20200430_204913_9.jpg…


May be one of the hardware developer @GoRoNb here can design such a board for community use.
I think, something like this exists already, e. g. this one. Honestly I don’t have the latest status of that PCBA, but it looks very sophisticated to me.
Is there an Part List of the WEder Circuit?
Regards, Peter
hello, I have a question how to setup this code using a esp32lr88, because I cannot understand how the code has to be uploaded.
regards,
Richard
Hi Richard,
for every ESP32 you need to add the support files into Arudion IDE. Check google, there are good videos, how to do this, or visit Espressif on Github: GitHub - espressif/arduino-esp32: Arduino core for the ESP32
In brief: add the URL you can see on GitHub Espressif ESP32 arduino to your arduino IDE settings (file/Preferences/additions Board Manager URL)( https://raw.githubusercontent.com/espressif/arduino-esp32/gh-pages/package_esp32_index.json ).
Then go to board manager and install ESP32.
Then select ESP32 board (dev board, if no other fits), select com port, maybe correct settings in the code flash - done.
first of all thanks for the very fast reply, but I still have some questions. I added all support files for the esp 32, but which code on the github do I have to install or do I have to combine the different codes in some way.
Regards
Richard