You could use a USB to TTL Serial adapter, but the timing in Windows is terrible for syncing the GPS with BNO.
1 Like
Hey Kevin,
I am still a little confused about the required hardware and software but I plan to start ordering some components based on your picture. Once I have some items in front of me maybe it will start to come together. I currently only need to control 4 sections but want to build it for future expansion. how do you know what pins to use?
Thanks
Nano pins
Relays
Ethernet adapter
Jumpers multiple connectors
Terminal adapter
12v-5v converter
Look at bottom of sketch. D4 is 1section D5 is 2nd section and so on. I used multi connectors. @m_elias idea. They stay on much better than single jumpers.
That, the sketch, and AOG should get you started. Can pm me as well. I had to get help from Matthew for enabling sketch. I used MTZ for external switches.
1 Like
Hope that helps. Forgot to reply to your post. Not a lot of documentation on section control like there is for auto steer. The works witch has to go to auto steer board I believe. I haven’t tied it in yet. Can order whatever relay board you want. Most have to have external 5v power. The 16ch has 12-5v built in.
Thanks for the info Kevin. I got some items ordered.
Hello. Wondering if someone can give me instructions on how to load the machine_UDP_v571 onto the nano via usb. My only expereience is loading the software onto the teensy. I have modified the sketch to hopfully run 8 relays as per @D0824 instructions. But beyond that I am unsure. I watched a few videos online but when I plug the nano in the computer it doesnt recognizes that it is even there. Do I need different software first? I am using Arduino 1.8.19. Also the “POW” light comes on and the “L” light flasheson the nano when it is plugged in to the computer but in the device manager “Ports” tab it doesnt see any COM ports. If anyone could give me some suggestions what I should doing that would be great.
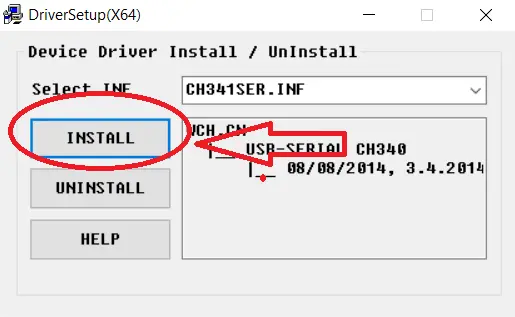
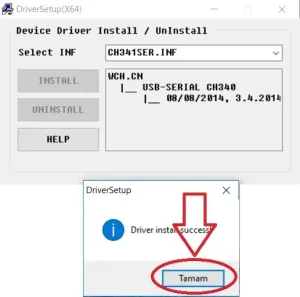

There are exhaustive driver installation instructions provided by arduino.cc:
Optional: Arduino IDE 1.8.19 is quite old, current release is 2.0.4 Before updating uninstall the old version and remove all related files.
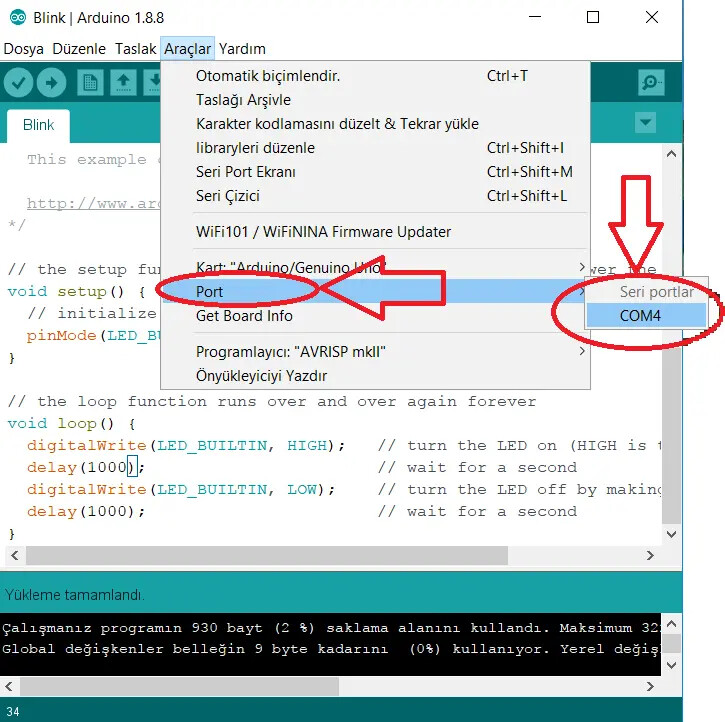
Apart from driver issues there is at least one setting in the Arduino IDE required:
Choose Tools → Boards → Arduino AVR Boards → Arduino Nano
Try to upload the sketch. If it doesn’t work and depending on your actual micro-controller it might be necessary to choose in Tools → Processor “ATMega328P” → “ATMega328P” (Old Bootloader)
First check which is the latest update that can run teensy programming, if you also use a teensy!
I have two arduino ino programs installed on my computer.
And you use a cable you know have data capability, and not only a charging cable?
Thanks Whiterose, this made it show up
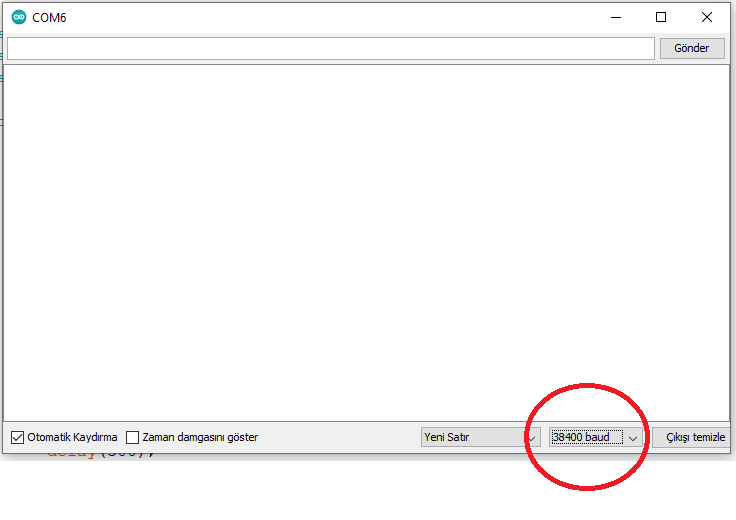
Once I installed the driver ch340 driver that Whiterose suggested the com port became visible in device manager. Still with Arduino 1.8.19 I attempted to upload the code to the nano by " Choose Tools → Boards → Arduino AVR Boards → Arduino Nano." and "Tools → Processor “ATMega328P” it took 5-10 min then said error “out of sync” or something to that affect. I then switched to “ATMega328P” (Old Bootloader) and uploaded. It showed upload done. But when I go to Serial Monitor the it says Com 6 serial and then the rest of the screen is blank. Does this mean that it did not work?
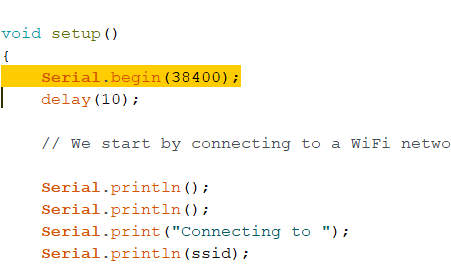
The baud rate in the void setup section of the code should be the same as the speed in the serial screen. And this line should be active in the void setup section. Example: Serial.begin(38400);
Not exactly sure what you mean? I should change the code to match the serial speed? Where do I find out the serial speed? Is it in the code already but I need to comment it in?
You need to match the serial monitor baud setting (bottom of the window) with the serial.begin line in the code
If you want to get information from the serial monitor, this line should be in the void setup section, and it should also be on the lines starting with serial.print. And the baud rate in the void setup should be the same as the baud rate in the serial monitor.
Ok. I’m kinda following what you are saying. On the serial monitor screen /(com6) screen the baud rate was 9600. I switched it to 38400 via the pull down menu to match the machine udp. Should something then happen? My serial monitor screen looks empty/ the same as yours. Did I do something incorrect? I was thinking it would display something similar to when I updated the teensy?
Should I be changing the machine udp to 9600? I tried to reupload the code after changing to 38400 and get an error saying: programmer is not responding does not exist or your board is not connected.
Not sure about the error. The baud rate doesn’t matter unless more is needed to move all data. The only thing that matters is the monitor baud matches the sketch baud. This is necessary for serial monitor to establish communication. I would leave sketch 38400 and make sure monitor says 38400. After that is switched, I would expect you to see something in monitor. If sketch uploaded fine, might just try to connect to AOG.
Did you ever work out what the problem was @ipeel8? I have been trying to play around with getting section control up and running and have been unsuccessful getting the machine5_6 to show anything in the serial monitor as well. It says it uploads successfully, and baud rates match. Anything else I load on the nano seems to show up in the serial monitor ![]() It feels like I’m missing something simple
It feels like I’m missing something simple