Thanks for posting the videos, it looks so clean. I am gonna print them as soon as getting the 3D printer that I ordered. I checked online to get the parts printed at an online printing service and they were more expensive than buying the machine so I ordered one and I will have one more toy to play with ![]()
![]() .
.
3 Likes
And I thank the potato farmer for showing us and sharing the final products, my friend ammonia; The 3d world is such a world that if you fully master it, it adds a dimension to your life, you want to print everything you see or imagine, but remember that the most important thing is the first layer, watch lots of videos and master it, learning the fine settings of the printer is yours. it makes you friendly with your printer otherwise you want to smash it. If it comes disassembled and you are going to assemble it, be careful and slow, square, metal ruler, etc. be with you. respects.
2 Likes
Could not of said it better. I only recently got the 3D printer, after my friend who had one, and taught me about them, moved to the city. But now my imagination appears in reality after 12hrs or so, very precisely and repeatably.
@Ammonius there of tons of .stl’s floating around, some hardware sellers now have them on there order pages so you can size metal parts before you buy. 3d printers are also like used cars, they run great for a month or two, then the maintenance starts. Its fun and you can print your own 3D printer upgrades.
The first layer is the hardest, have been having really good luck with the heated glass bed. Its all about getting the nozzle to bed clearances dialed in. Use two paper thickness for 0.4mm nozzle, and four paper thicknesses for a 0.6mm nozzle.
2 Likes
There was interest in a segmented gear so you do not have to remove the steering wheel for installation. Was able to modify the existing gear and use 1/4" bolts as fasteners. Its just as rigid or more and round as the original solid large gear.
[
]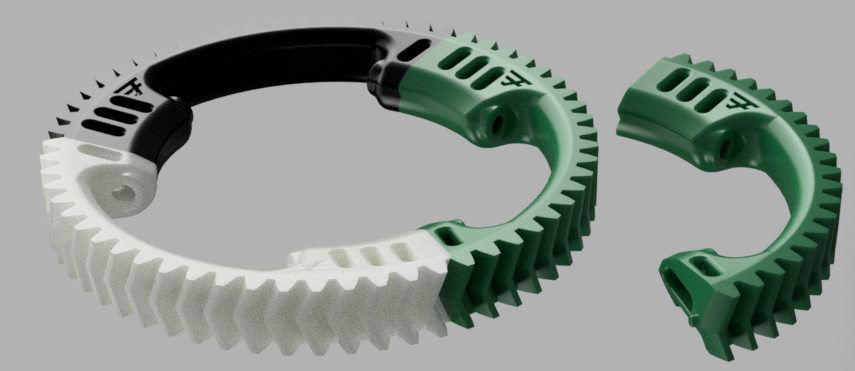
The CAD render looks pretty decent, the bolts give it a much more mechanical look.
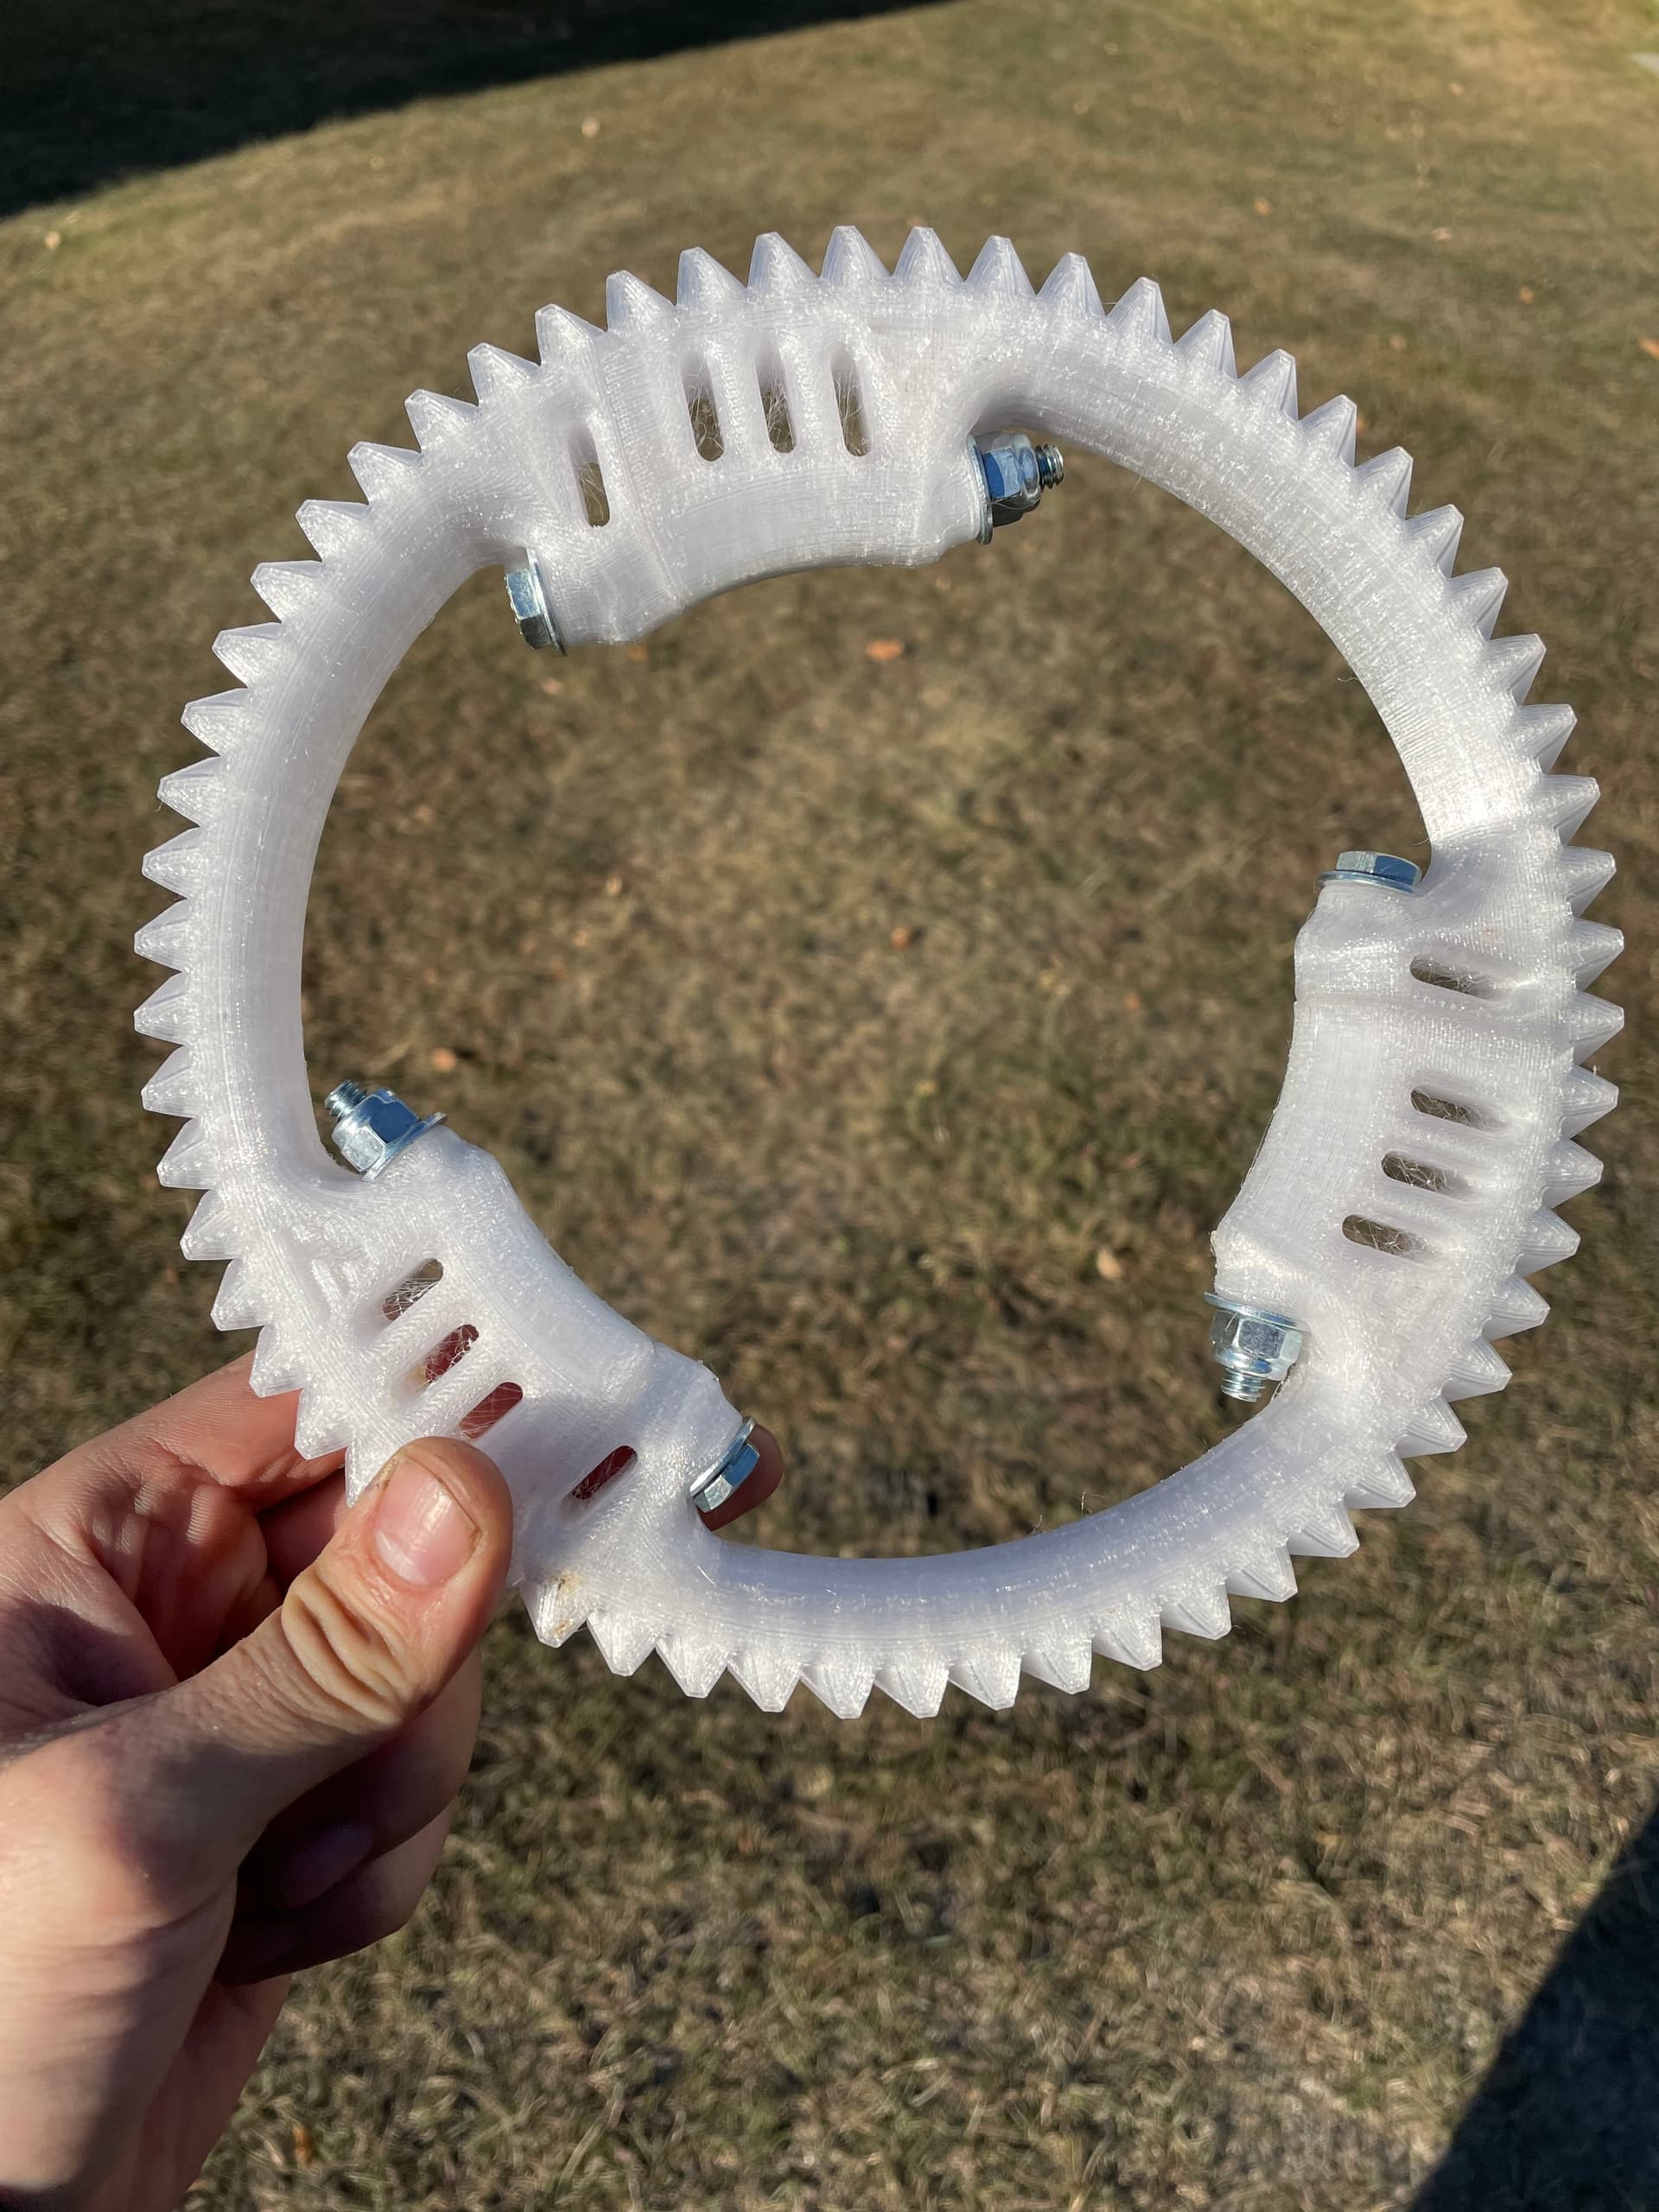
Did my test print in some clear PETG I am not really that crazy about, and of course it came out without having to revise it at all. So I guess this ones ready for a White, Agco, or Gleaner. Usually a few prints go in the trash before getting all the bugs out. They even printed not too bad with a chipped nozzle.
Assembled it with two segments already fully tightened, had to stretch open the gear a little but nothing major. Think its best to leave it all a little loose until all the bolts and washers are in, the bolts can only be assembled in one direction from the small end to the big end.
12 Likes
So I do not know much about 3d printing. Where can I get one of these made?
I am sure there is someone near your town that has a 3D printer. The printers cost less than a trimble ez steer motor.
So far this design is pretty new only a couple months old, so selling them at the moment would not be a good idea. They may get revised with structural but non dimensional changes after next season. Material cost is pretty low if you have access to a printer.
Have not had any reports back yet about them. Still writing a proper manual. Only have two installs complete currently, with more planned next spring.
1 Like
I just bought a 3d printed off amazon and printed my TPU gear, apparently my PETG is lost in the mail… I noticed in the google drive instructions you state 60% fill and on the forum you mention 80%
Probably wont make much difference with such a large wall thickness though, but I wont be able to test them until I need them so ill print a couple spares.
1 Like
The main thing is to get solid teeth, hollow teeth become very sad, very quickly. The strength gains after 60% are minimal, but these are functional parts. Trying to find a happy medium between component reliability and material waste.
The forum post is not very updated anymore other than the date on major revisions, the google drive gets more incremental updates. Thank you for giving these gears a shot, hopefully they make AOG a bit easier. Please post pictures when installed.
I also keep one extra small gear on hand, but so far still using the same one. Its tempting to print lots, but no need to keep much stock when replacements are made in half a day.
1 Like
I haven’t tried printing much with gears, but with a lot of mechanical applications the shell takes the vast majority of the load and increasing perimeter layers can add a lot more strength than increasing fill % for the amount of material used. It’s possible to get very technical with applying more layers and in fill to key parts of a model and save material in others areas that are not so stressed, though with one off prints it’s better to use a bit more material than necessary than not quiet enough.
It’s not often I use over 20% infill on mechanical parts, but I haven’t tried gears yet on steering wheel motors and have use friction drive onto a “ring gear” instead.
When I started by modifying the fiat gears with both petg gears at 20%, they were flexy. Then they started to chip, crack, then shred. The hollow teeth cracked at their bases.
The small gear being TPU helps tons preventing shredding. The springs in the holder also let them decouple if the worst is happening. I decided it was better to be at a point of reliability, and work backwards to material savings.
But really the printer and time is the expensive part, the plastic is really cheap. Might as well make it a brick.
The current gear setup I used to test new code for the acs712 disengagement system. So they have taken a fair bit of abuse more than most would experience. Still no damage.
Any chance in getting the speednut with metric thread? ![]() I think that was the only one having printed thread.
I think that was the only one having printed thread.
Bonjour
As tu mis à dispo tes fichiers STL quelques parts ?
Merci d’avance
Julien
I will alter for metric nut no problem.
1 Like
le tout premier message contient le lien du lecteur g avec tous les fichiers stl. Aussi un manuel à moitié complet.
Oups ! Désolé je suis allé trop vite… Merci A+ J
pas de problème, content pour google translate afin que nous puissions parler.
Metric Speed nut has been added, M6X1.
Find I still have to lube the nut a little and heat a bolt lightly to get the 3d printing smoothed out.
Let me know if things are fitting, not fitting, binding. If they work please post pictures, find it wild being able to email parts.
2 Likes
bonjour grand merci pour ton travail et partage je vais essayé ta rou pour un tracteur casse luxxum 100 merci
1 Like
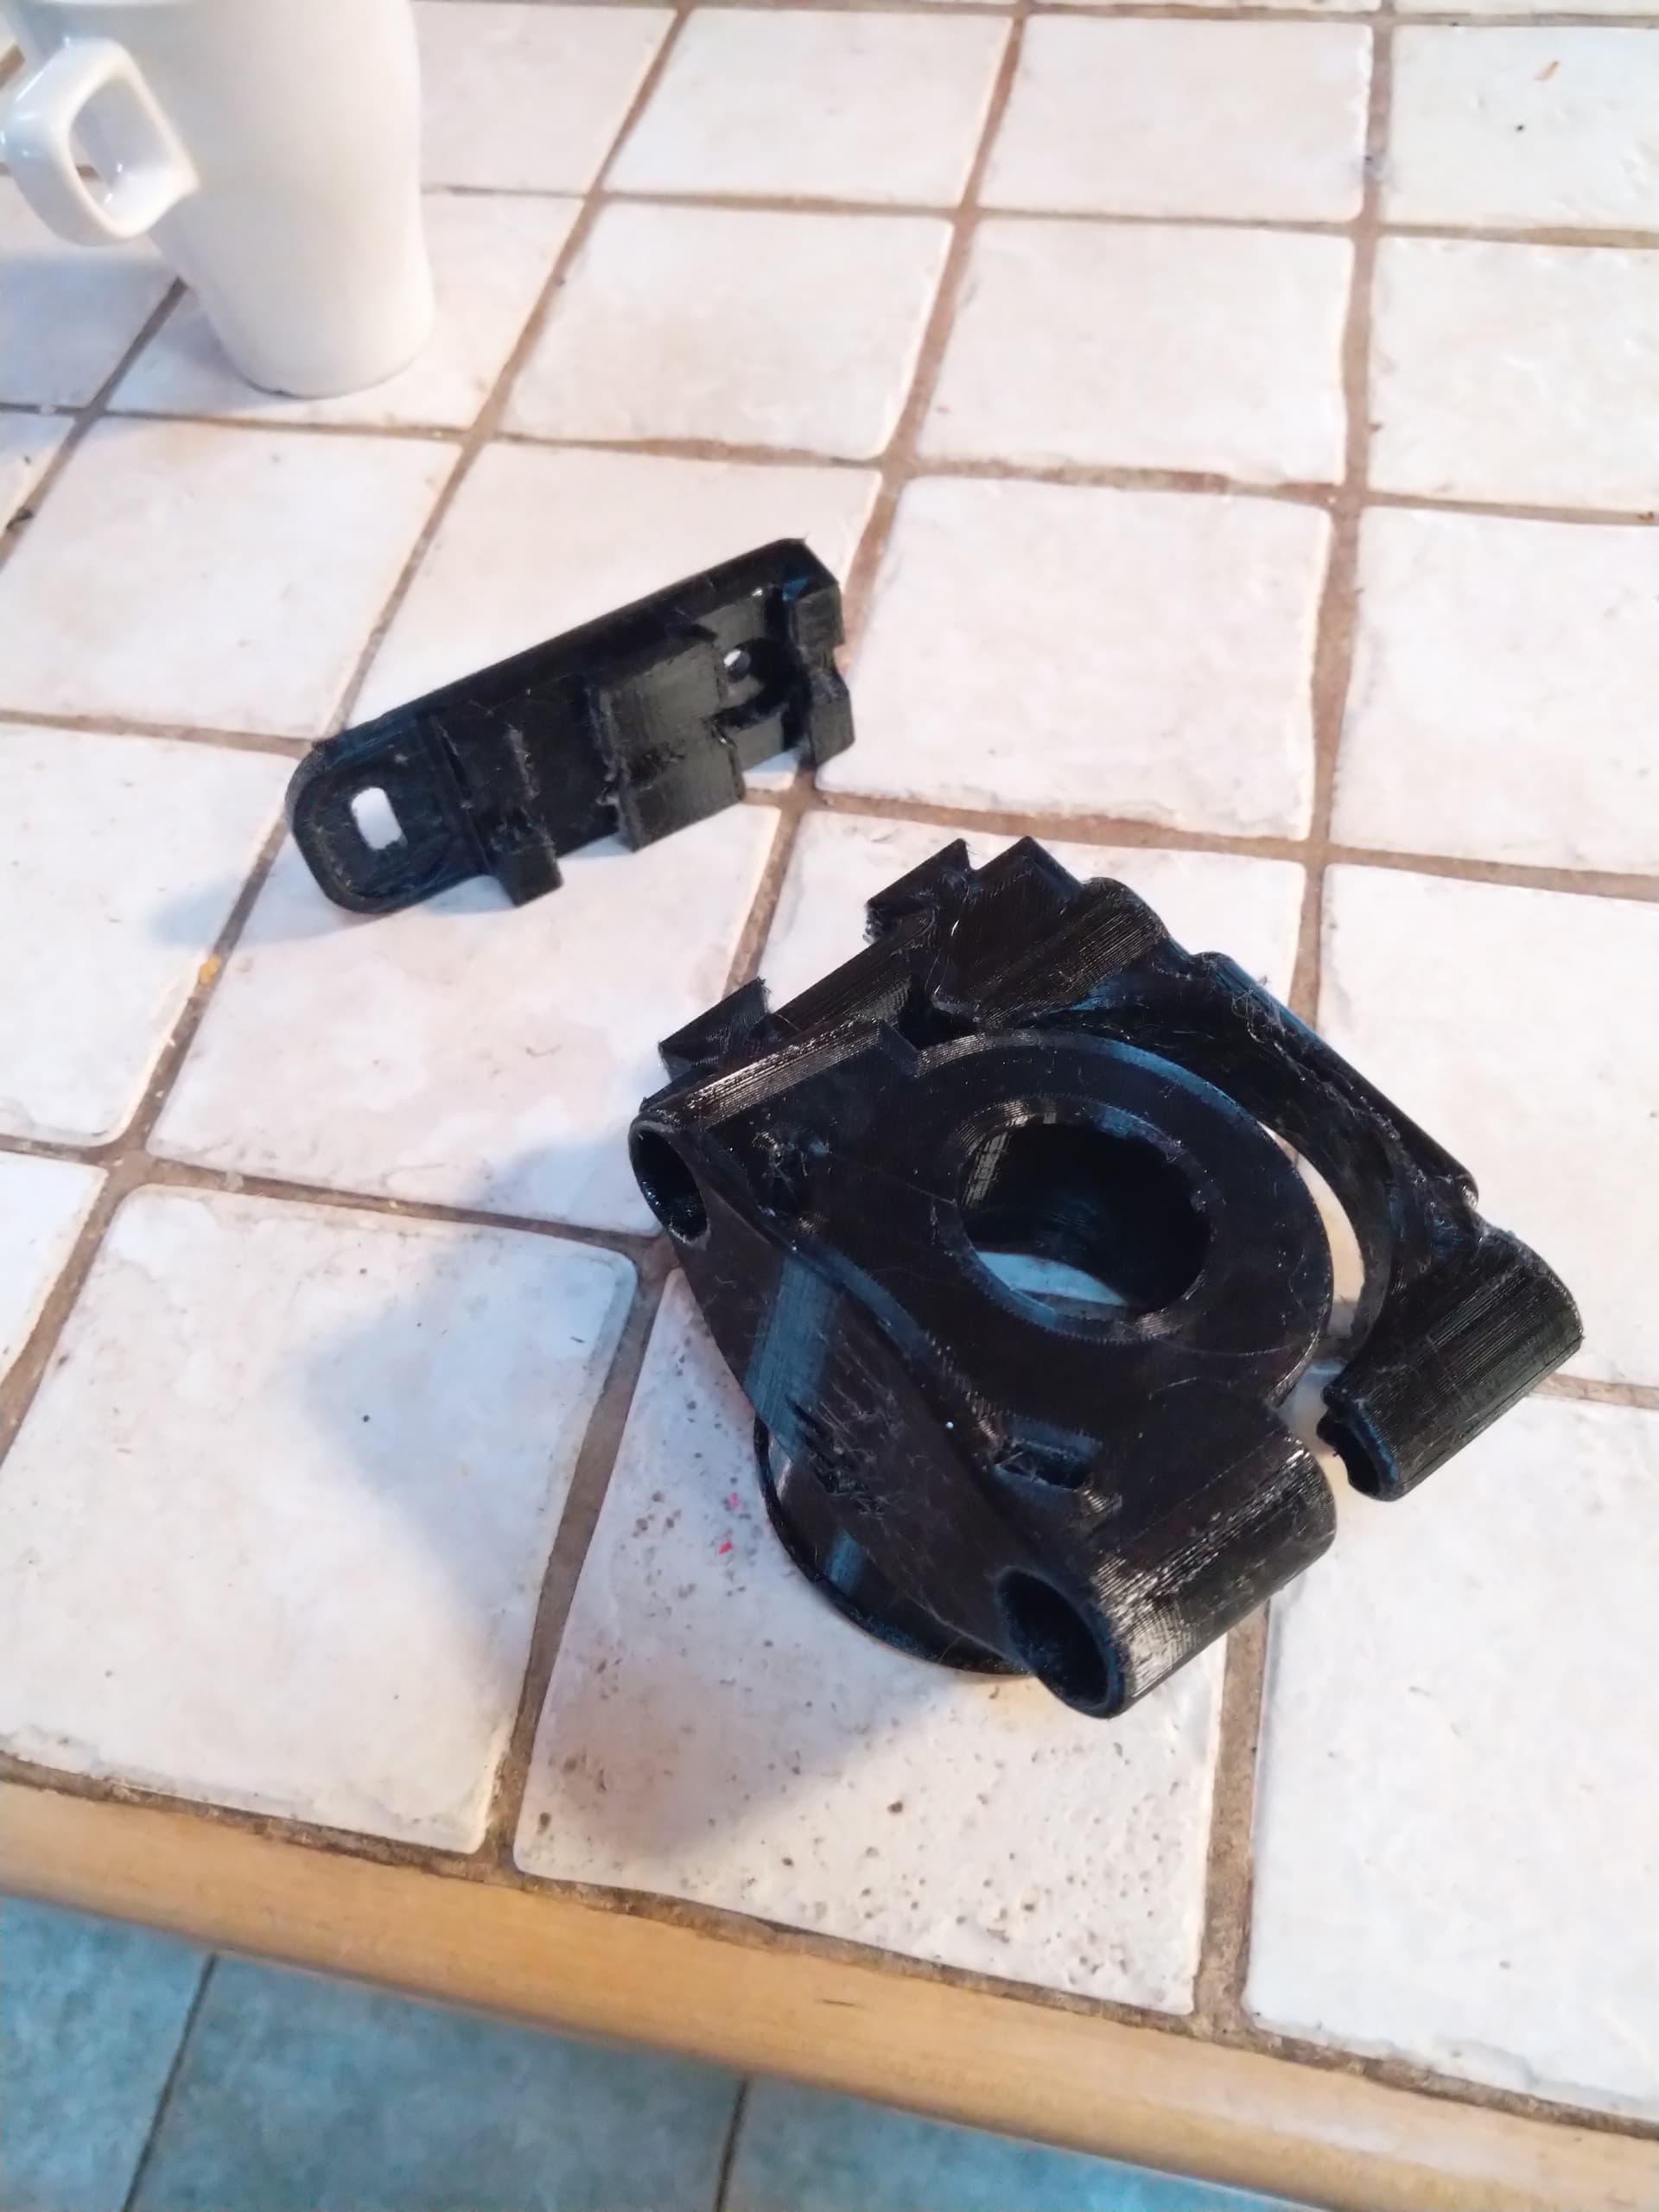
I’m in the process of printing all the parts! So far so good. I’ll just need to do a bit of sanding to clean up the stringing from the PETG. Thanks for all the work you’ve put in to this.
Now I just have to figure out how to put the acs712 together…
1 Like
Very cool, thank you for the photo. Its wild to see something you’ve drawn just magically appear somewhere else. Hopefully it simplifies your installation.
The gloss black will look very sharp once you get the motor held in with a shiny hose clamp.
ACS712 disengagement is a very nice option. The 24v motor is smooth steering, but has more torque than I can fight. Nice to just grab and go around trees.