Universal Fit Gear System, with Quick Tach Motor Holder

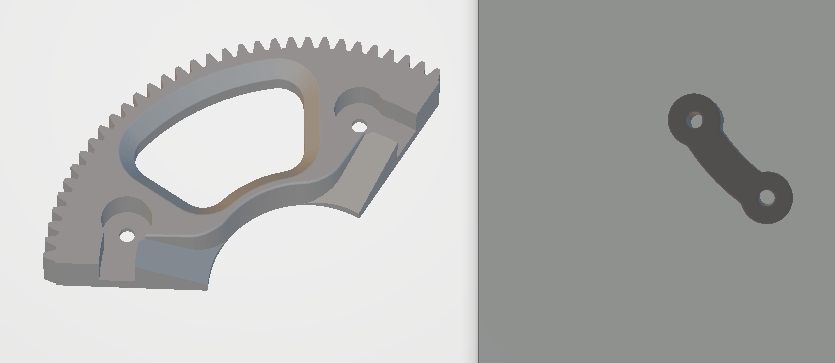
Here are .STL’s (updated Jan 23, 2022) files for those interested. Just added a Big Segmented gear. The materials and settings are just a suggestion, but they seem to be working very well. Has large overhangs, support material required.
https://drive.google.com/drive/folders/1oB-xxBiD6sCXIlz-HanKOceyacVLFpN9?usp=sharing

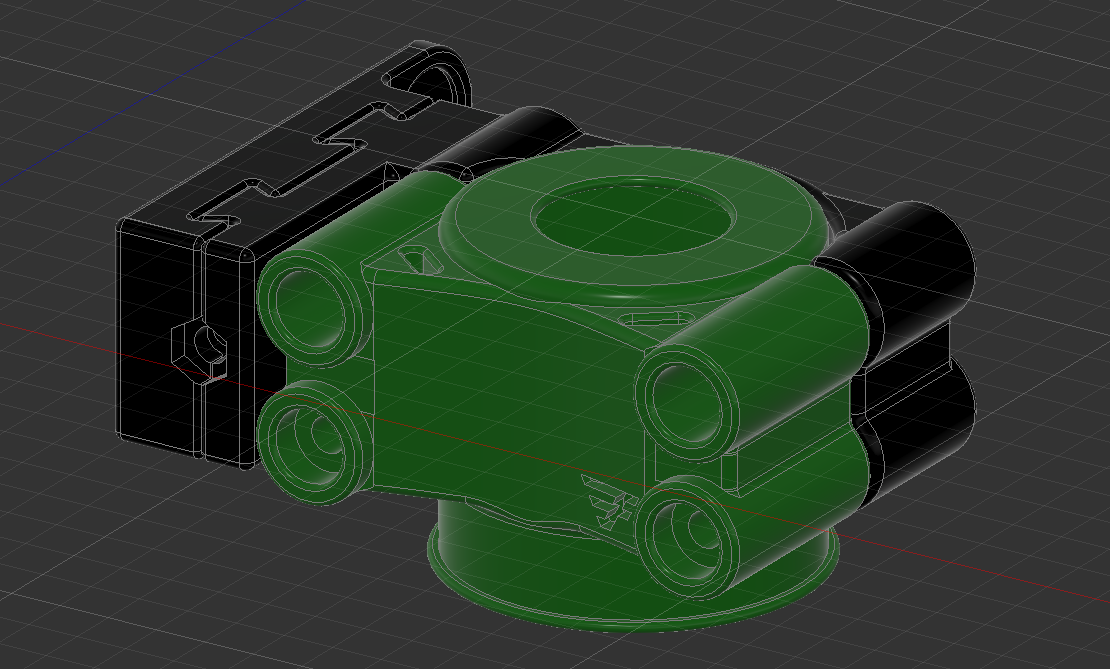
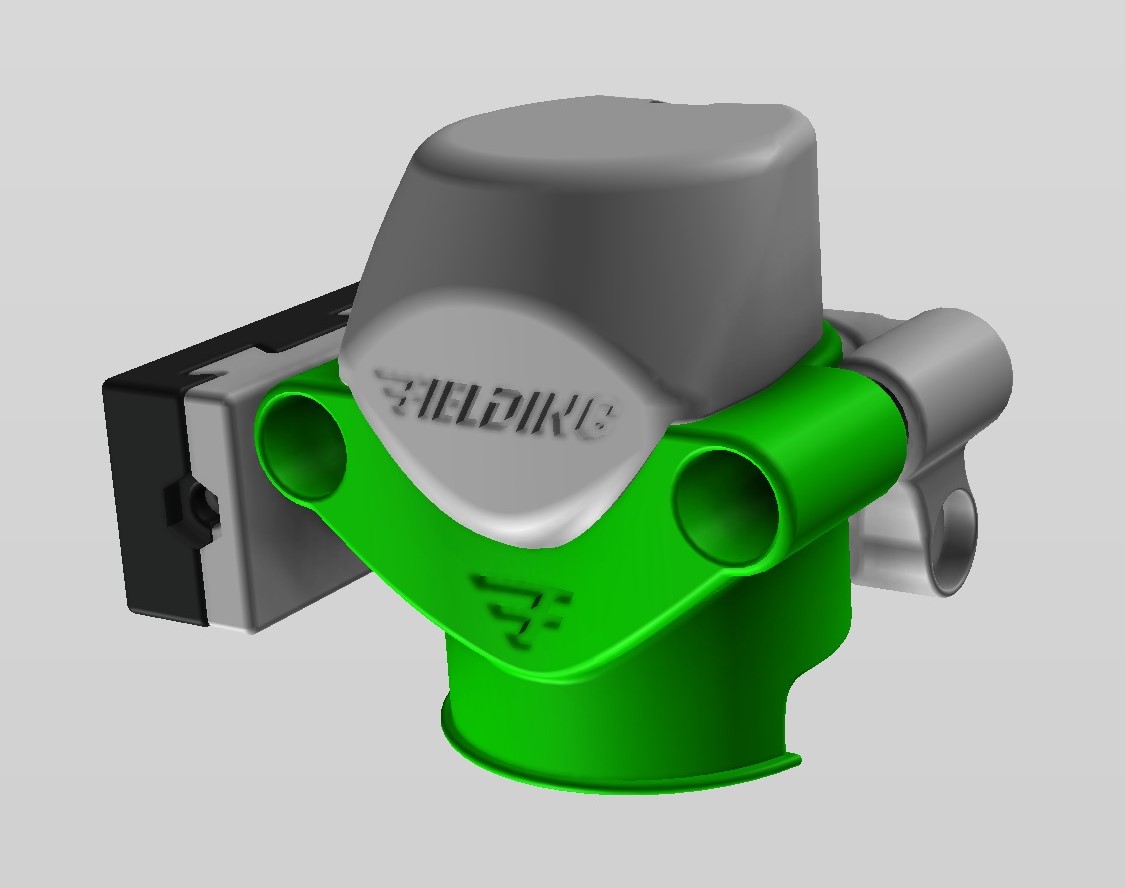
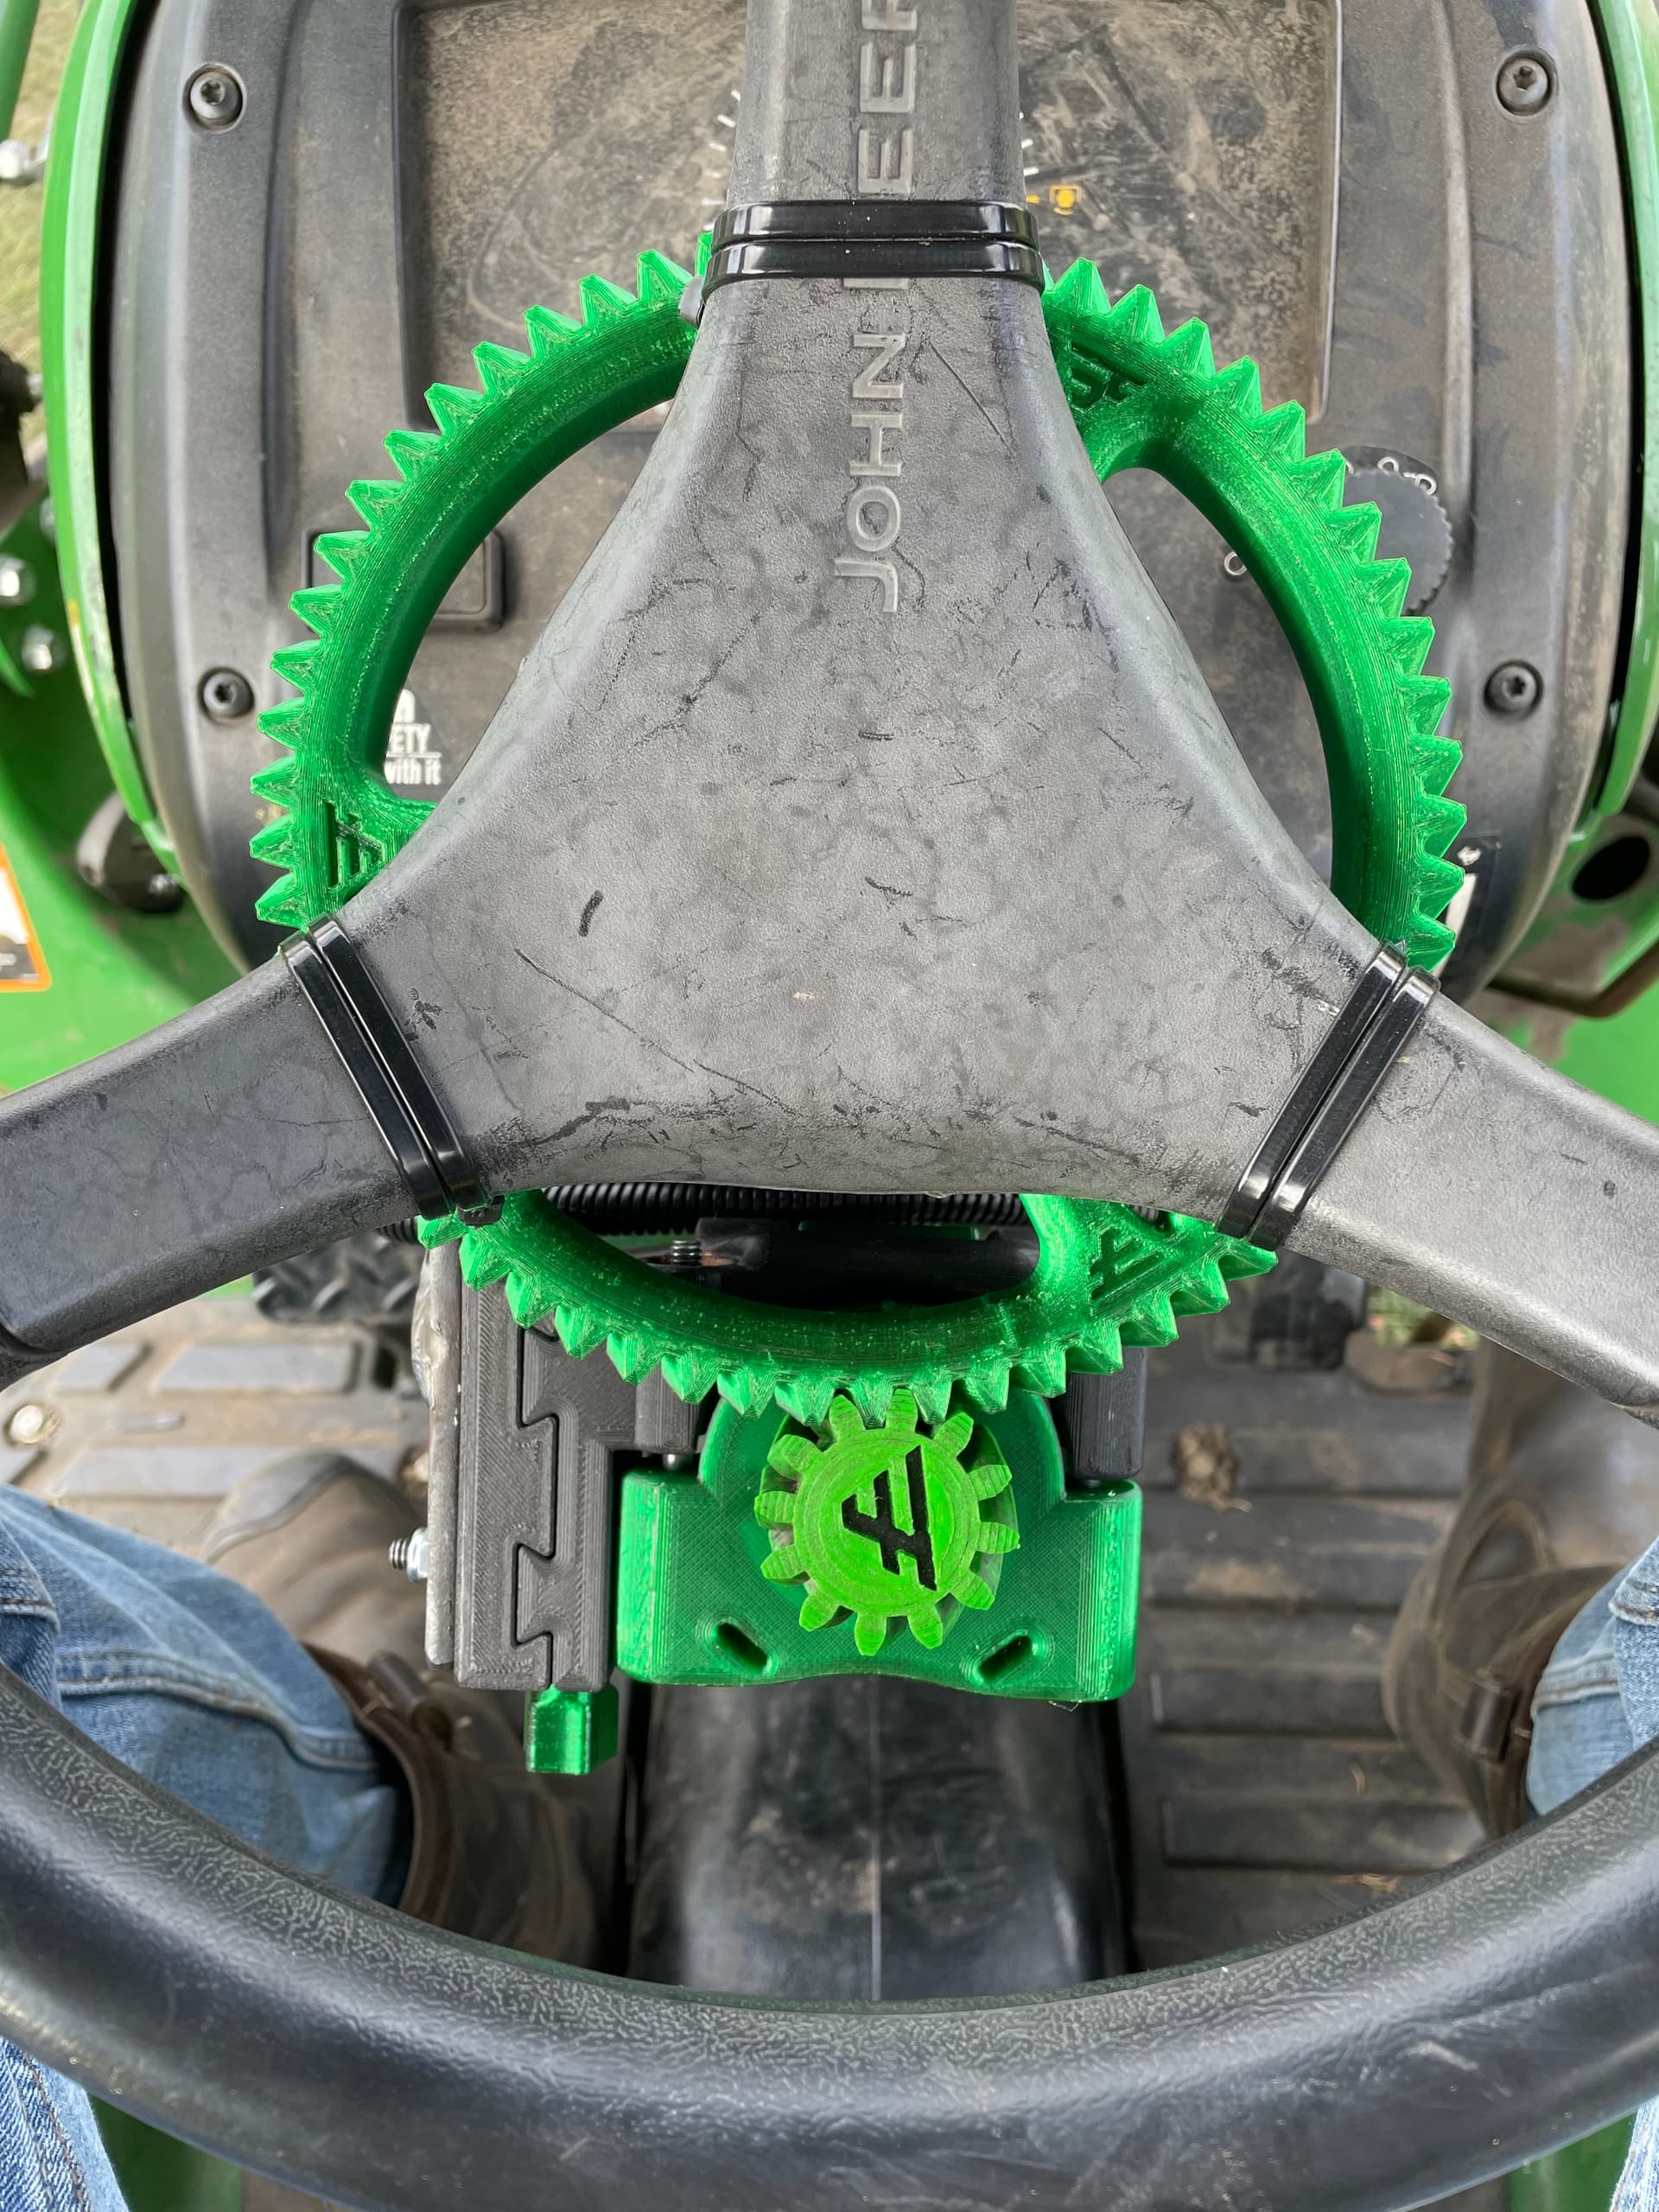
Attempting to build a one size fits most geared motor drive unit that will hopefully reduce the custom farm shop fabrication to a minimum.

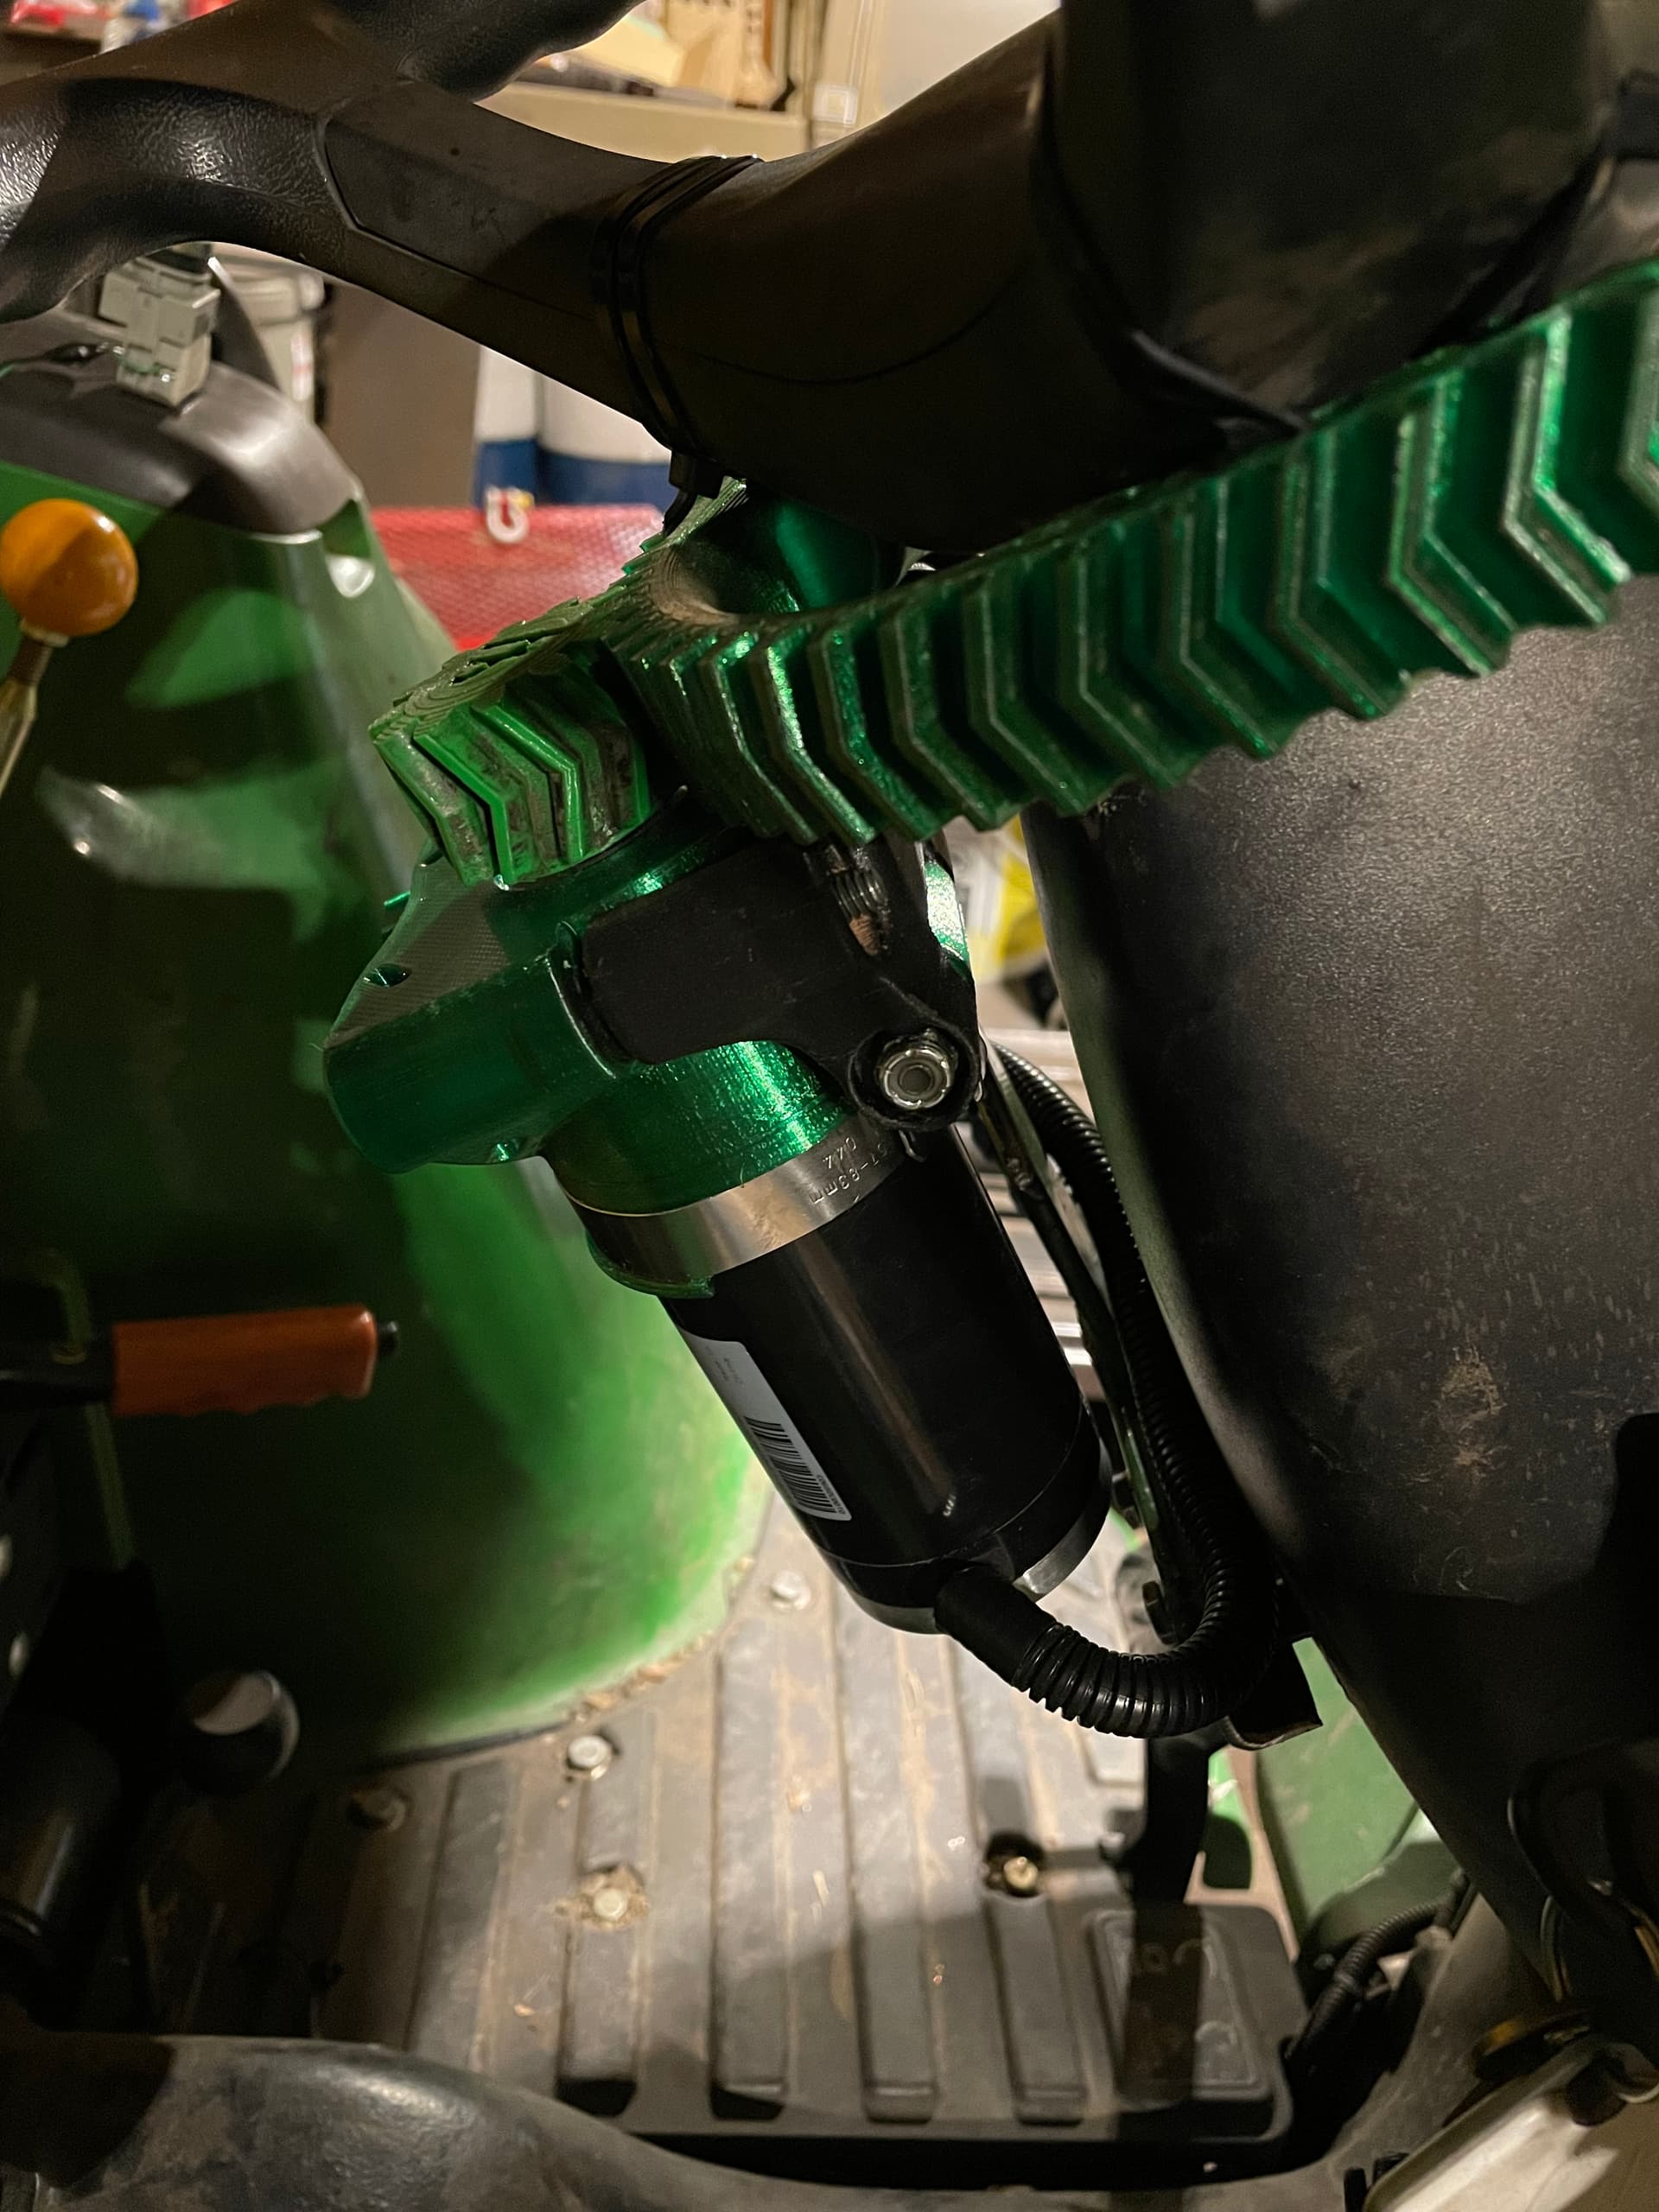
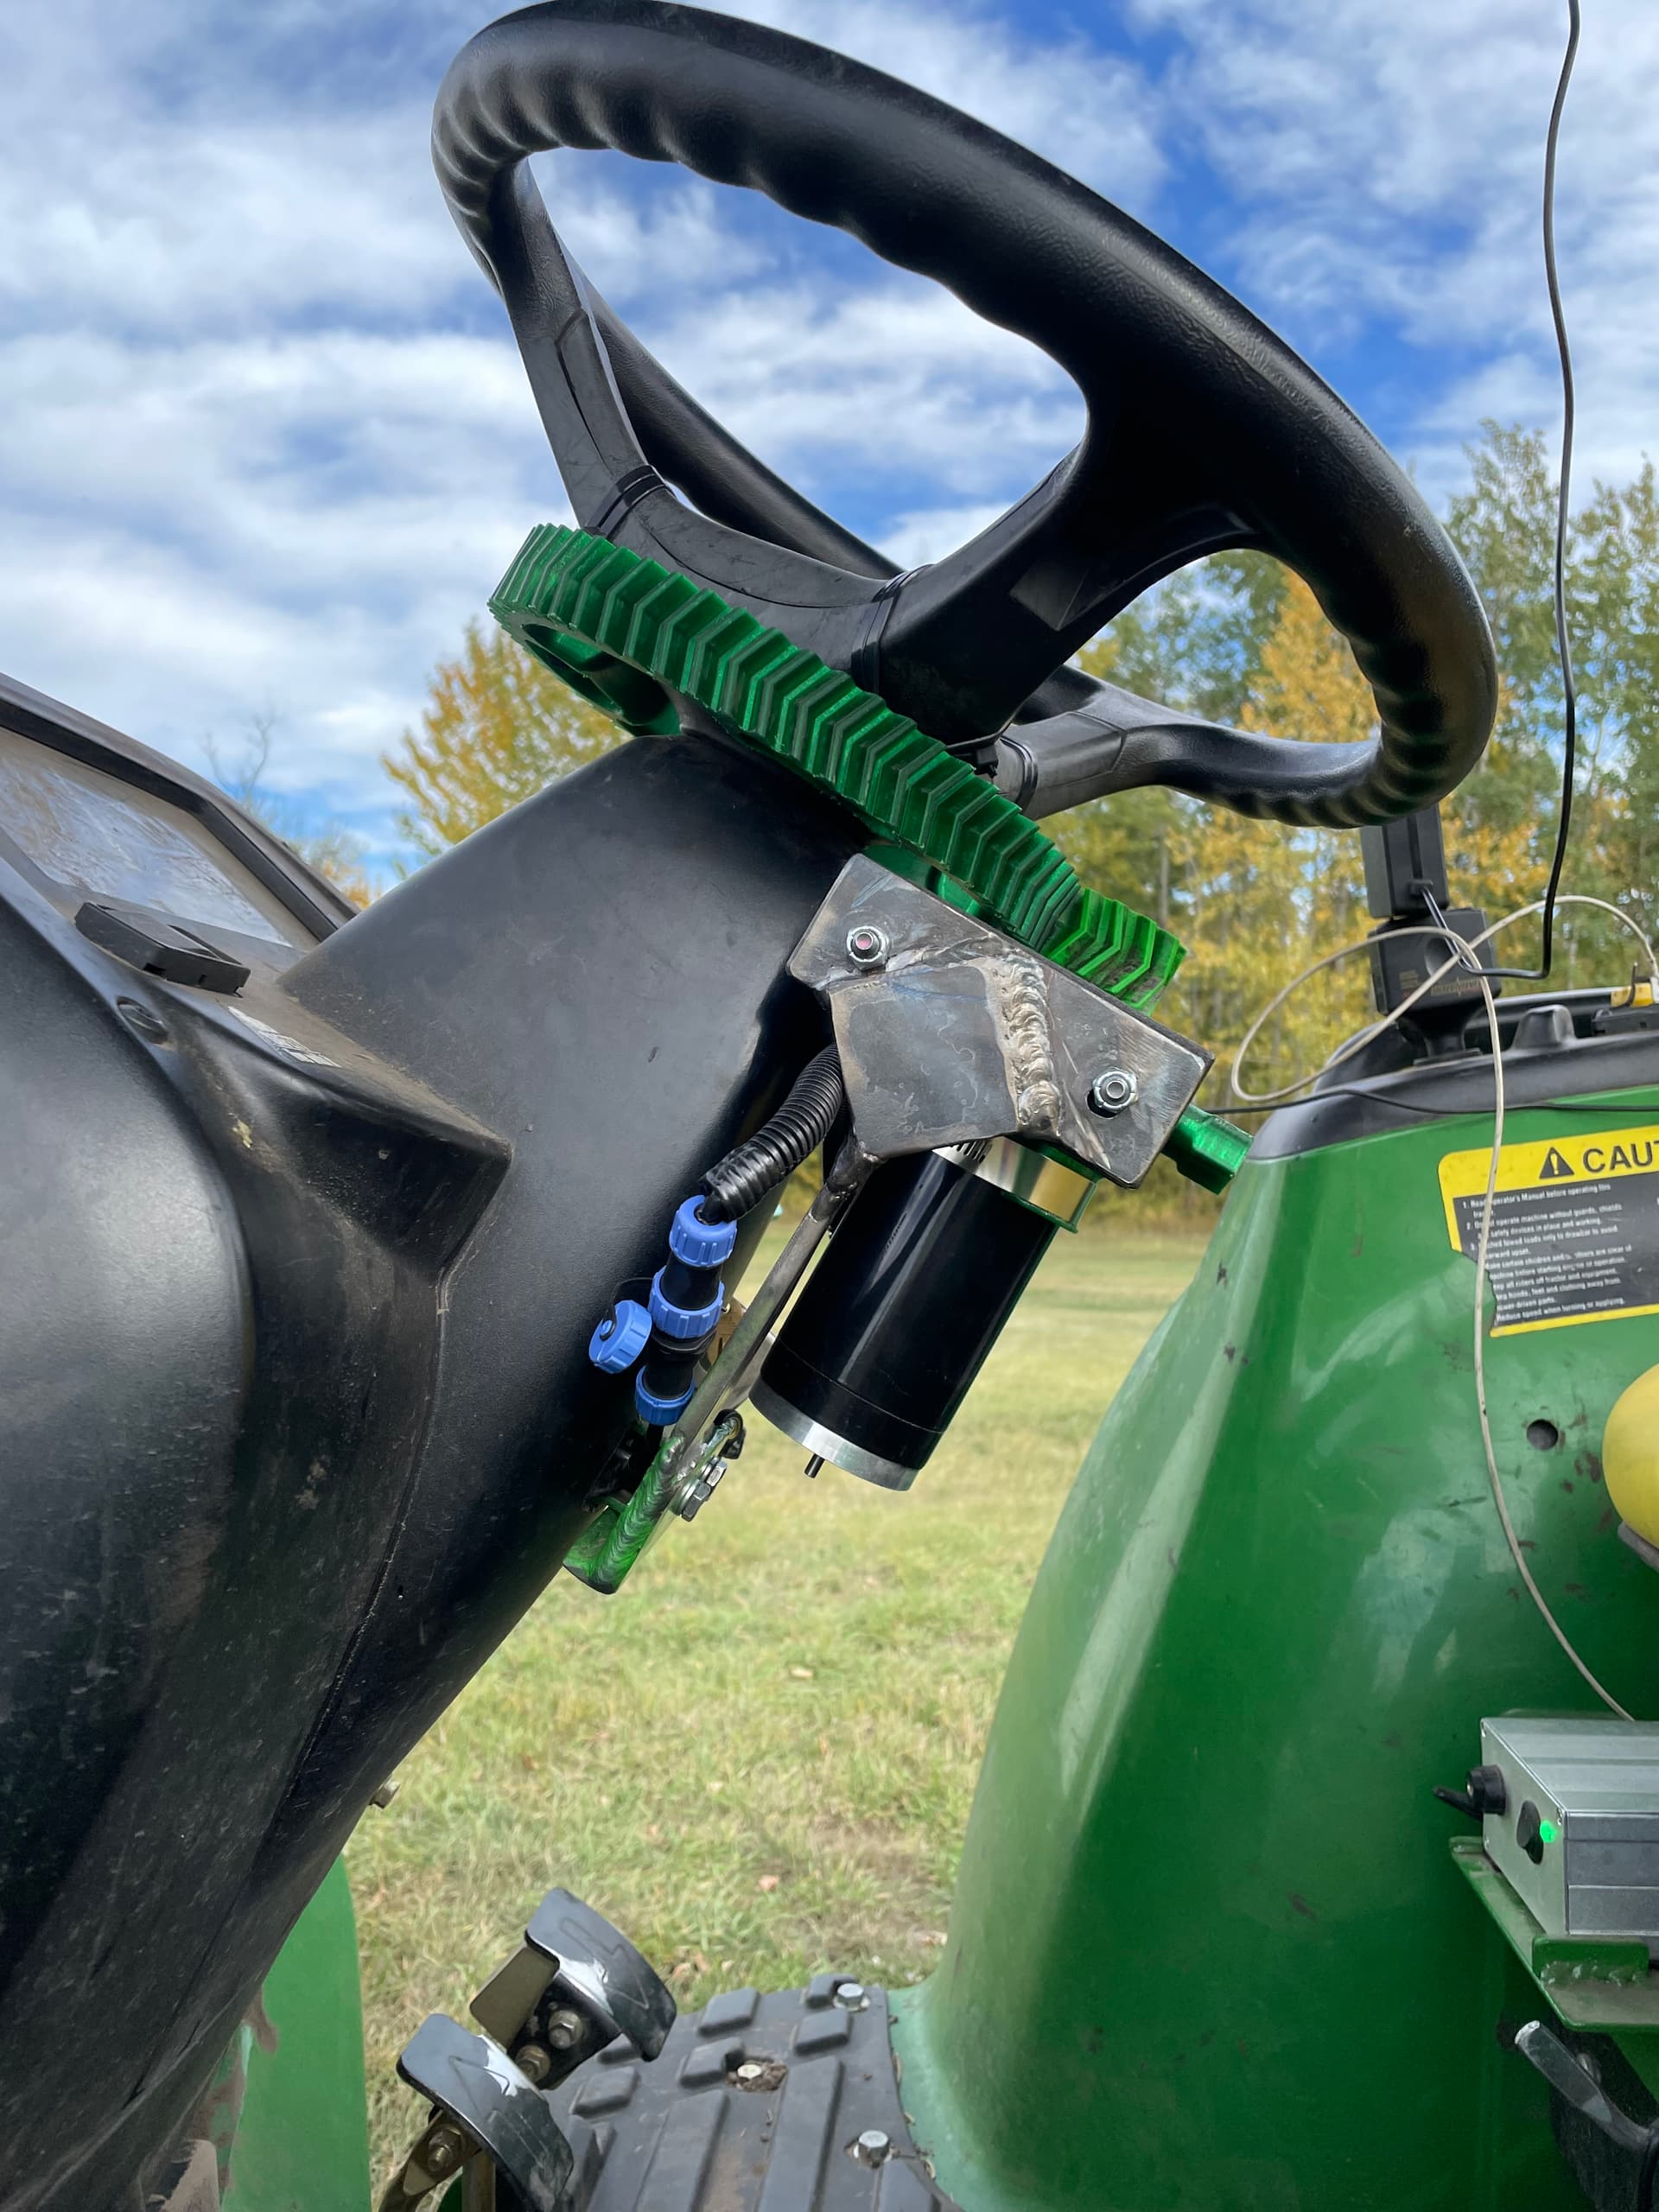
I started with @Math Fiat gears altered with a buffer wheel, and found that zip ties are sufficient to self center and hold the ring gear on tri spoke steering wheels. The zip ties must choke behind the spoke smaller than the diameter of the spoke. using two ties really concretes them in place. Care must be taken that the fat ends are not in a position that can touch the drive motor.

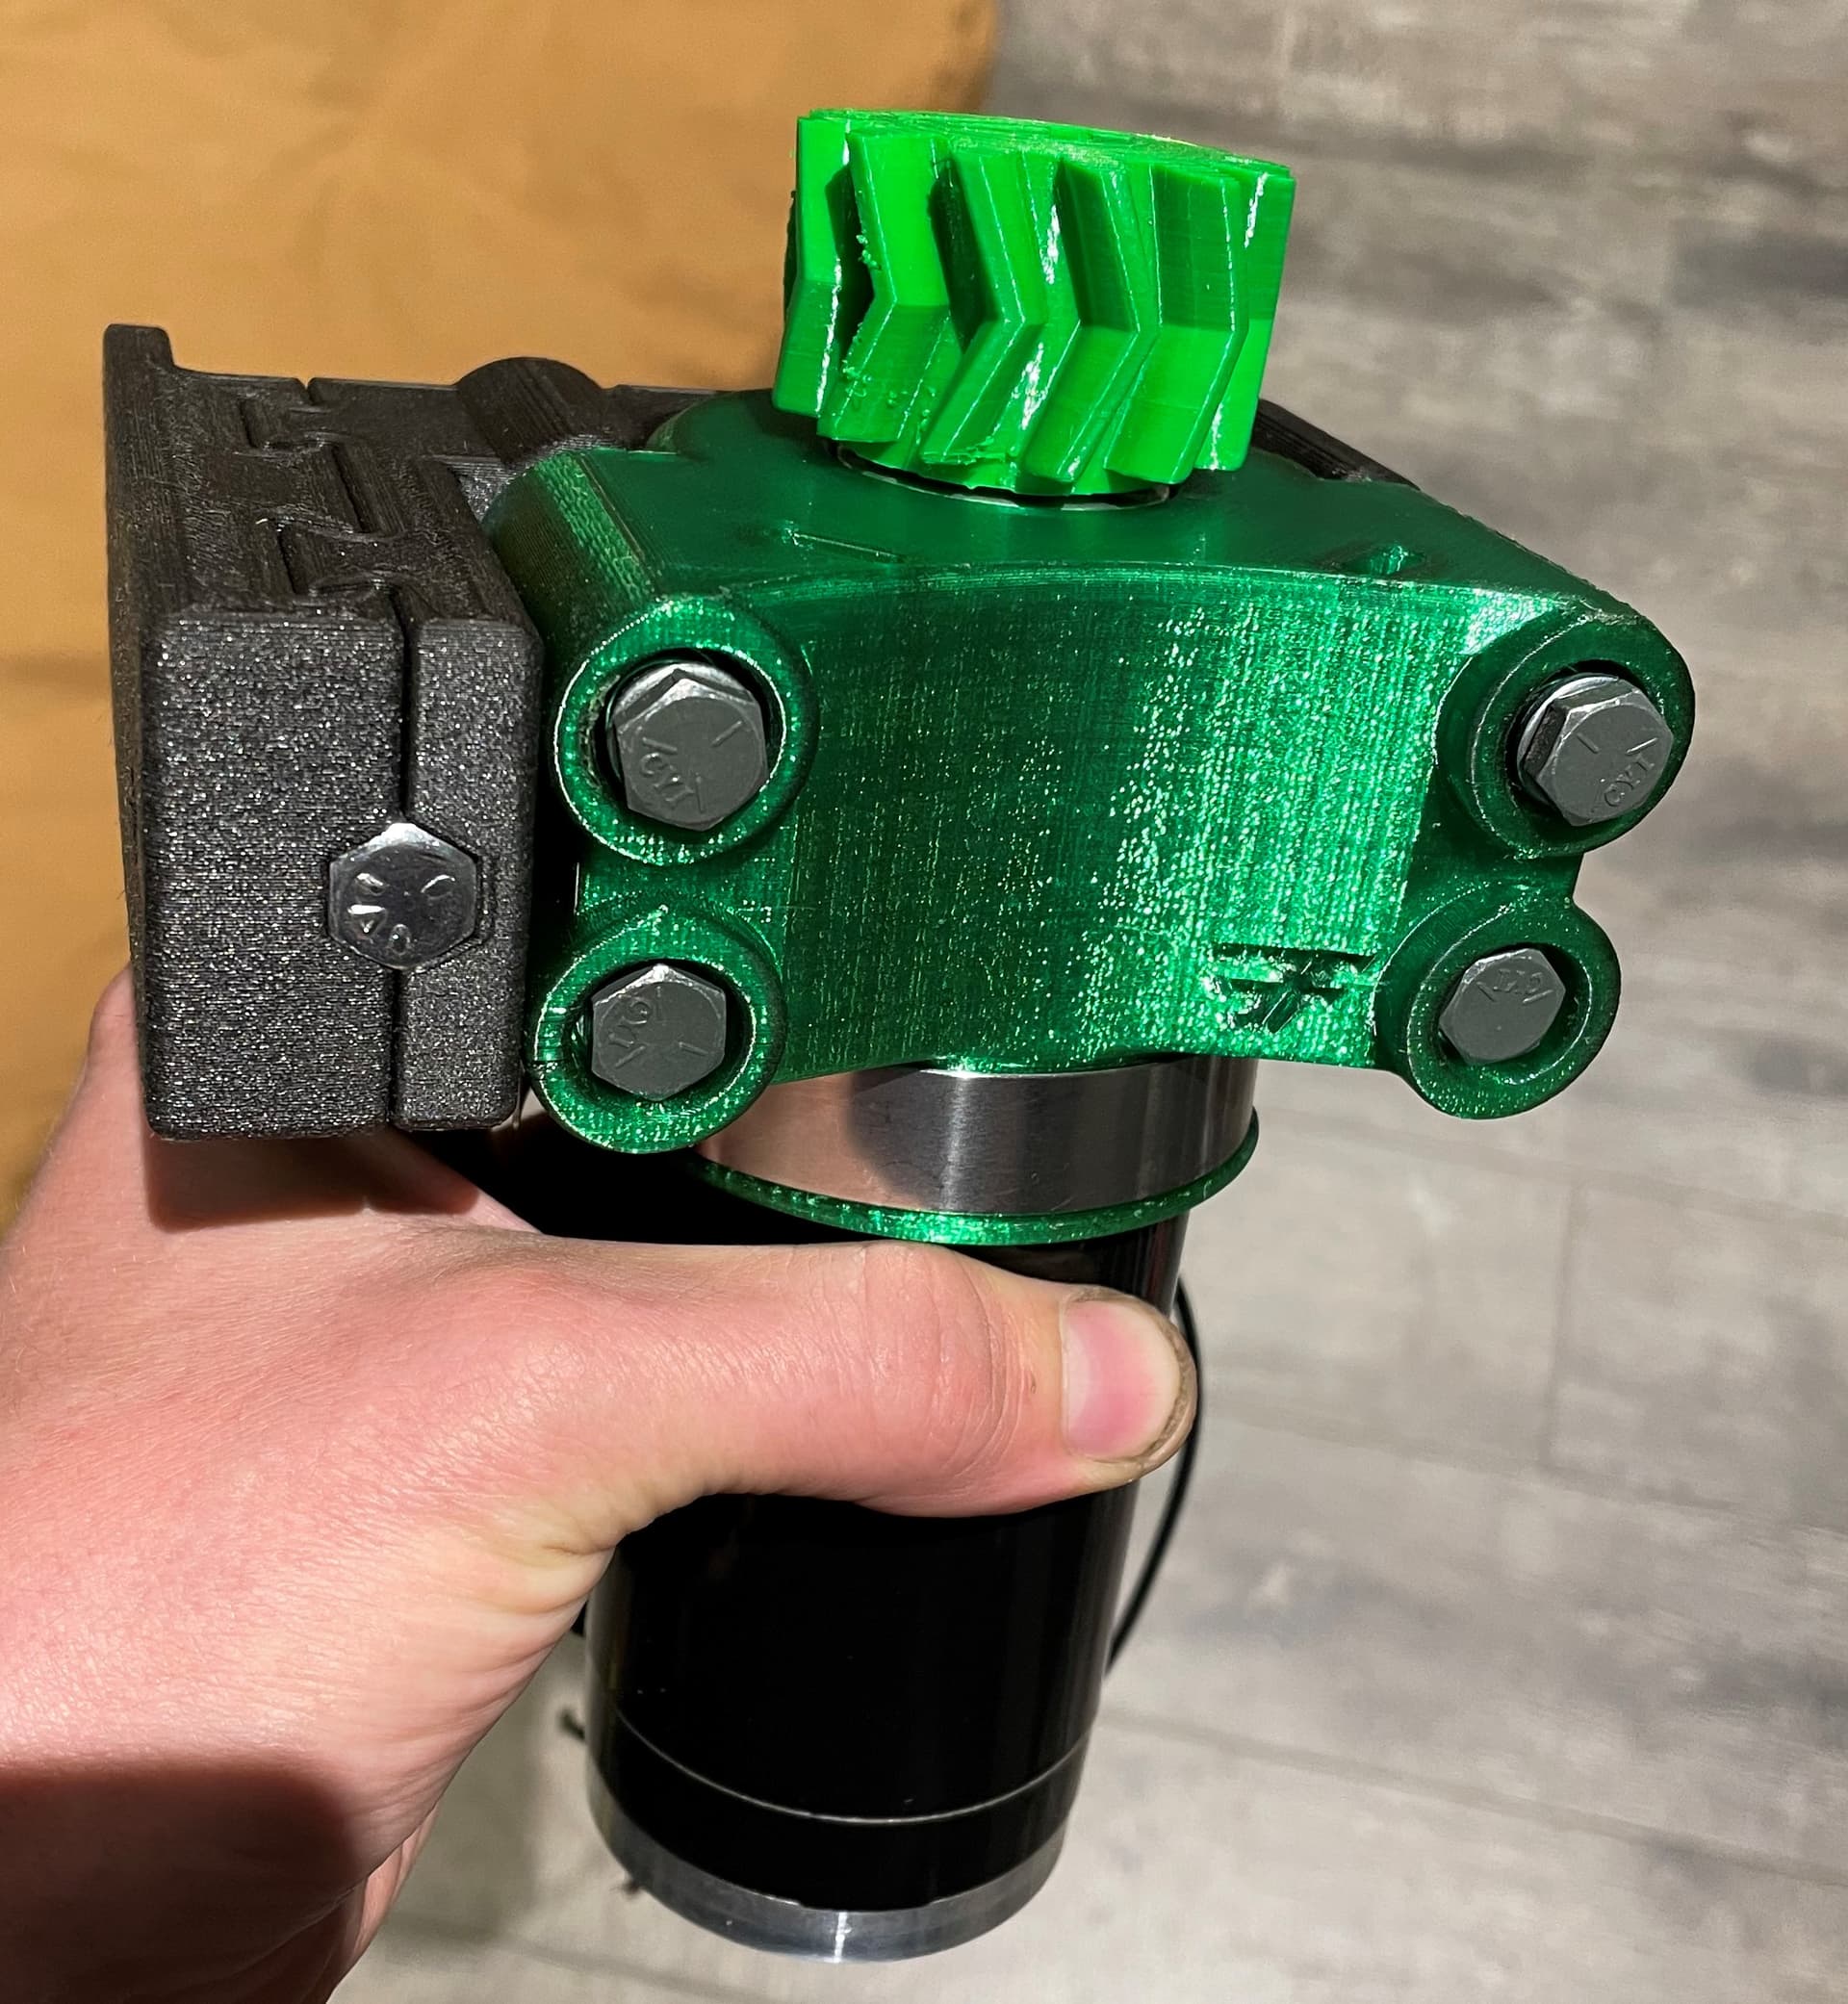
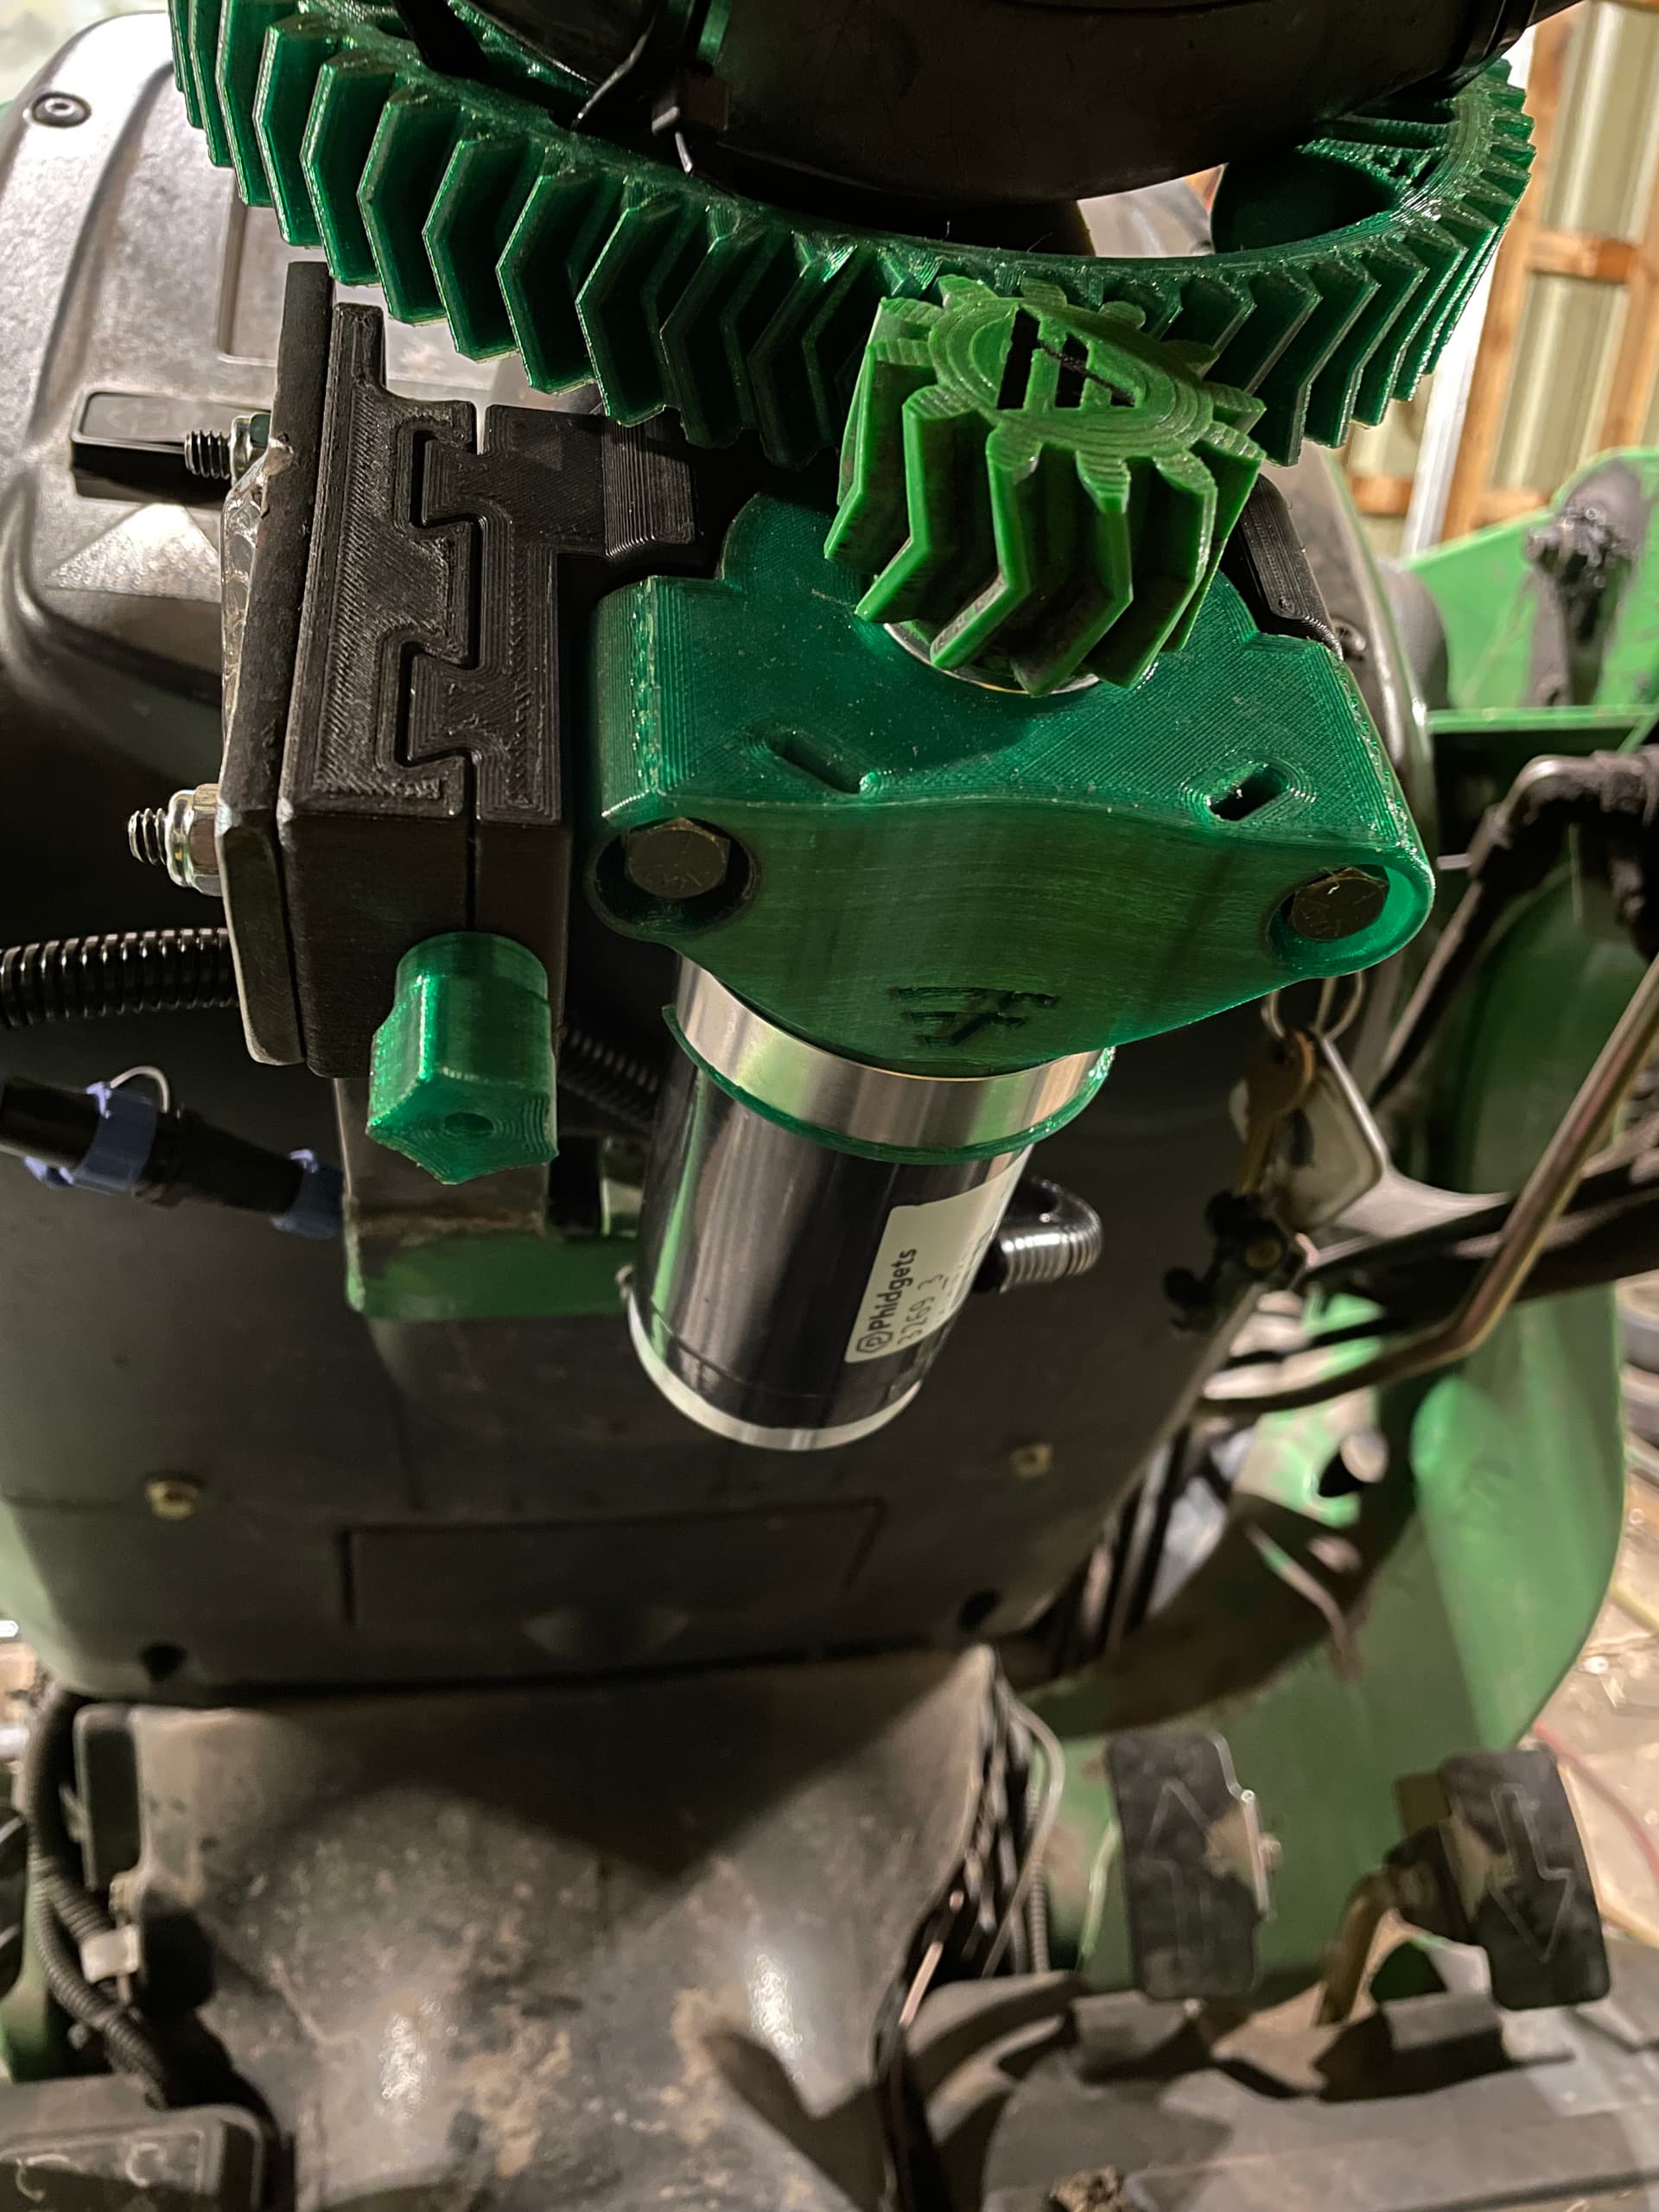
Herringbone gears are great because the thrust load is cancelled out so they ride centered and keep centered.

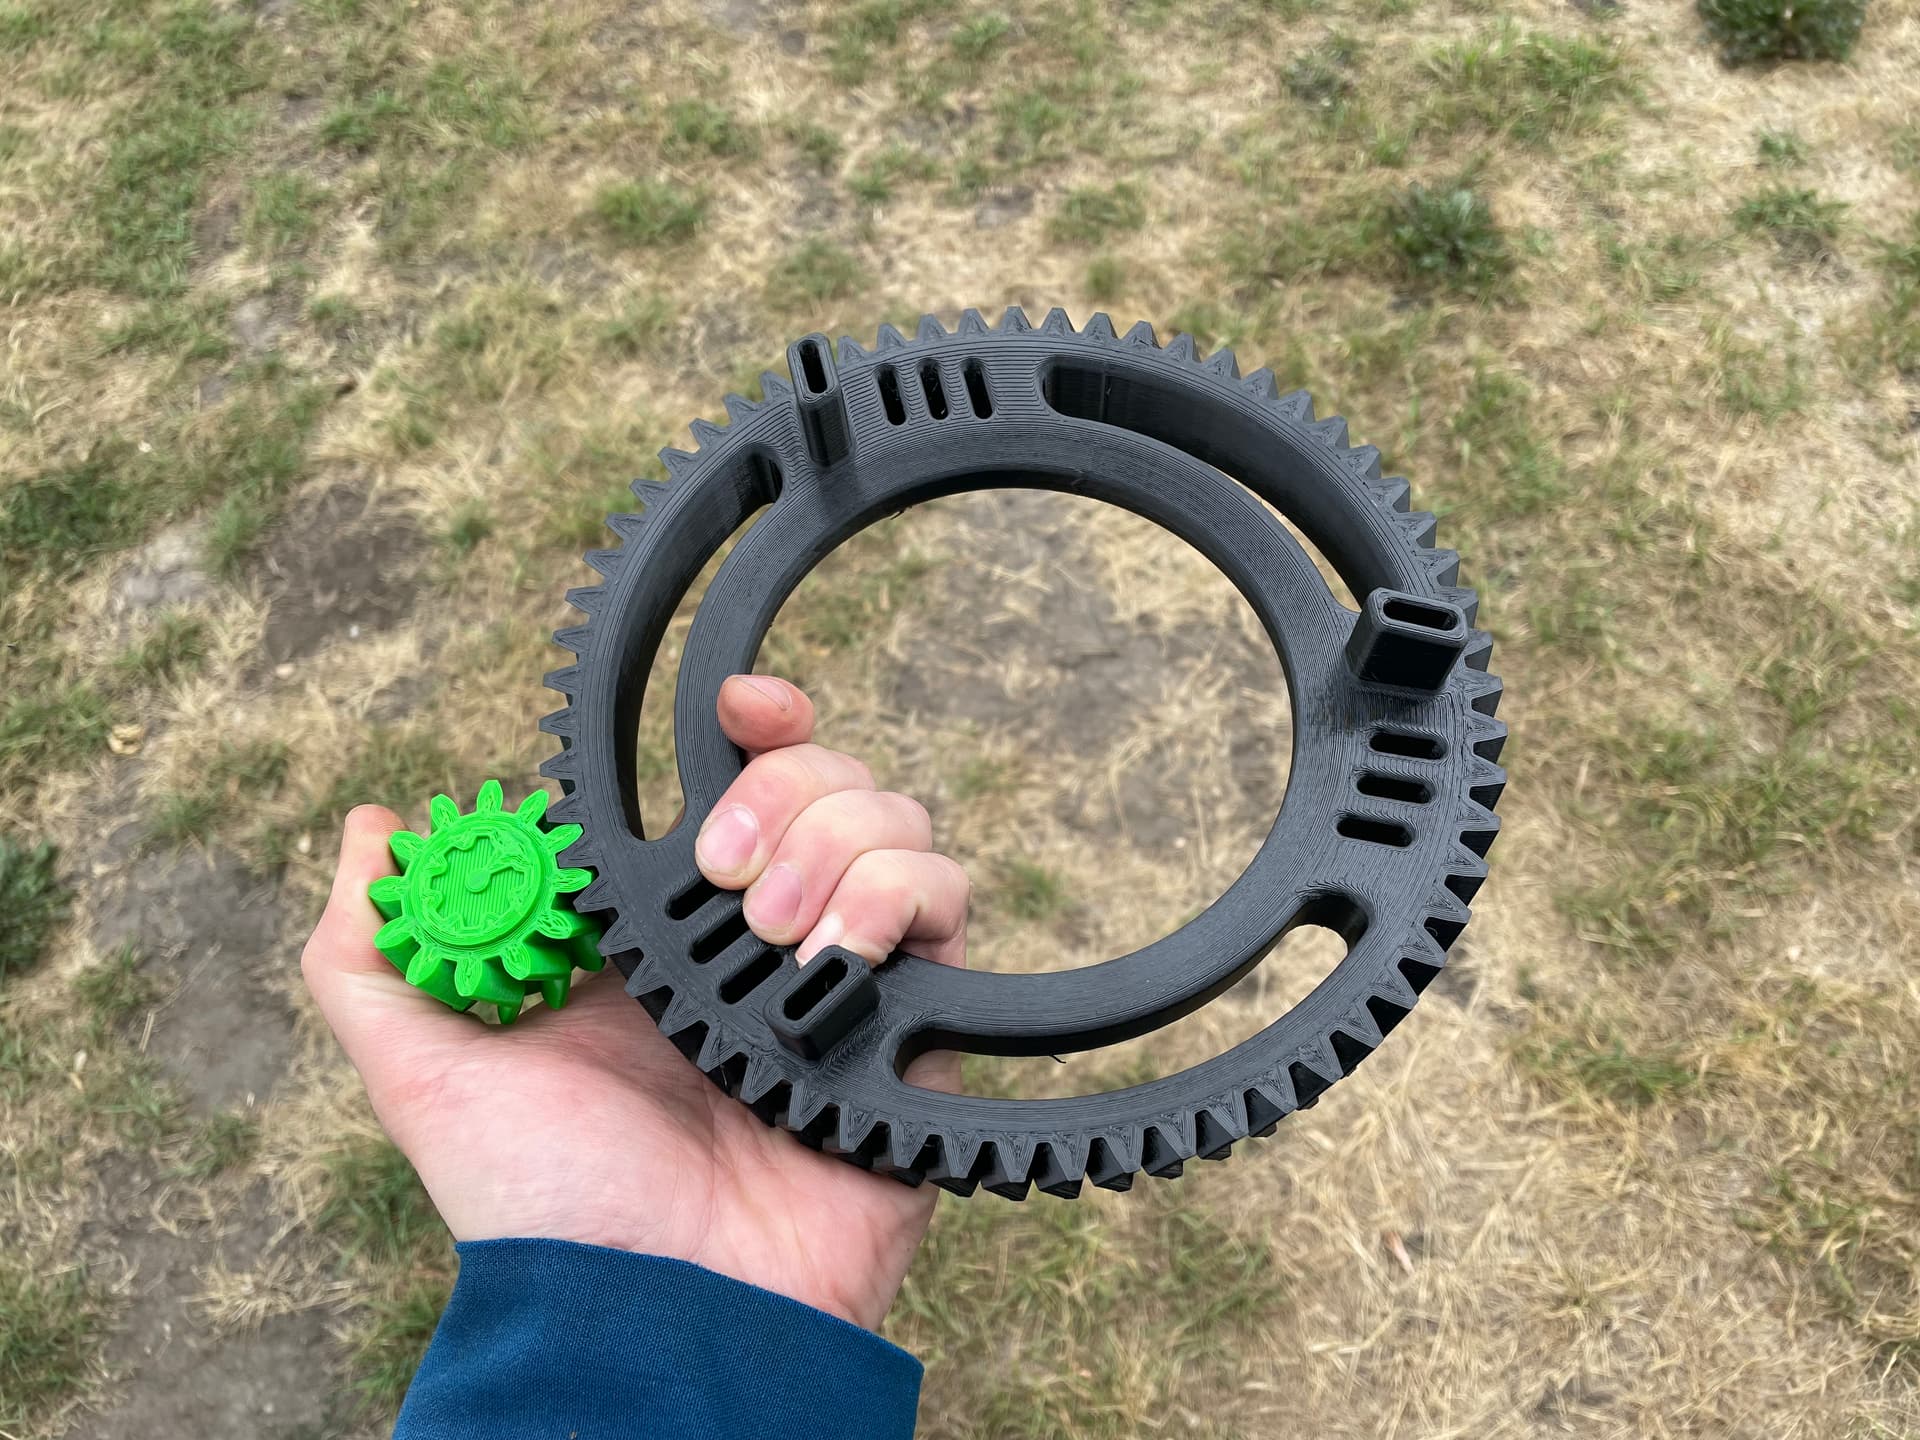
The large gear is printed out of PETG which is very hard. The gear is printed so the teeth are solid in the hopes of never taking it off. 3.6mm wall thickness, 2mm top and bottom, 60% infill. Takes 310g of material and 1.5 days of print time.

The smaller gear is TPU, when printed thick TPU is hard like a hockey puck, but still rubbery. Since it is softer it should be sacrificial and save the larger gear from damage. 2.8 mm wall thickness for solid teeth and 2mm top and bottom 80% infill. Uses 40g of material and takes 5 hours to print.

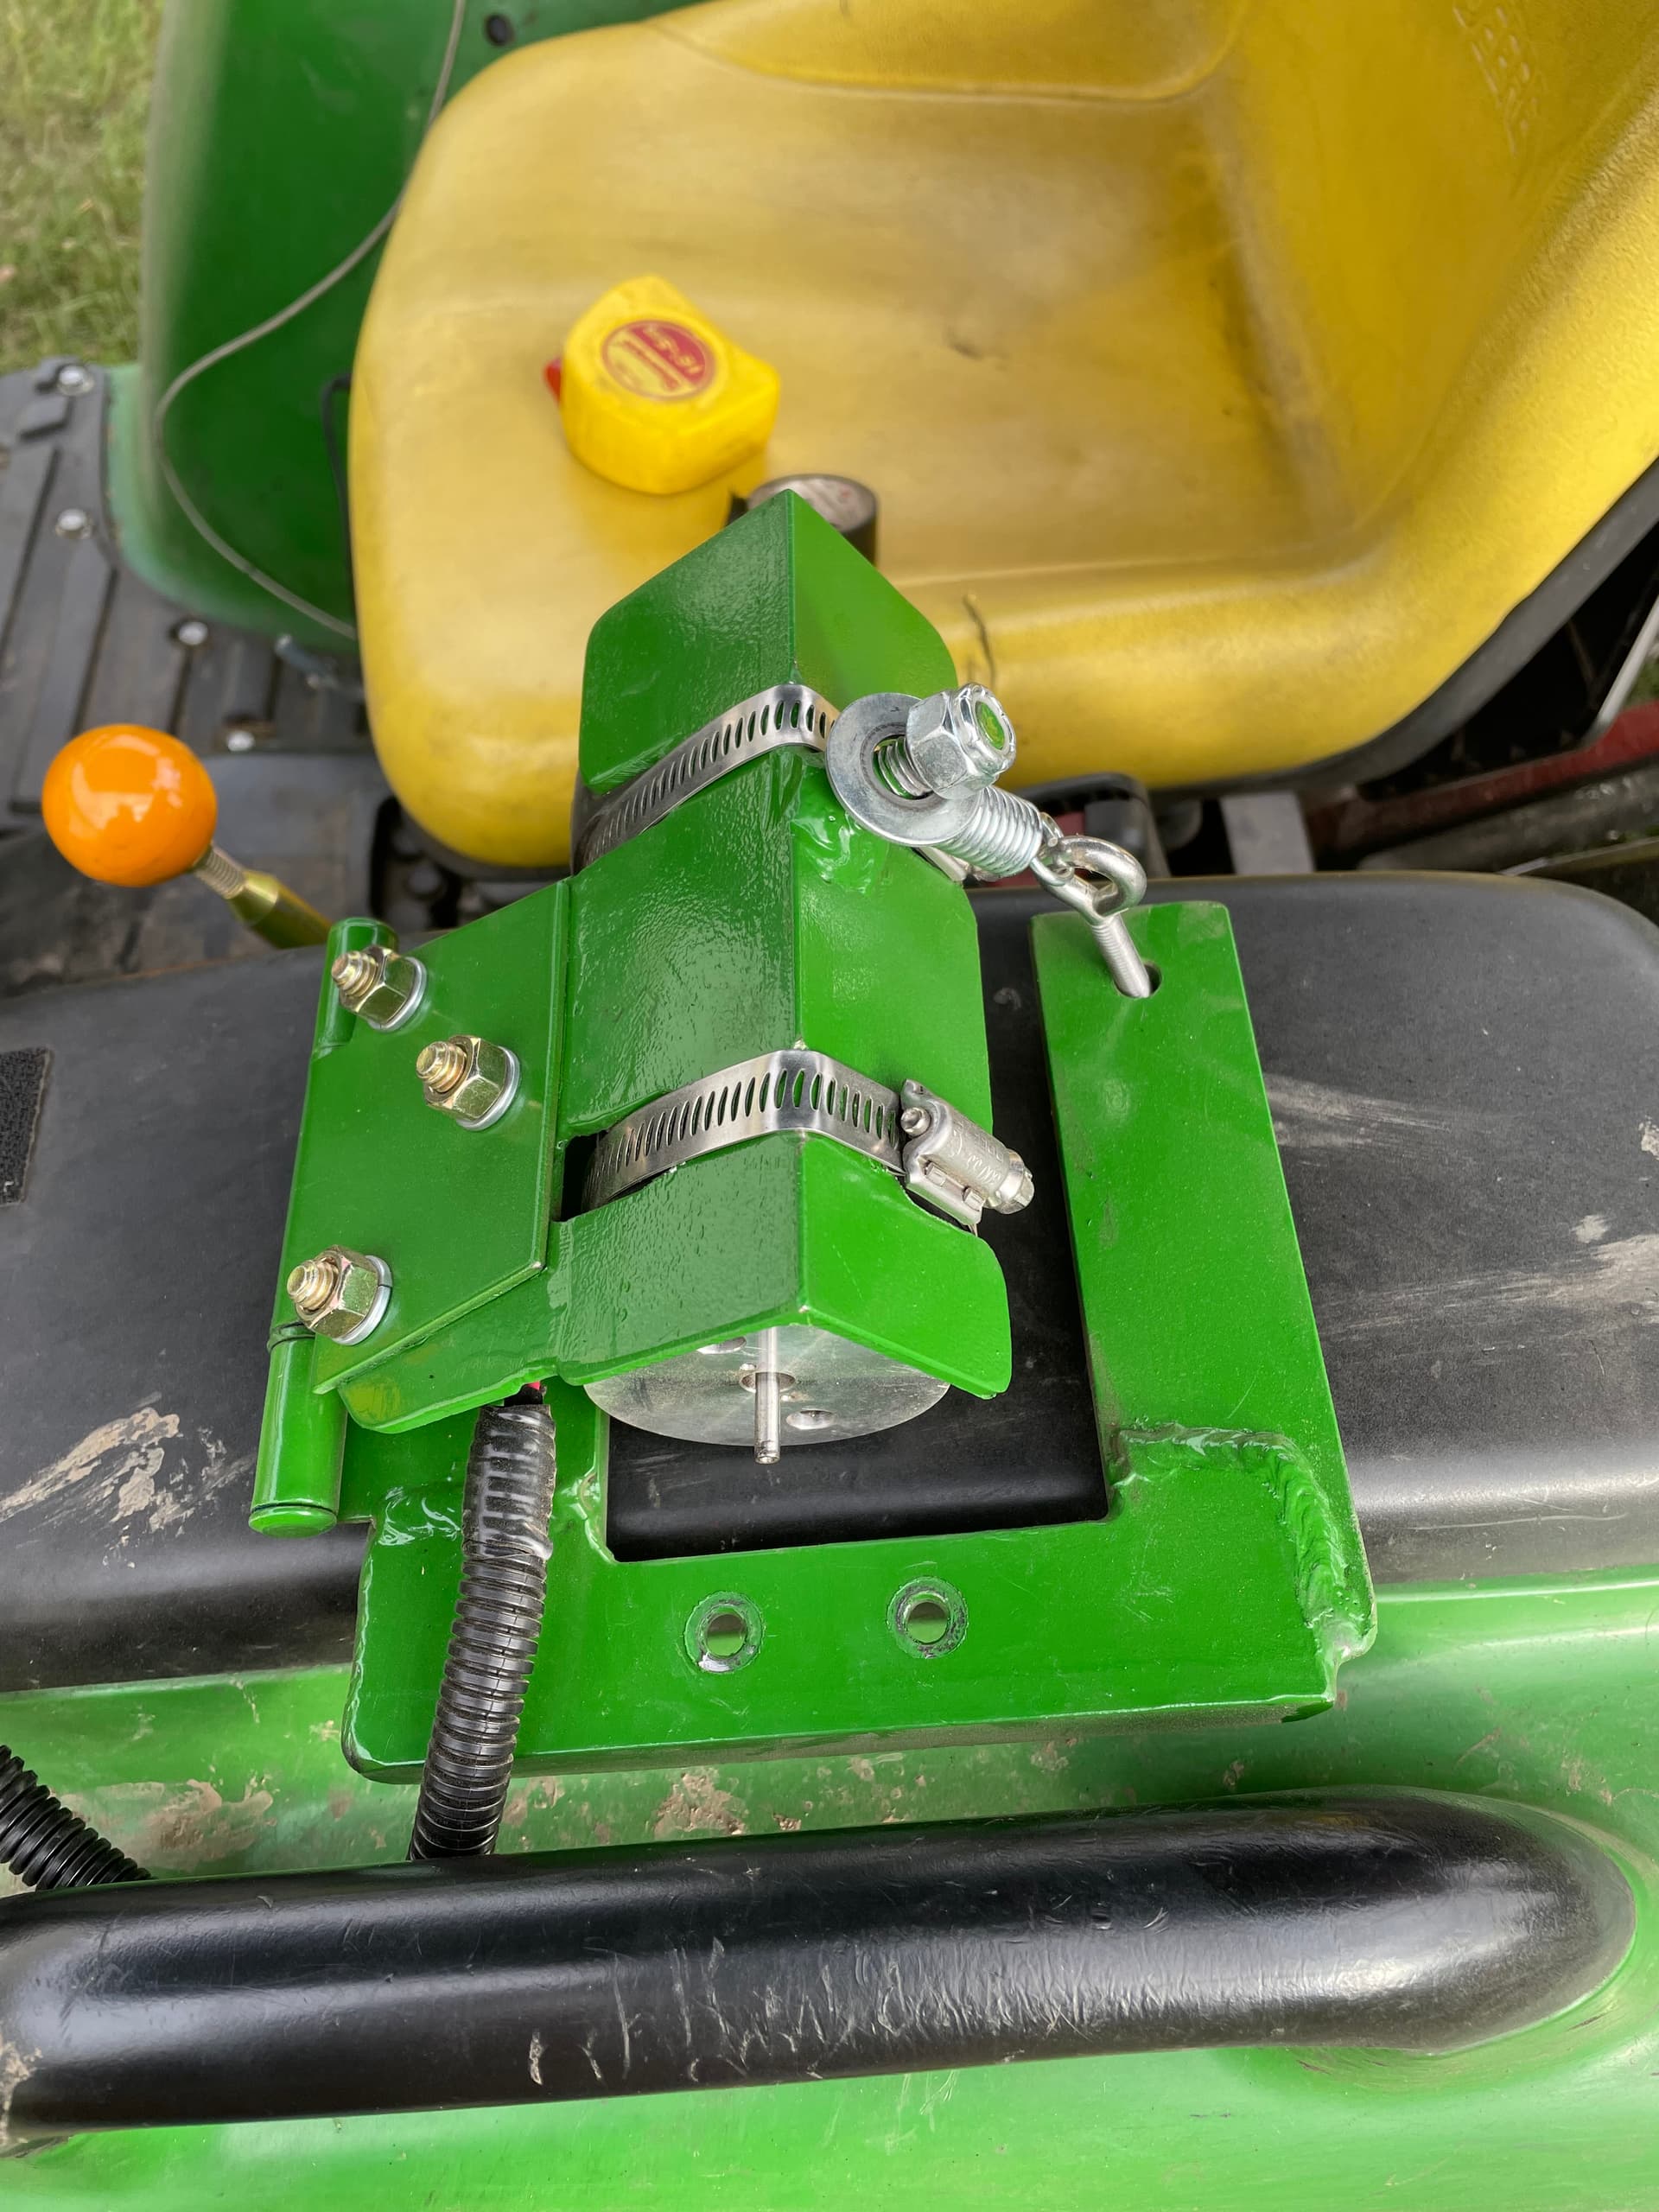
Added bonus of TPU is during fitment, if too much spring tension is applied the gears will squak. Once they are fully bedded and quiet, tension is proper. In open cab lots of dirt will make the gears noisy. But dirt accumulation seems to be prevented by spraying them with dry silicone lubricant. It does not take much force to keep the gears engaged, the PETG does not try decouple the TPU.

Version one was very chunky and took over two days to print

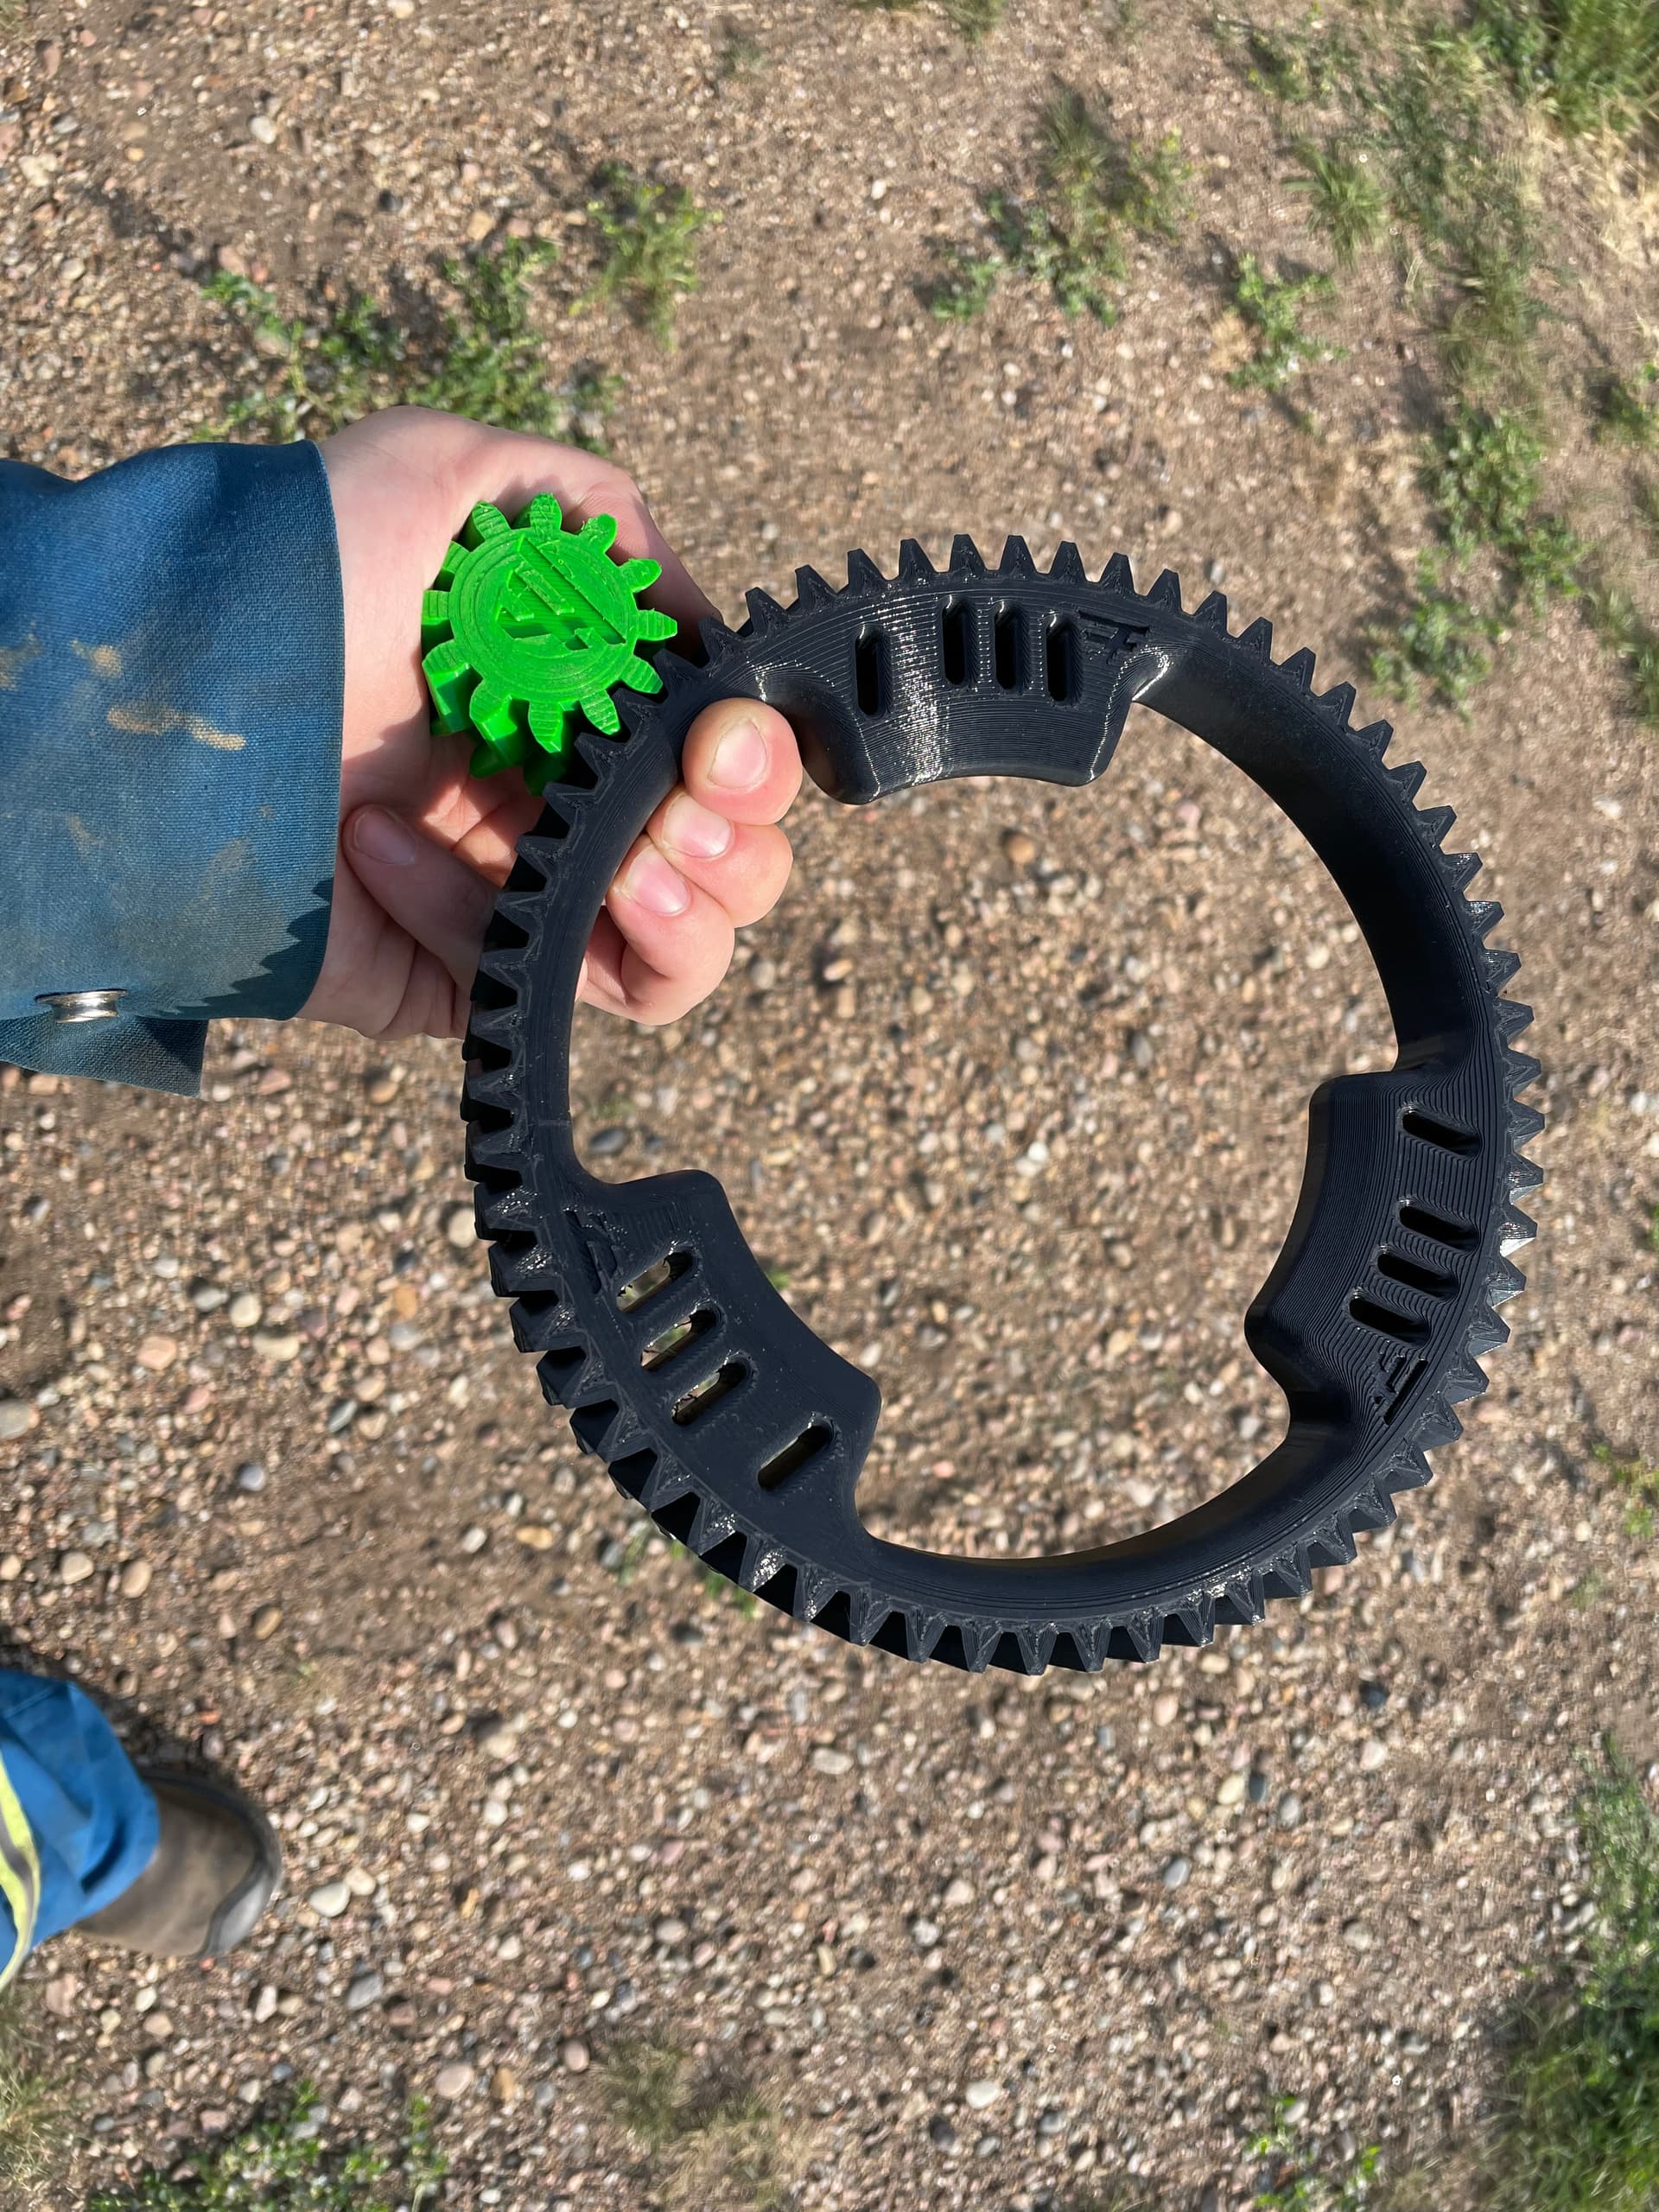
Version two dropped a bunch of mass, and print time without compromising strength,

Here are the V3 gear and V1 quick attach .STL (updated Sept 24, 2021) files for those interested. The materials and settings are just a suggestion, but they seem to be working very well. Has large overhangs, support material required.
https://drive.google.com/drive/folders/1oB-xxBiD6sCXIlz-HanKOceyacVLFpN9?usp=sharing

Those wondering the benefits of gears vs wheel tire, the main advantage of gears is zero slippage and wonderful repeatability making tuning with them more precise. Also Having the full use of the steering wheel at all times, especially with the cytron freewheel modification.

22 Likes

good Job

the TPU is so good for that !

I use similar concept with combination of Steel and TPU

Pay attention about the shaft of the motor and TPU gear because the TPU can be also flexible and be deform

Currently keeping the motor keyway stuffed with extra tpu to keep it in compression. The first version of the small gear would shear the key because it fit too loose pretty fast.

I have been doing acs712 disengagement testing with it, so there is a lot more higher force cycles than normal.

If shearing continues the plan is a two part gear with the TPU glued over PETG.

looks great. I finally went to metal insert over petg for my foam wheel. With just petg the odd one would come loose even though I made it tight enough it took some force to install. Will attach picture of example if you want to go that route.photo_2021-08-18_08-12-11

So far the TPU seems pretty magical, But I will see how many hours I can run before failure.

3D printing strength can very greatly with very with minor setting differences. I just recently got a printer, the guy I used to get them from moved.
I notice a difference in final properties just between the two machines.

Great idea with the big gear and zip ties, easy install and should work great.
what 3d printer did you buy? that big gear shouldnt need a day and a half to print, there is probably some thing you can change to speed that up. also for printing gears and parts I put in a .06mm (or is it a .08mm I forget) nozzle on the printer. the parts are stronger and much much faster print time…

The printer is the Creality Sermoon D1, using the 0.4mm nozzle that came with it. I have not had to use any glue on the bed yet. Print quality is very nice.

I have read the opposite, that the finer you print the greater the layer adhesion making the parts stronger. But at the penalty of time.

A day and a half is not too bad, most other parts at the dealerships take 2 weeks+ delivery.

The big challenge will be able to make a motor mount that allows the motor to be swapped between machines with minimal time. The motors are reasonable, but if they can travel with the operator the cost per machine falls again.

1 Like

Are you just using a grub screw to lock the insert on the wheel?

I’ve had no trouble so far with petg hubs inside rubber wheels, but use a clamp bolts to hold them tight rather than grub screws.

yes i am. I got some longer ones so they extend into the petg to help hold metal insert

Just printing off an updated version of the big gear, put some pockets underneath to fully hide the big heads of the tywraps. If it is still strong I will update the Google drive folder.

This motor holder is single pin quick attach, the first version printed showed promising strength. It will also be getting a finger guard based off of my snowblowers hydraulic hose guard.

If it holds up on tractor it will be updated to the same file as the gears. It will require one steel support member 90 degrees to the steering wheel for mounting, but will make installation simpler. It will require a few common nuts and bolts, I tried to make it accommodate either 1/4" and M6 hardware.

2 Likes

Looks really nice! By looking the model, I guess it will be fixed installation. So in other words the gear wheels are all the time connected or am I right?

Out of curiosity, how do you fit the printed parts to different tractor models? Meaning the steering wheel mounting in relation to the gear wheels attached to the steering wheel differ a lot. Is there any other way than print the parts and design an adapter piece attached to the rest? Converting the stl models to solid models doesn’t always work, but it would be nice to do the fitting on screen first.

I came a cross with a gear wheel solution where the big gearwheel was done with segments, which enabled to attach it without removing the steering wheel. Unfortunately I don’t remember anymore if it was on Cerea forum or where. There was a separate printed holder also instead of zipties, which might bring some added stiffnes when the gearwheel is made from segments.

2 Likes

Great feedback I do like questions.

Yes the gears will be connected all the time! There is a modification to the Cytron that lets the motor freewheel so no need to disconnect gears during operation. But if you pull the single pin in the location of the hexagon, the steering motor and tension assembly can be removed and taken to another machine with the operator.

All that needs to be reprinted is the side adapter block for each new machine install. But mating that adapter block to an arm would be the only custom fabrication left for the farmer. I think most farmers can fabricate one metal bracket 90 degrees to the steering column very easily. If they are on this forum extremely easily. But adapting and getting spring tension on a motor is tricky multiple times starting from scratch.

The motor holder will also work with a quick swap to a steering wheel tire as it does not require a set screw on the phidgets for the small gear.

Not sure what you mean by this? Put an .stl in Cura Slicer and the magic happens. The adapter has two 1/4"(M6) bolt holes and tilt adjustment. It just bolts to what ever arm you can fab up, but the motor removes with a single pin.

Zip ties make it more universal that’s the beauty, six of them on a tri spoke wheel and the gear self centres and is very firmly in place. The gear you show looks like it will only work with one wheel, if its to fat or skinny or the wrong angle you need a complete redesign. Zip ties mould around the spokes and your done, look at the first picture in this thread custom fit in seconds. Its given me many hours of hassle free use without shifting. This is the second zip tie version tested, the first was @Math fiat gears that where altered with a buffer wheel and they worked great too.

Segmented gears loose a lot of strength are not my first choice, but I will be making one in future. Some steering wheels are harder to get off than others. I have a Combine in my life that requires a set.

Think once I am done oats, I will make a video to show how this setup works. I am converting my friends farm to AOG he has 9 machines and 3 operators. This will save him buying 6 motors, and many hours of motor installation.


Here is the first one ready to get installed.

5 Likes

Thank you for the reply! Answers were spot on :slight_smile: .

With the comment regarding the conversion from stl to solid I was more thinking, if I would like to create a special holder for my tractor without the need to drill holes to the steering column or other ways stripping it down to be able to connect the mount. I could design it in e.g. Onshape or similar and ensure that it fits. Stl doesn’t bend that easily back to modelling…but anything else than stl creates a lot bigger files also. BTW which printer you use for these?

I’m still in a middle of setting up my second AOG setup, which will have the Cytron modification, so hoping it will be nearly zero resistance.

The video you mentioned is very nice idea. One picture is more than 1000 words and video is even better :+1:

2 Likes

Is printing in PETG pretty easy? I’ve got some on hand, but only have printed PLA until now. I understand it can destroy glass beds if you’re not careful and put down a releasing agent like gluestick. Any tips?

Your dreams will come true, the only resistance you get is if you are mashing the gears together way too tightly. I could just about kiss @d1ken for figuring it out.

The printer is a creality Sermoon D1. Its a direct drive, and has a descending bed kinda like an ultimaker. I really like it its a 9.5/10. Already had the thermistor go, and It really needs a filament handling upgrade to the direct drive.

Once you start using PETG you will just stop buying PLA all together. Its a way better material for functional objects. It prints a little hotter than PLA. I am a 3D novice, have had the printer a little over a month, and had no issues switching.

My favourite filament is 3D printing canada’s house brand, Its cheap, and prints very well. Also they ship by Canada Post very fast and have and order over $125 is free shipping policy. Great for living on a rural route. If you have a hardened or jewelled nozzle their carbon fibre PETG is superb.

The printer has a heated glass bed. It just prints directly on it, after the bed cools to room temp just pick up the parts no fighting. After two or three prints it gets rubbed down with isopropyl alcohol and regular paper towels, it leaves a dusty white surface. I give the nozzle two white paper thicknesses of clearance for the first layer. Put the folded paper under the nozzle and lower the bed until it still drags when pulled but has minimal resistance, not ripping the paper.

3 Likes

Here is a video explaining zip tie installation, review of the 3D printed gears, showing why quick tach motor is a good idea, and one last look at the old install.

I have installed it and of course found a few more small tweaks to do. But overall I was impressed by the results. Just need to run it around a few more times in the light and I can release the .stl’s into the wild.

This is what I am trying to prevent that is a pile of work for every tractor, It worked but it did not make her think my tractor is sexy by any means. Also ties up the motor permanently.

Here is the new holder, It takes a lot less space than the old one and is much easier on the eyes. Still needs an optional finger guard. The big gear got an upgrade due to the tywrap head clearance issue, I really like the green PETG.

Sorry for the dim pictures started ripping out the old holder at 5pm and it was dark by 8pm when I finished the install. Will have another video once I get these dialed in.

12 Likes

Hello,

That looks great, great job! I just have a question, how do you attach the motor holder to the steering column? It is not very clear from the pictures.

Thanks!

The quick tach block is attached to a metal bracket that’s welded together, I will get some better views of it. All it needs is an arm 90 degrees to the steering wheel to bolt to, some much easier flat bar fabrication. The arm is custom to each tractor because the steering columns all are very different.

But once it is in place the motor can be removed and moved to another tractor easily without extra tools.

1 Like

The V1 quick attach .stl files have finally been added, other than maybe cosmetics I am not touching this design for a year until I can get more hours on them. Here is the final holder with finger guard, I also added an inset hex to each side of the brackets as it allows for reversible pin placement. I found installing as a wheel motor unit in a Steiger the block needs to be reversed for wheel motor.


The final fusion rendition


Close up of the farmer fabricated arm, now motor installation is just common shop tools for the custom parts. Much simpler geometry.


Drivers view of the install.

I also have a short video to show motor removal.

Here the system is in action, I am almost fully happy with AOG steer tuning for the tractor.

If you do use this gear system please let me know if you are having any major issues, the whole system is obvious to me but its because i have been spending a lot of time with it.

I need to come up with a split gear for this for hard to remove steering wheels, and a better tpu steer tire.

13 Likes