Hello AGOpen Familly, spending some time in the office during the winter, I look for to be more precise
with the wheel position.
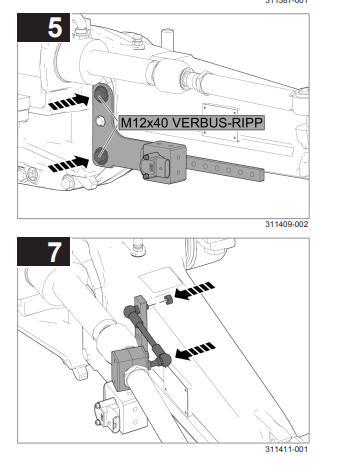
Indeed, regarding the sensor installation I have the same version of the claas GPS sensor (AG open is fitted on an Arion 410 t3)
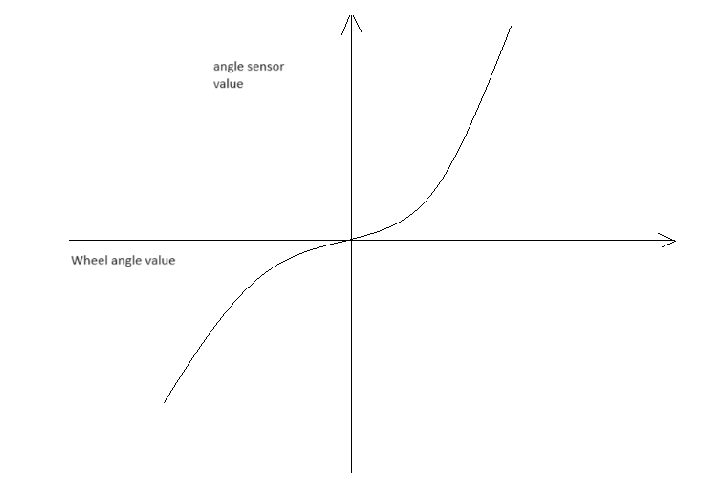
This installation seemed a good comprise for me, however the linearity of the measurment is not good as a sensor fitted directly on the wheel hub is.
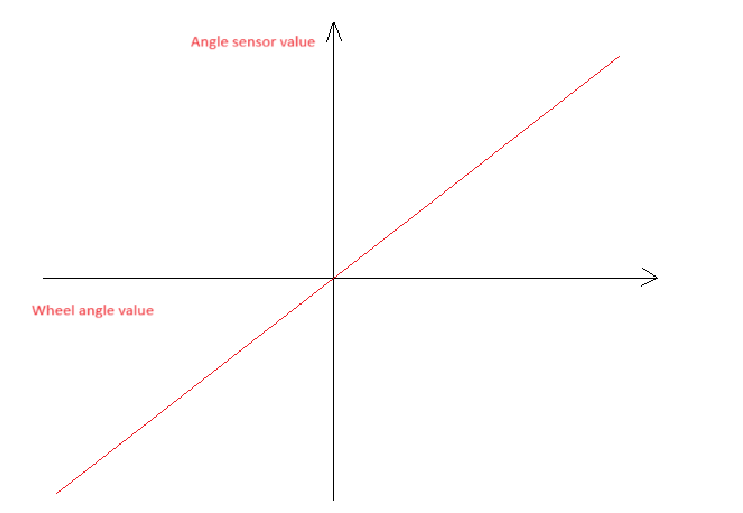
For wheel hub sensor fitting : a drawing showing physical wheel hub vs angle sensor value (ax + b line)
The idea was to create a transfert fonction (by reading a calibration table filled before) inside AG open after the data reception from the Arduino raw value.
As far as I now this fonctionnality already exist on the danfoss PVED-CL autosteer orbitrol module
Does anyone already did something or think about it on AG?
I will start to work on it with visual studio the following weeks by adding an extra fonctionality on the angle sensor menu.
What do you calibrate to? If you calibrate to kingpin angle: it doesn’t account for caster angle and a lot of other things.
With a good WAS install you can try the existing “drive a diameter” calibration at different angles. Try one at a sharp angle like 35 degrees, one at a slight angle like 5 degrees. For some tractors you’ll see that the reported CPD values differ significantly, indicating that there is room for improvement.
So which CPD value do you use? The 5 degree result will provide better straight performance, while the 35 degree will provide better u turn performance.
A couple of us have kicked this idea of mapping the WAS around before and we talked about calibrating to driven curvature. You’d drive the tractor at different angles and use GPS to calculate the steering diameter at that angle. A 5 point calibration is probably sufficient or a good place to start: straight, +/- ~5 degrees, +/- ~35 degrees.
While brainstorming about this recently I realized that for a 5 point calibration (like @WildBuckwheat is talking about) it’s just a different CPD at a 30+ deg turn vs 5 deg turn. I think the nonlinearity is why some people find better on-line performance with a CPD different then what the drive-a-circle function in AoG gives them because that circle was driven at lock (30+ deg) but holding a straight line is only ± a couple degrees. Do I was thinking it may be best to continue using the drive-a-circle function to get the initial CPD & Ackerman settings, and then after driving a (much larger) 5 degree circle, enter the alternative CPD into the steer module and just have it use a formula to scale the two CPD.
As said up a few posts when needed I use the mapped wheel angle. Works very good especially when driving curves and uturns at full steering lock.
Very easy to setup just use the standard record function in AgOpen, make some driving every 5deg. Set wheel angle to 5, then 10, then 15 etc both left & right. Then fill in the table / mapping line and job done. Perfect wheel angle throughout the whole range.
Yes basically, the idea was to improve during curves, Uturns and any case when the full range of the wheel angle is needed (especially positionning before guidance line or curve).
On my side I have on only Kaupoi PCB, will double checked ino code if this can work.
The base idea was to implement directly on the AG soft with a conbinaison of the recorded fonction or directly a new function.