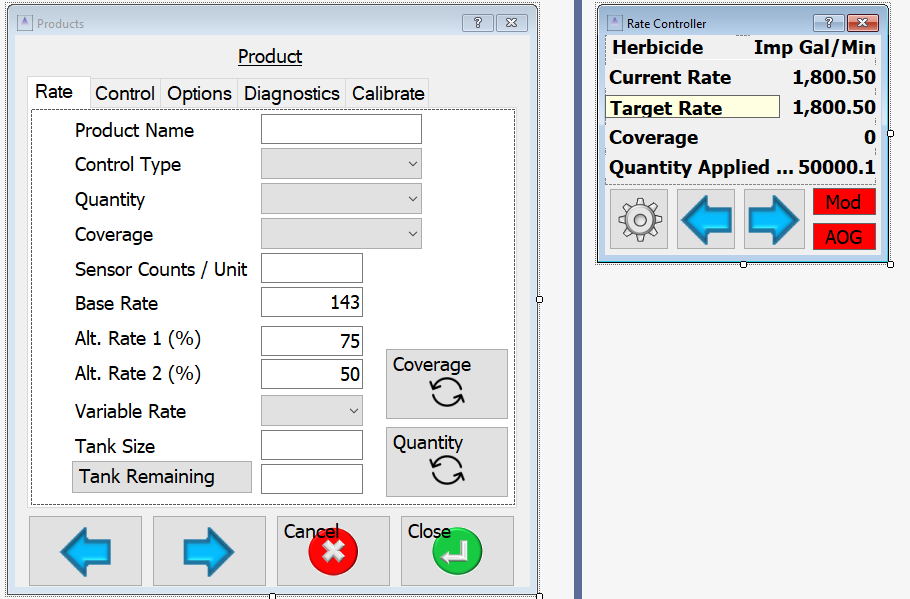
On the settings page there could be the base rate and two alternate rates at % of the base rate. On the main screen “Target Rate” could be a button that when pressed would cycle among the rates. A switchbox could also change the selection.
The switch box would be ideal as it’s easier bouncing in the field to hit a toggle switch. It could get confusing to have to cycle through rates versus flipping a toggle in direction of actual set rate.
When i built my VR box, I integrated the 16 relays, cytron, VR pcb, section pcb and all switches into the front clear cover of the water proof box. 32 pin connector to connect sprayer, planter, etc. easily to the wired box. It left lots of room for more switches, 12 vdc plug, etc too. I highly recommend to people to use a bigger box then needed and clear cover to see led lights for verification and functionality of relays and cytron. The rate controller has not skipped a beat all spring spraying. Keeps up gpm with speed perfect! Rate controller worked flawlessly with my 12 row shutoffs on the corn/soybean planter as well.
A switchbox would be best. Something in software would be quicker to make. Maybe only two rates and a separate push button. Open to ideas.
Good to hear it worked for you. Which version of the software?
2.2.0, it’s the “works” that you sent me back in march-april. Having the select able relays is a great feature. I’m really looking forward to variable rate coming. What you, @KentStuff, @PotatoFarmer and @BrianTee_Admin were working on looks amazing.
I would agree that would be the quickest. In the future for pcb changes, a physical switch would integrate more into what i’m familiar with Raven spray controllers. A push button isn’t a bad idea just much easier to forget the set rate versus seeing a switch flipped up or down. This will be nice for overriding a prescription map amount or in this case not having a prescription and wanting to manually bump up the base rate in sections of fields!
I don’t work much yet, Just lots of building whats already been created, testing and testing and testing.
Trying to learn the magic of programming the windows side of things.
Debug.zip (6.8 MB)
Here is the latest version with a rate change button. Click on “Target Rate” to switch. Use the settings page to change the amount. It will work in the simulator but it won’t work with the ver 2.2 nano ino.
That works awesome in simulator. Very easy to switch back and forth. Can each rate be tied with different paint colors? Even then, how easy is it to implement it on a nano file?
RCnano.zip (11.4 KB)
Here is an ino file that will work.
Painting different colors would be good. This has to be done in AOG. I don’t think a pgn exists to allow this from an external program. AOG ver 6 feature request!
All the motor, relays and other inos have to be loaded correct? Not just the rate control ino paired with version 2.2.0.
RateController_Install.zip (7.0 MB)
The two files should be all you need, just install the ino file on a nano.
I’d also like the option to paint different colors in AOG for applying different products with the sprayer. How could those different color areas be kept separate for acre counting and KML export?
Not my area of understanding. Maybe Kentstuff or Brian.
Good evening, I tried to load the ino and it kicked it back at me when trying to verify it. Have you tried it yet? I ended up loading the old software and entered the two different rates while side dressing nitrogen tonight. Let me know if your able to get it loaded on the arduino! Thank you for your passion in this system! I have a friend that’s a guru in building software and computers to fabrication of machines that is very interested in this system. I can’t wait for him to get on board with a wealth of knowledge also!
It loads fine here. It could need old bootloader or not.
I will give it a shot again this weekend. I got done side dressing but will try it out again spraying soybeans in the next week or so!
@Pat how did you edit this? I can’t seem to find it in the source code.
It’s a long time since I looked at it.
I think you have to look at the “graphical page” where you see the windows. Then you click on the box to see the properties.
In forms/ settings / FormConfig.cs
click on tsect tab
right click on section Widht, select properties
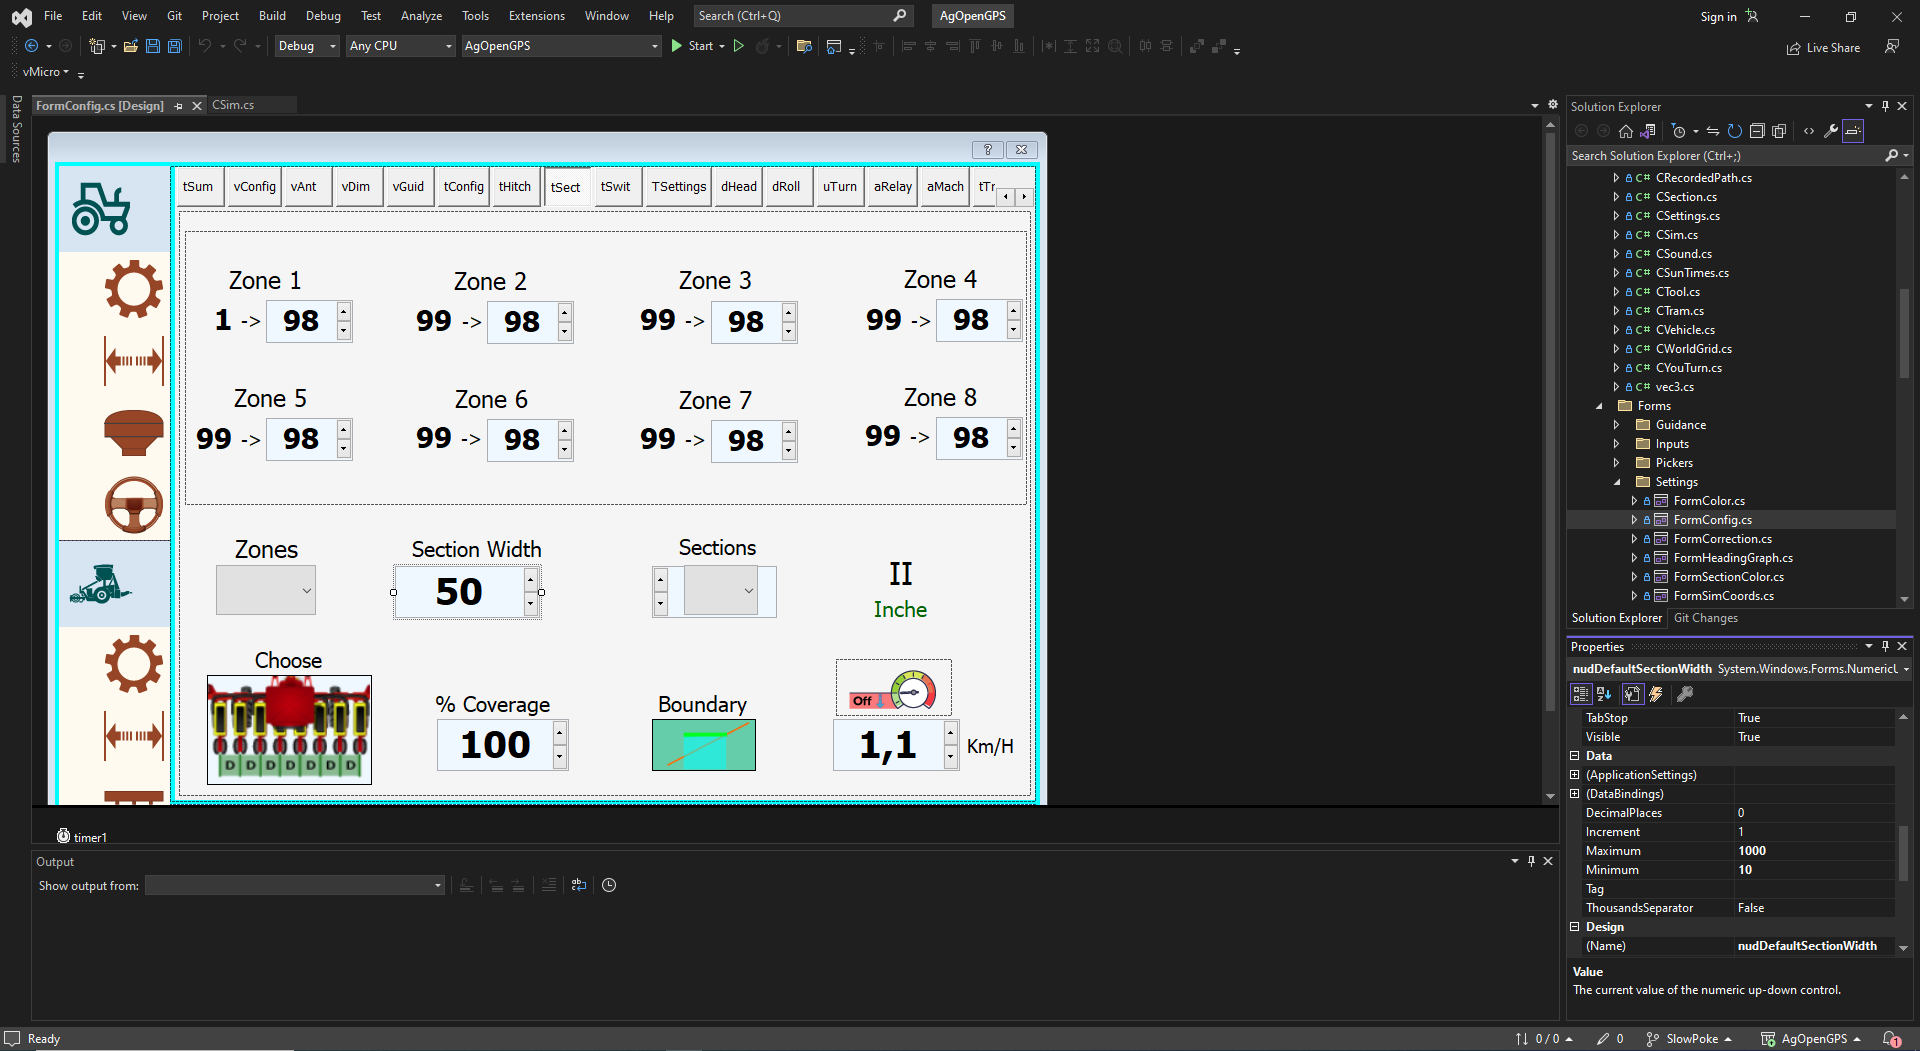
If you change it and use it report back if it works or if you run in some errors.
1 Like