This guide is a step-by-step (with pictures) on how to upload on an Arduino using a Windows 10 machine.
Go to last version of AgOpenGPS

Download AgOpenGPS.zip (this file contents last program files) and SupportFiles.zip (this files contents ino files, PCB desings, wirings, …)

Step 1: Connect Arduino using a USB Cable
A separate power cable is not required; the USB connection to the computer will power the board.
Step 2: Download and install Arduino IDE
The IDE (Integrated Development Environment) is used to write code, compile programs, and upload them to the Arduino for it to execute.
The IDE can be downloaded from Arduino’s website here. Follow the steps in the installation wizard to get started – I believe the installation wizard has the advantage of taking care of installing the drivers for you. It’s the IDE that lets you write code into sketches, compile those sketches into instructions for the processor, and upload those instructions to the Arduino.
Step 3: Open your correct ino file with Arduino IDE
Inside SupportFiles.zip you can find ArduinoModules\InoFiles\AutoSteer_XXX_X_X folder, you can choose USB or UDP version.
Step 4: Select the Arduino Board and Port
Under the Tools menu at the top of the IDE, select your Board
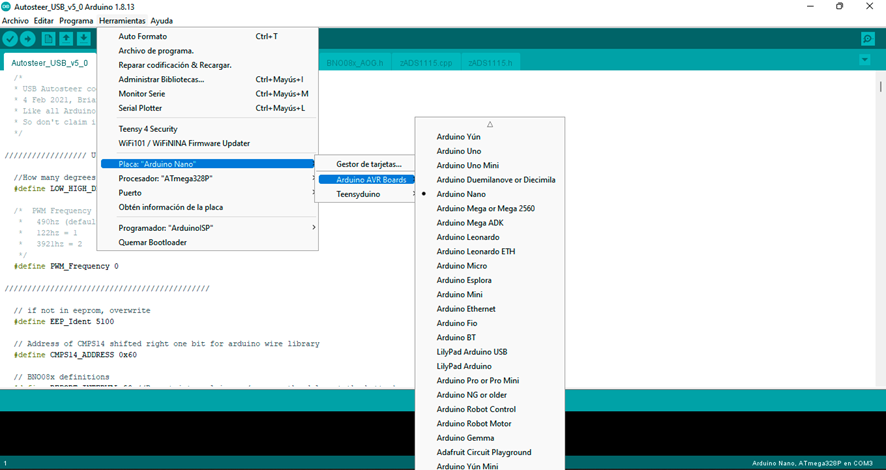
Select your processor
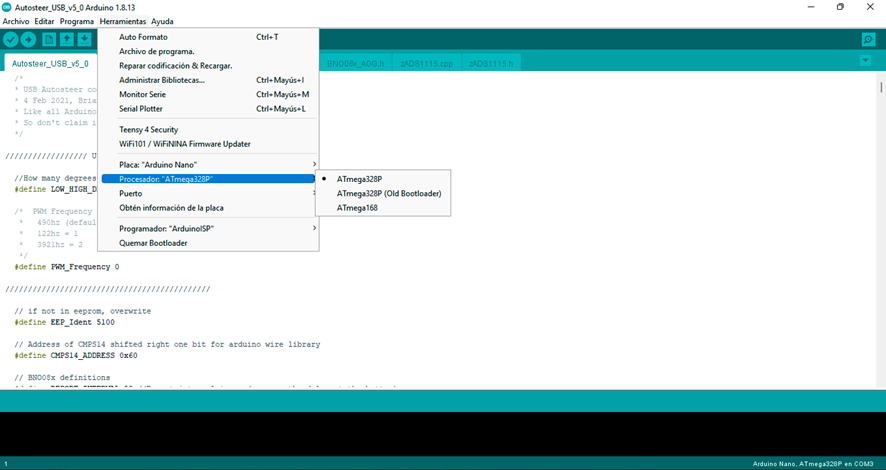
If you are using an original Arduino Nano you should choose a ATmega328P, and if you are using a clone you should choose ATmega328P (Old Bootloader), users reports some clones use ATmega328P, but for mostly, Old bootloader it’s correct option.
Select correct COM port

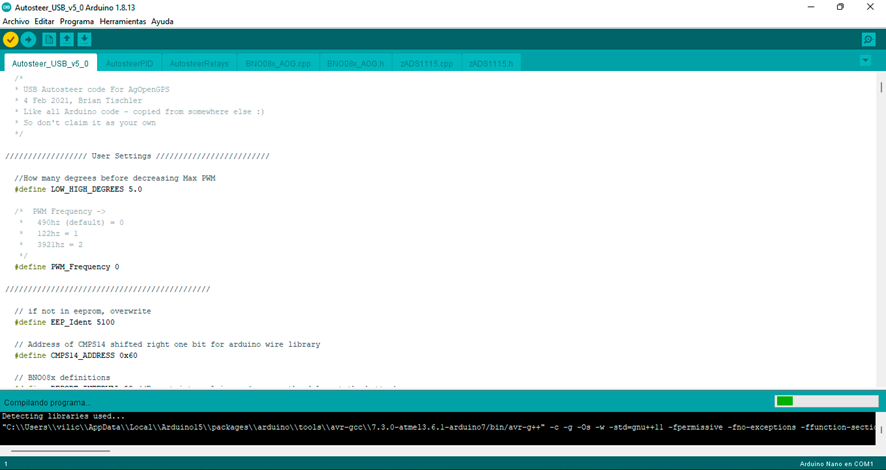
Step 5: Compile solution with first icon and wait ends
Step 6 :Upload ino file to Arduino Nano
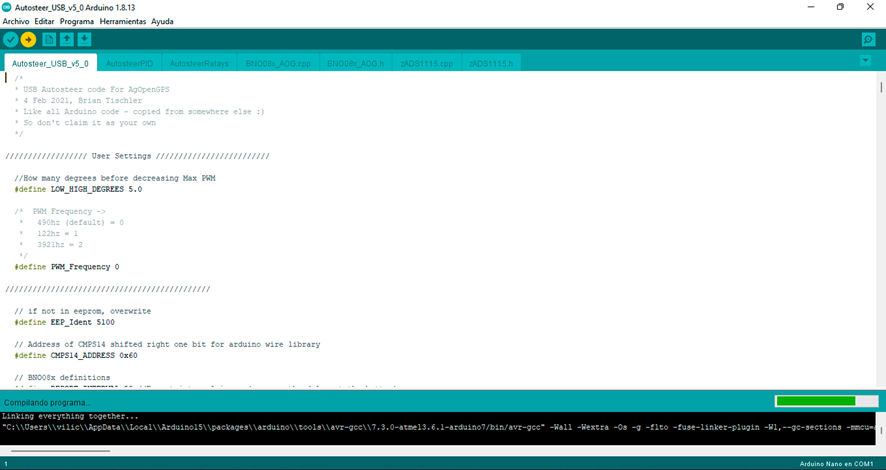
When finish without errors, now you are ready to check your ino in AgOpenGPS, but first remember to close the Arduino IDE, if you don’t close the program, you get an error in AgIO “COM Port Used”