200 rpm seems fast for the seed discs?
I’m currently working on a rate controller for a drill, grain, fert and small seeds boxes. A friend is writing the code in ladder logic.
It’s been bench tested and next is a small planting test.
I hope to share it here in about 3 or 4 weeks.
I thinking about a stepper motor, because if we want to achieve precision in sowing seeds (seed spacing between one seed and another), only a stepper motor can provide such precision in combination with an Incremental Encoder
basically, I only need 30 rpm because the discs on my seeder have 16 holes with a distance of 20 cm between the plants, in one turn I have 3.2 m, but if you increase the travel speed to more than 7 km/h, no 30 will be enough and I tend to think that a 50rpm motor would be more suitable for me, I look forward to the completion of your project
This is my understanding. A stepper controller assumes that the motor is stepping correctly. A servo motor is more like a regular motor but it has position feedback to the controller which in response controls the motor as needed.
the stepper motor I don’t know if it will be reliable in this case, I don’t know if it can work 8-10 hours continuously although it is more precise than a DC one
I do not understand why a stepper motor would be necessary to achieve seed precision in this case.
I think an Incremental Encoder to get pulses for calculation of rpm of seeder axle, then compare that to (calculated) necessary rpm of seeder axle, at given speed (from GPS or tractor) tell motor controller (PWM) to output enough power to DC motor, to keep that rpm on seeder
with a regular DC motor you may have a problem when accelerating - in such cases, the sowing precision may be lost, at a constant speed, and I suspect that you can achieve sowing precision… in the case of a stepper motor, the acceleration disappears (I think) because the faster the pulses are transferred to the motor stepper motor, the faster it starts to rotate but this is just my opinion, I haven’t tested it and so far I have it as a theory in my head
the stepper motor I don’t know if it will be reliable in this case, I don’t know if it can work 8-10 hours continuously although it is more precise than a DC one
stepper motor our servo motor they are used in 3D printers and they can sometimes print for several hours
I’m using an ordinary DC motor chain drive to the drill then a shaft sensor for feedback and a PID loop to tune.
This is the same as electric drive on many air carts- proven principal.
Precision planter may need more control through, not an area I’m experienced in.
I started to test our PCB and adapted the ESP32 code from the GitHub repostitory, here are the changes we’d have to do to make it work with European style flowmeters:
Interrupts gave me a massive headache… I had to lower Debounce by factors… It used to be 3000 now I’m running with 80-100
Interrupt type FALLING on esp32s3 is more like “failing”. With Change type it matches really nicely. (See video)
(We used an Opto to add some saftey to the ESP32 3.3V pins)
EthernetUDP class → caused the ESP to freeze up , WiFiUDP works well even for Ethernet traffic
Maybe it’s because we’re using W5500 instead of W5100? (copied it from Lilygo T-ETH lite)
I disabled WiFi for the time being as it added 5ms to the calculations… (And we’re not using it.)
Manually turning the sections on / off does work nicely.
truning all the sections off closes the master valve.
However the auto sction doesn’t really work.as rate controller always keeps all the sections on. (3.6.1 on github) 3.6.0 works as expected.
Also this new switch panel can’t be moved.
As ESP32 can also have a touch screen maybe we could play with that too? I.e display the web page on it and have the GUI switches turned on-off from there?
I’ll keep playing with this but so far loks promising.
I looked at your github. The ESP32 file is missing. On the interrupts I could never get change to work, only falling. The loop time is about 4ms with wifi on. While it is quite a bit slower than the Teensy at 0.2 ms, I didn’t think it would be a problem. The Nano takes about 2 ms per loop. The switch panel can be moved by right clicking on it and dragging, the same as the LargeScreen panel. The switch code has problems I will work on.
Hi,
For my seeder project, I would like to include reading the status of the ISO11786 Work pin in switchbox . I’m having trouble including this in the best place in the sketch.
Should this be found instead with sw0? or Master?
The seeder is 1 motor, 1 section.
I would like the seeder to only be able to sow when the lift is low, and as soon as I raise it, it stops.
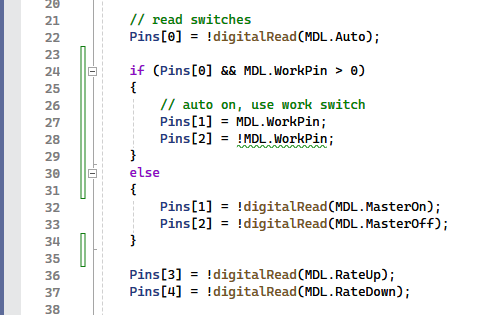
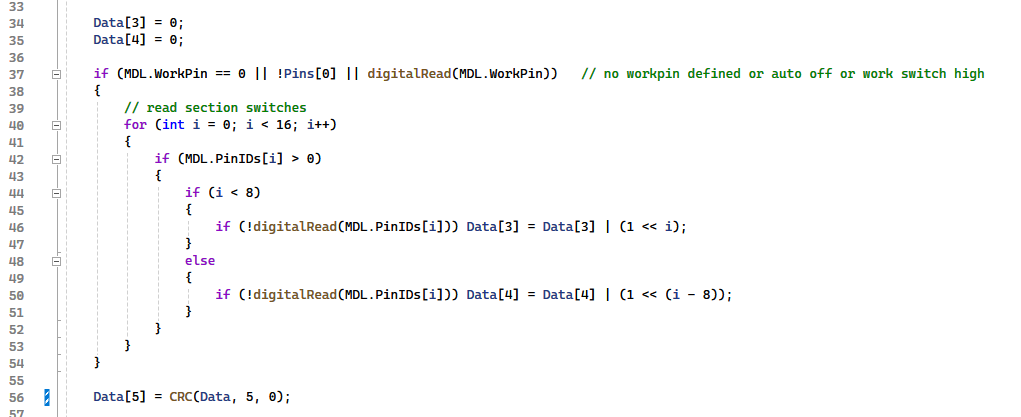
Something like this may work. Have a pin work pin in the switchbox. When auto is on the Master state would be set by the work pin. When auto is off the Master switch would control the master state. A drawback would be that the master switch is disabled in auto.
Looks like a good solution. Only problem I can see is if you want to turn it on with the machine up, maybe for testing, it would always be off. The code could optionally only use the work switch only when auto is on.
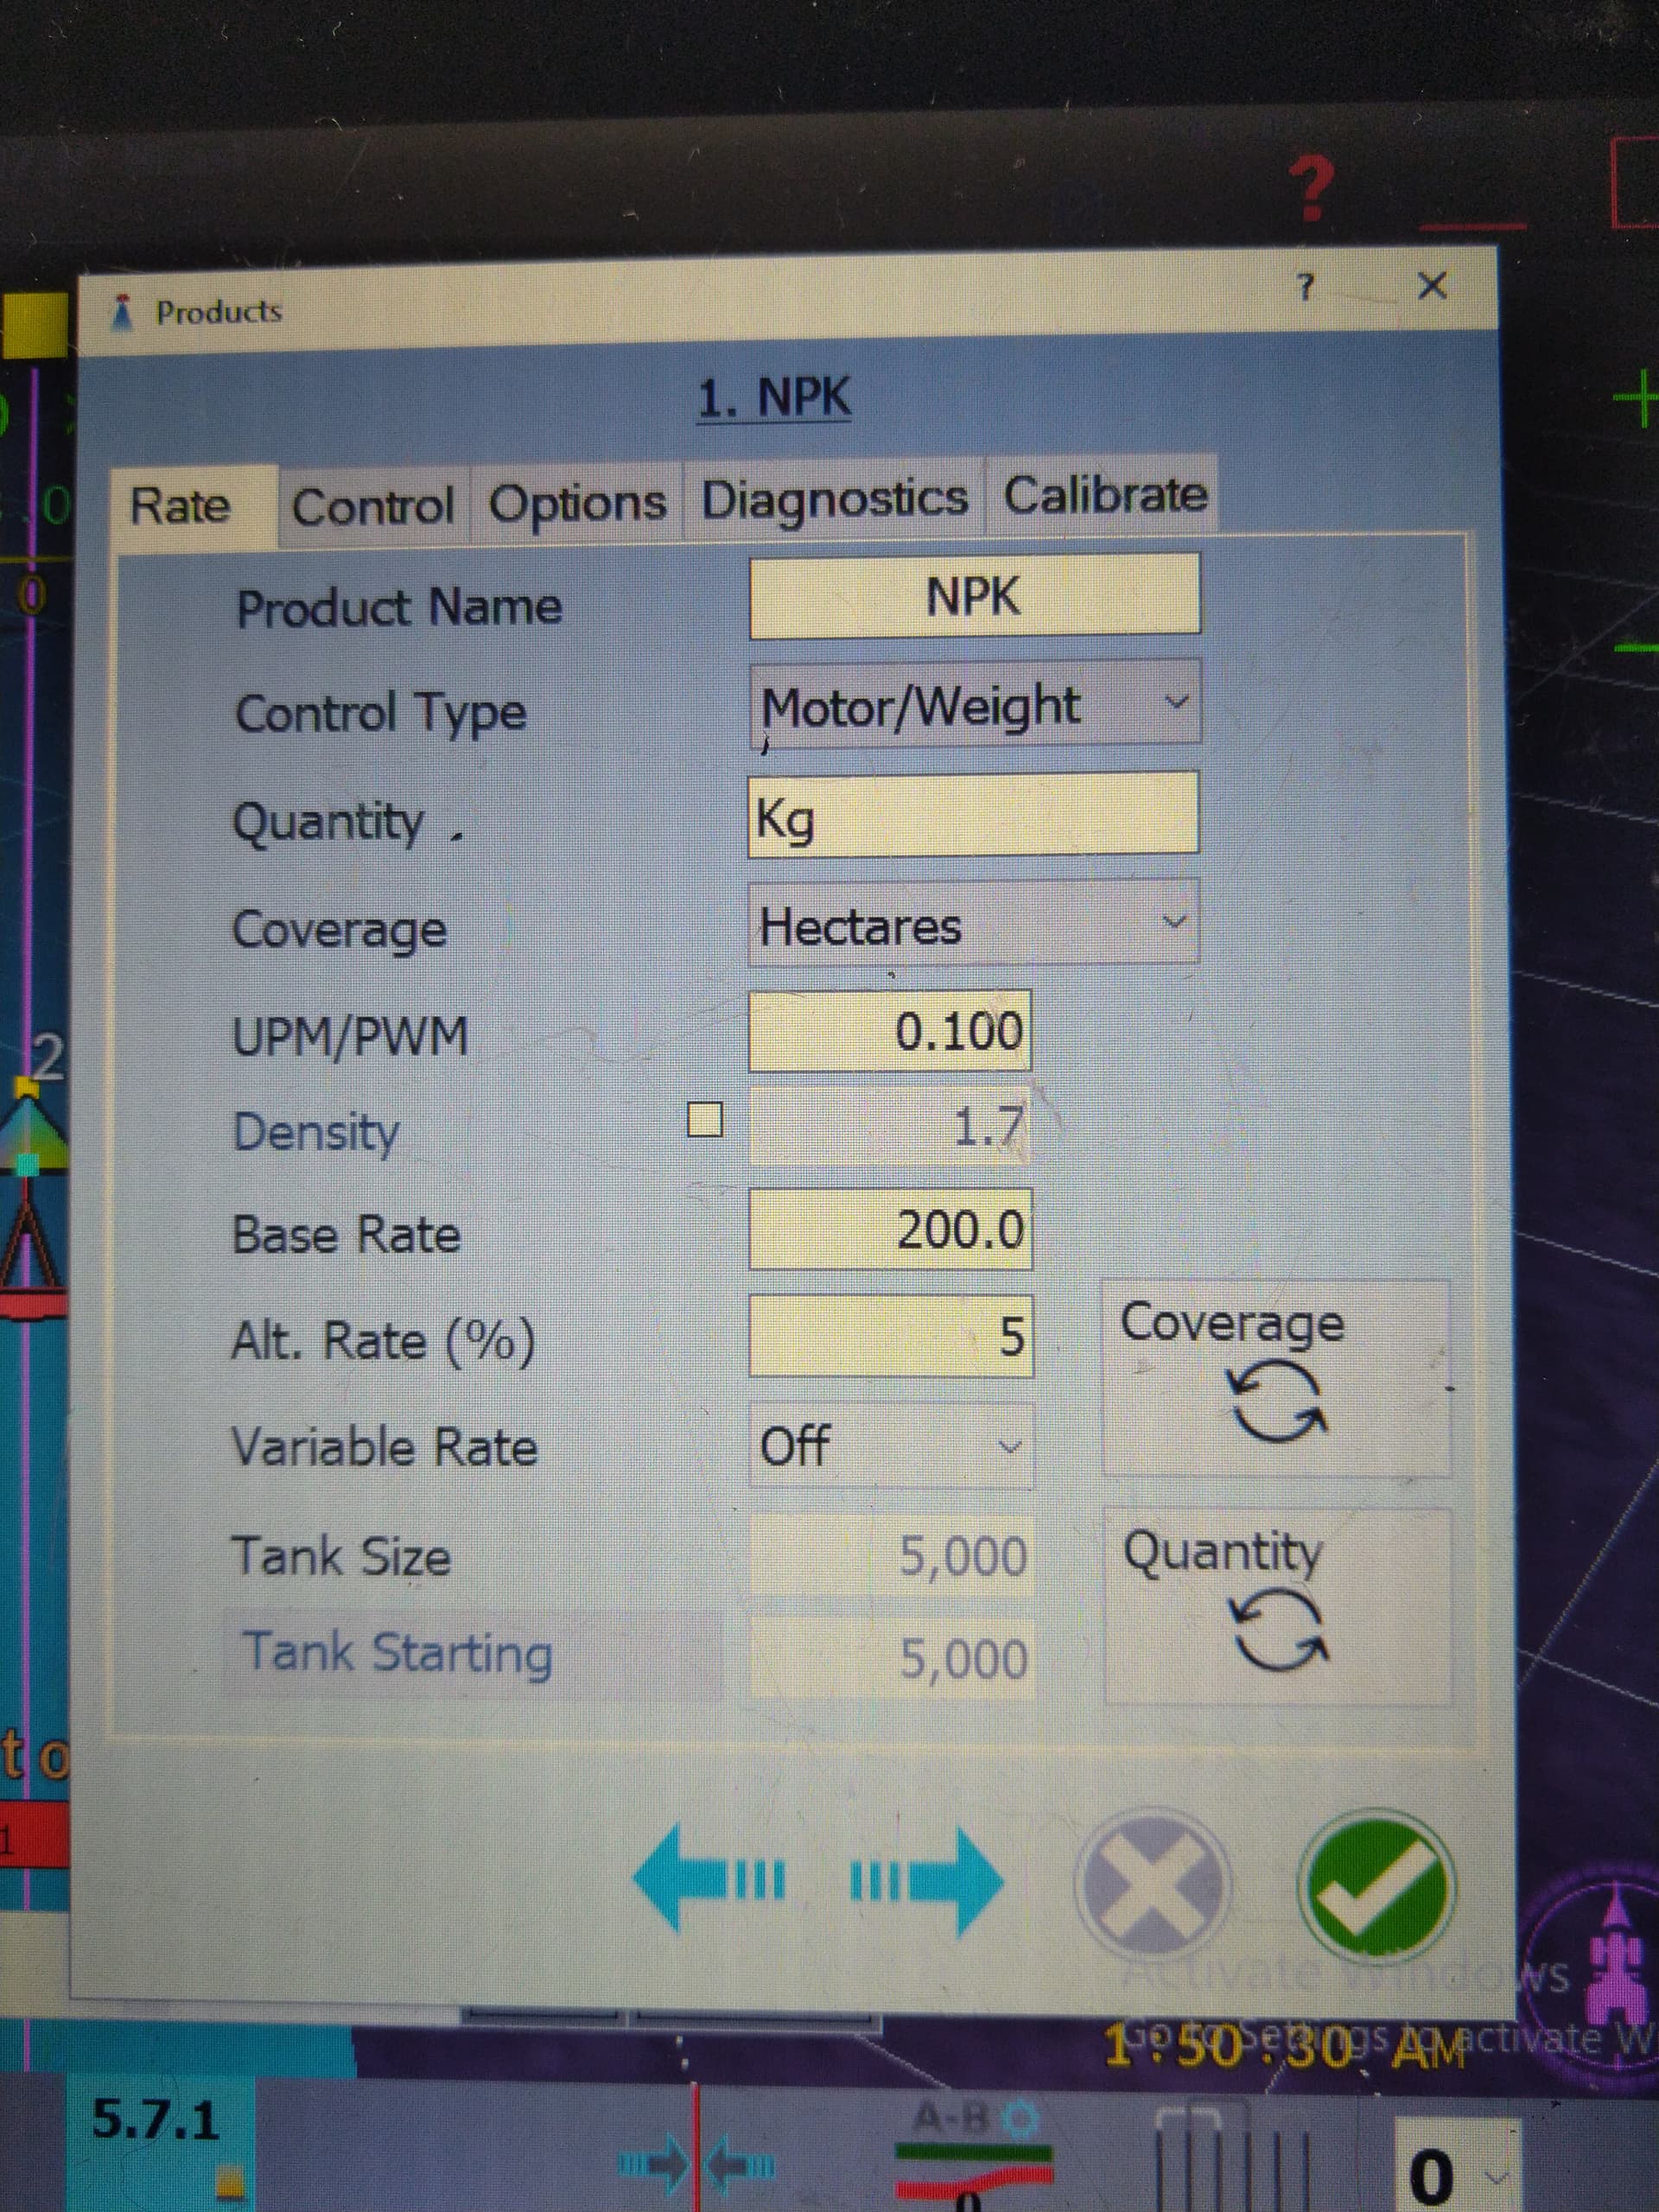
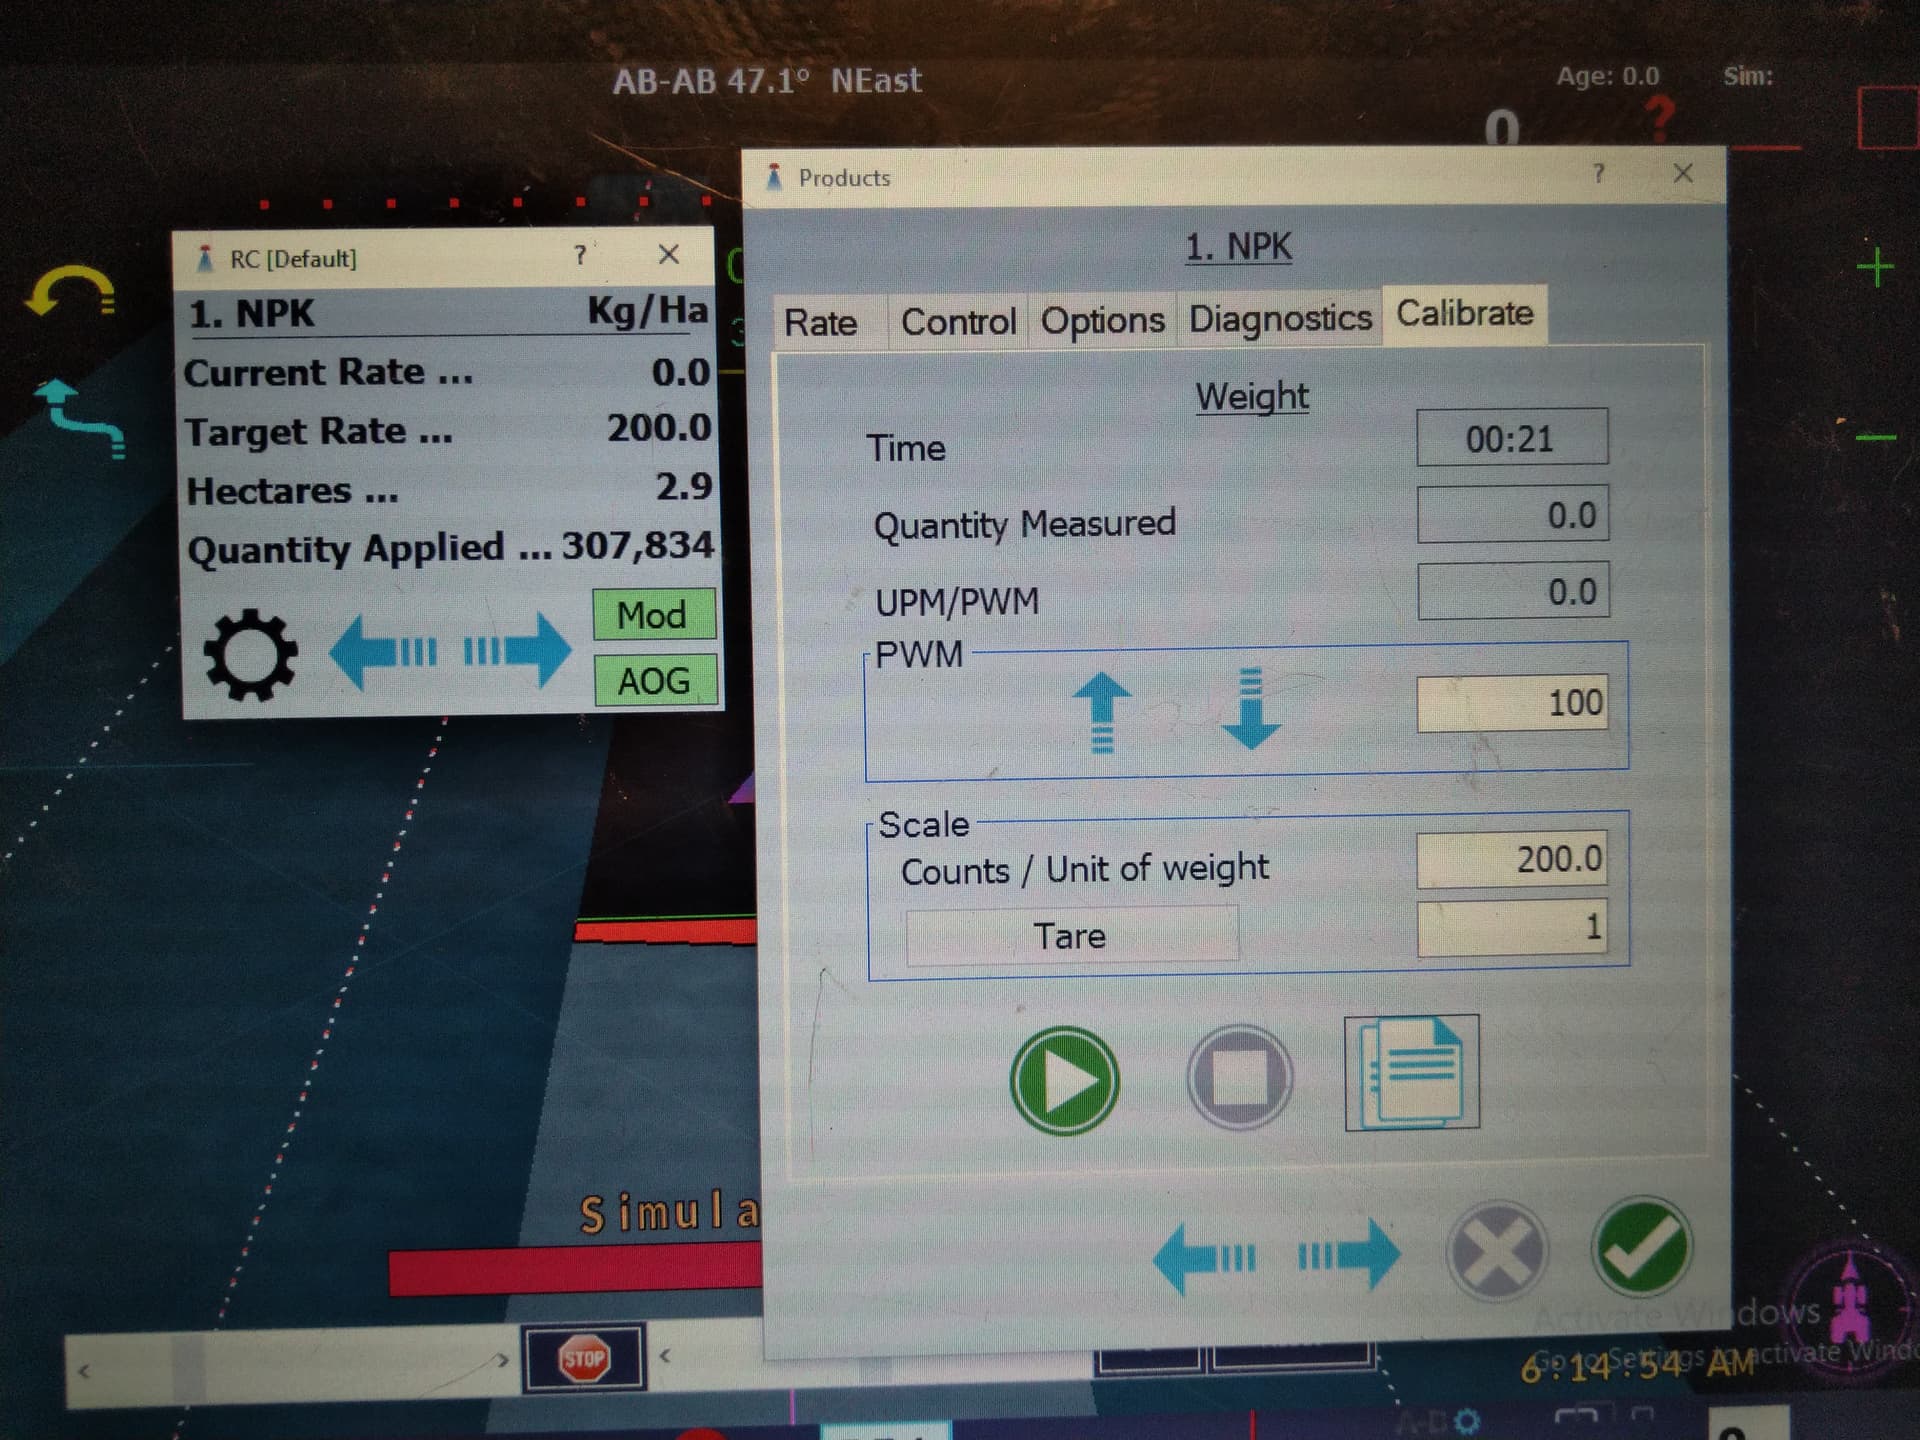
Got the correct motor driver, and tested to try out all the Control types. Standard, Motor and others, what has basic calibration window with rpm count and enter measured weight, but even with multiple years of AGO experience it is janky as hell to adjust and get the motor run linear to the speed. Basically same issues as Tooki57. Calibration type Motor/Weight runs perfect with UPM/PWM setting 0.1 and 400 proportional gain, but I can’t put together what should i write and measure for calibration. Most confusing, that Quantity measured window in not available to edit.
Could someone, please, comment: PWM, Scale units of weight and tare aisles?
And why Tare is possible with negative value, but not 0.xxx, just round number?
Just got the latest version, now after uploading new soft in Nano, in 10sec. motor starts itself in max speed and does 't stop without single program open