Looks Nice.
Can it be powered with 12V?
Have you thought about putting some Blade style automotive fuse holders on It?
I think it would be nice to have a place to mount a Digi SX pro radio rather than on the RTK2B Just more secure i guess. Plus they are cheaper on Digikey than from ardusimple.
And data sources goin out? An easy way to connect from board to thru panel connectors on enclosure?
Is it designed to go in a specific box? I would go for more than 2 mounting holes more like 4.
Just my thoughts. You guys that have learned how to design PCB’s have my respect. They really clean up electronic projects
I like to have everything secured good enough so the box can be mounted in any orientation. Thats partly why i would say the radio should be mounted directly onto the PCB somehow
If attached to a CNH Scraper plug it draws 5 V from machine to power it, that way it is keyed power and wont kill your tractor if you forget to power down at the end of the day. But if you wanted to power it from 12V I don’t see there being and issue, it has diodes to prevent current backflow to tractor and the Voltage regulator I used is rated for 30V @ 1.5 amps. This is the spec sheet for it below if someone would like to confirm.
As for the mount for a radio, for me anyways I don’t mind paying the little bit more for the radio from companies like Ardusimple. I think the work they are doing is important like bringing RTK capabilities at a 1/25th of what commercial companies charge. This is one of the reasons I Incorporated their board directly in to my design as I would like to continue to support them, and in doing so who knows what else they may develop to help farmers in the future. A quick fix for security is a nice glob of hot glue underneath the Radio module securing it to the main board.
Data sources right now are from the USB UARTS on both the esp32 and the RTK2B they make bulkhead USB fitting( can see them in post 509) it is made to fit in the specific box it is this one
In the future I want to work towards sending GPS data from the RTK2B over serial to esp32 and then communicate both the NMEA data and GradeControl Data Wirelessly to the table via UDP. Then all you would need to go through panel would be the power supply and 2 outputs for 2 HYD valves. (all sourced from onboard CNH Scraper plug OR external 12V Danfoss Valve Adapter PCB) .
2 Likes
I didnt think of everything including the RTK2B pulling power from the plug. Should work fine though.
Yeah I feel like ardusimple is a good company to support. I would like to move all my grading work from Swiftnav over to ardusimple. Swiftnav is getting to complicated and less focused on simple RTK GPS
1 Like
Those looking to design their own PCB’s here is a good place to start it is free and pretty easy to navigate. There are also a lot of good instructions online if you get stuck.
1 Like
My problem is probably a lack of really trying… Someday
I levelled one field last year with 17 km distance from base, work reasonably well, just needs bit more resetting the offset every now and then (few centimeters). As for NTRIP, OpenGrade3D has a built-in NTRIP client, I have been using a separate receiver box with antenna magnet mounted on the blade, takes 5 minutes to install and take off.
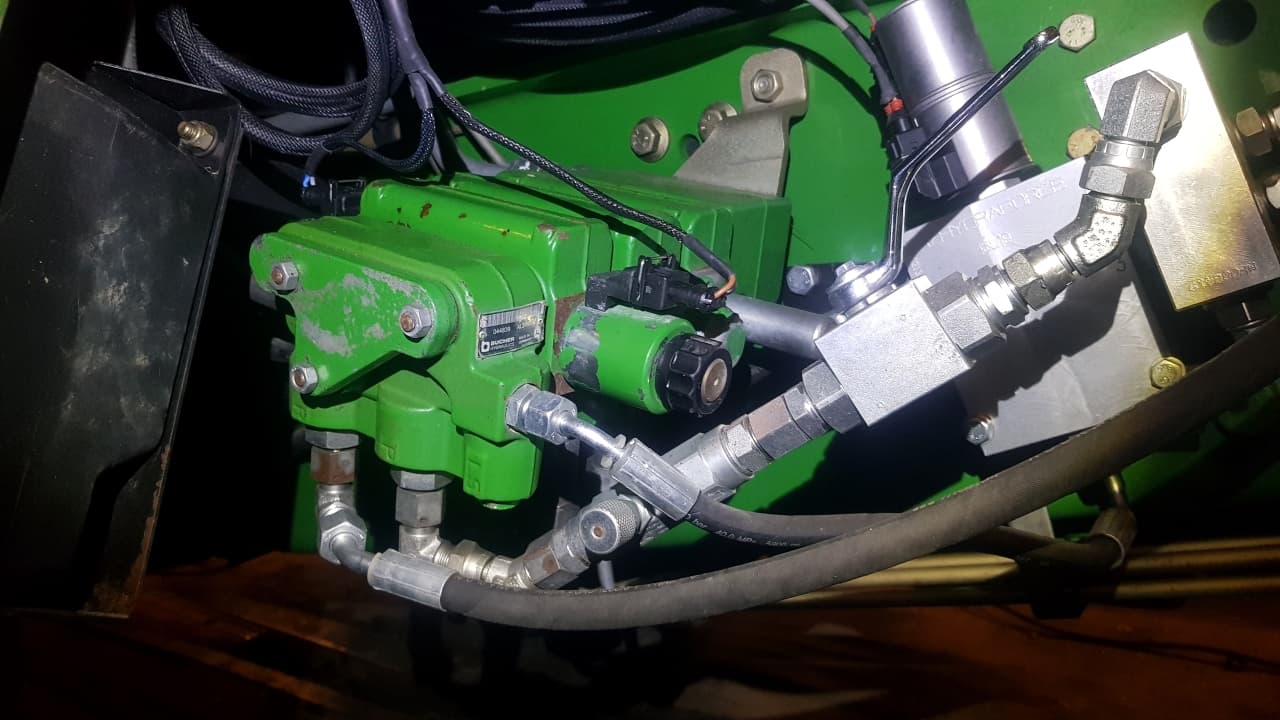
@Kaupoi do you have CAN valves on the Deere, or are they analogue control? Would be easy to hook into the bus and avoid all the cytrons etc. just one CAN board and arduino / teensy.
I bought the Mara M8 blade two years back, pricing was quite reasonable, 4 meter version.
1 Like
I’m not sure but I think they are CAN.
The one that I connected to OG use is with regular PWM coils.
1 Like
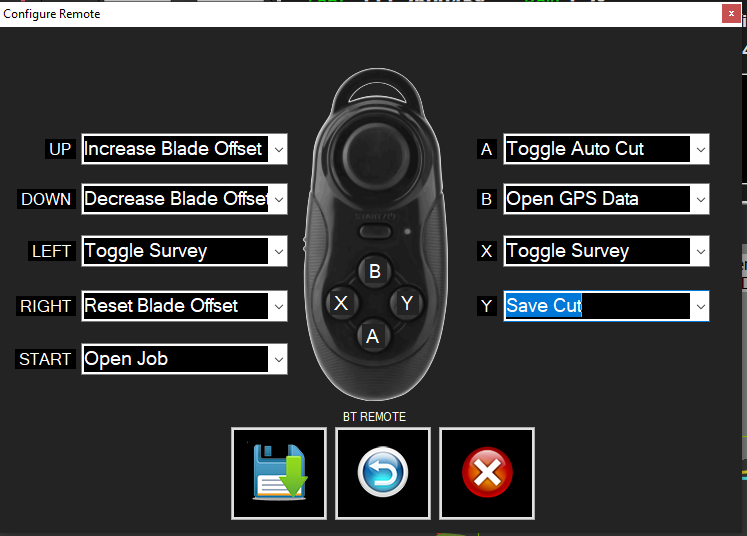
Couple bugs to work out yet but should let you program whatever function you would like to each button through OpenGrade.
2 Likes
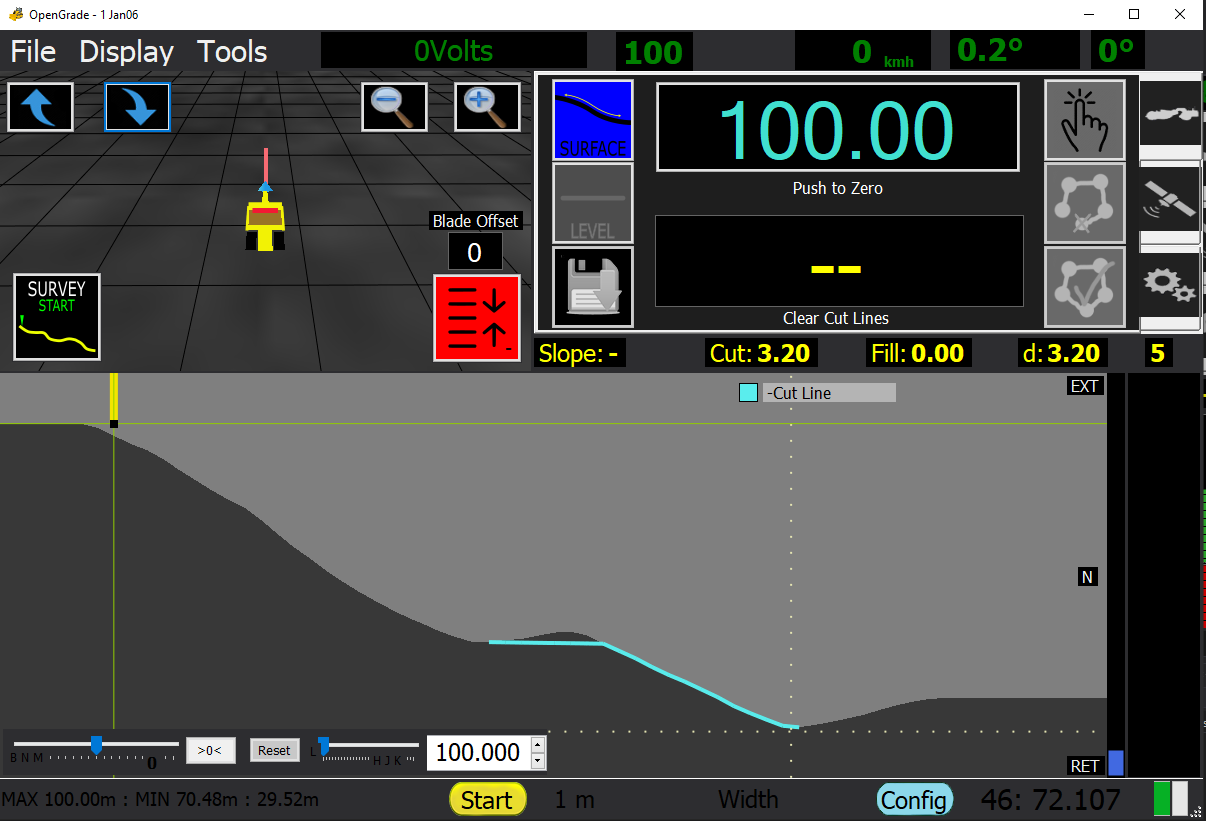
Nice work BlackAce. I have been playing with ,very useable in pipe mode. (simulation)
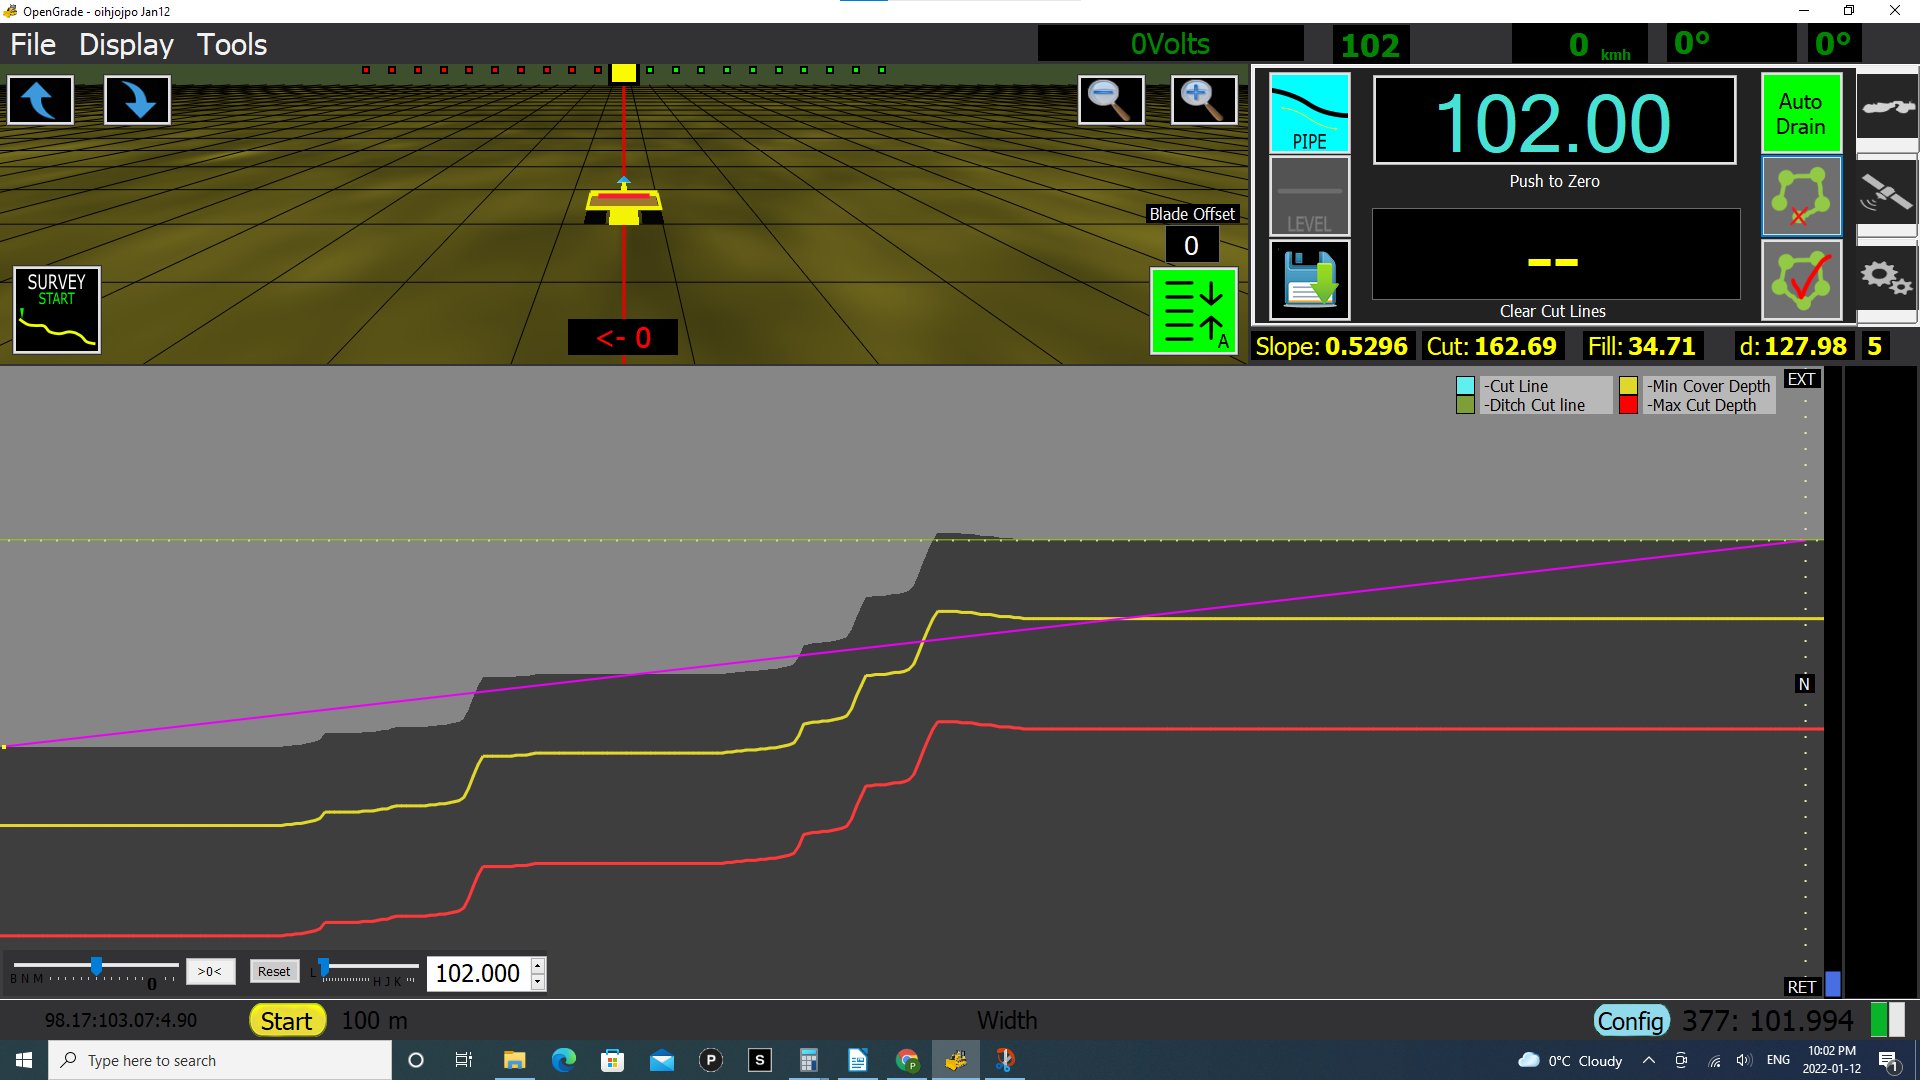
Is the “distance” (beside the Start button used to calculate slope?
Is this distance different then the coordinates in the lower right?
The slope is calculated correctly using these coords. but not when using the “distance” (beside the start button)
2 Likes
This is because I have not re-written it to work from a low point to a high point yet. Sureveys must start from a high point and go lower from there to calculate slope. Then the auto slop will populate as well, in auto mode It also starts the survey from the first survey low point (ie-low point of a slough) and builds your grade line from there.
As well the bottom right is the surveyed point height and believe the bottom left is actual grade height (surveyed height - antenna height), or I have accidentally put a bug in there I will look into it.
The auto drain feature is not specific to any of the modes yet I have an idea of how I would like it to work for the ditch mode but will
Need input from members on how they would need the pipe mode to work.
1 Like
Have you got any PCBs from the new board design
delivered?
1 Like
I have not yet want to make sure everything is correct before I send away for them
2 Likes
Bottom Left was a bug, good catch. I changed it up a little so it is a little easier to ready it displays the max elevation the min elevational and the the overall difference between the two.
1 Like
Wireless GPS and GradeControl connectivity pretty well complete. No more wires! Connects over WiFi to the esp32.
1 Like
Sounds nice. Do you think it will be reliable?
1 Like
I think it should be, haven’t ran into any issues in testing, yet. Real world may tell another story but works good on the bench.
1 Like
Your connecting the ESP32 directly to computer? or using a router?