Minimalistic AgOpenGPS test system and lightbar steering for 300 €

Have repeatedly been told in the forum that my expectations are a bit high, and my experience with AgOpenGPS a bit low.
Agreed.
So let’s build a learning system to bridge the gap and start to get moving.

Got a used Microsoft tablet with WIN 11 on it, a BT mouse and keyboard for desktop use, a 12V-cig-lighter adapter and 20 € tablet holder into my John Deere 6530, all together ~ 200 €

Replaced one of the cab screws by a rod and welded a nut to 16 cm round steel plate:

My first RTK module - a quectel LC29HDAMD with a PL2303 UART-cable - refused to cooperate with WIN11. With 1 Hz output rate, it was too slow for field work, anyway.

Thus, my first tractor RTK-test was Android-only.
The gear goes to a android survey stick reported here:
100 € survey stick

So I got a LC29HDAME (37 €) with 10 Hz output rate and a decent metal case as recommended by u-blox antenna and RF design instructions.

The tall HA-3011A antenna in the image came with a (unusable) UM626N, but went to my survey stick as well.
On the tractor, my next tries now go with a 3-Band HA 901-A for ~ 30 €
In the mean, I got a bunch of AG-30 for the same price (usually they are sold at ~ 40€), which are reported to deliver superior performance. Let’s see.

Desk tests revealed that while the 1 HZ variant ran stable for hours from the UARTS USB power, the 10 Hz version does not so.
It works, when I add a second USB-C-power-only-cable to an active Hub, powered by a power bank.
For continued tractor use, I’ll prefer a 12V-in USB-out charging outlet.

The provisional test cabling with an open module does not easily fit into my case any more.

I expect CH340 UART in cable plug format the next days.
Hope I can report success then.

The datasheet says that even the LC29HDA doesn’t support 10 Hz.

sorry, mixed the letters …
the 10 Hz variant is coined LC29HEAMD
and iet DOES spit 10 times per second, just have it on the bench again.

Nice but nasty detail solved - as I hope:

(Tractor is back from service, but I’m still busy with my base station and waiting for USB-UART-cables without PL2303.)

But what I can say from bench testing is that it is possible to power a (10 Hz) LE29HDE… from a USB_C-Hub conntected to the tablet by USB-C.
(It was not possible to reliably run this module on USB-UART-power alone.)
Just connect a simple passive 2-wire USB-C-to-5V-cable to the module’s 5V input and GND.
No extra power line to the hub or to the module required.
(Earlier tests ran with an extra USB power bank, and I was planning quite elaborated power cabling…)

I think this finding eases the job of simple test setups quite a lot.
I had a similiar power issue with UM982 (the dual antenna variant). While A (single antenna) UM980 runs fine on UART power, the UM982 does not. Hope it will be able to power it this way as well.

When you click the image for full scale, you can read the “EA” under LC25H on the module cover.
I prefer to put all my modules into metal cases for RF shielding.
What’s the experience with GNSS modules in the teensy box in plastic covers?

Maybe for the cabling, I have to find some way to fix the DuPont-cables against vibration.
May be some 3D-printed part, or glue, or shrink wrap


This ist the hub I mentioned.
got it for 5€ here
8 in1 USB C HUB 3.0 Type C Splitter 4K Docking Station Laptop Adapter PD SD TF Voor Macbook Air M1 iPad Pro RJ45 HDMI-compatibel - AliExpress 7
and a similiar one (same shape, albeit with labeled ports) for 20 € at ebay.
Found no difference yet in bench tests.

The white USB-C is the power cable which supplies the GNSS module.
It has a USB-C power-in where even the tablet can be loaded, so I’d not even require a tablet power supply.
It has a Ethernt NIC (to the left) so I can connect e. g. a teensy steering box later on.
It has a HDMI socket so I could add a second screen, e.g at the sun visor for light bar.
And still a USB-A left where I will try surfstick for internet connection.

oops, looks like I forgot to ask the lords of monoply for permission :see_no_evil_monkey: :man_shrugging:

I cannot find any surf stick compatible with WIN11 any more.
Neither on my shelves, nor in the internet.

OK, may be an age old Huawei E220 isn’t even compatible with the signals any more.
But wouldn’t sth. like a more recent K51654Z LTE stick on the tractor’s roof top be the perfect internet access? Optimized for continued RTK-fix as close to the trees as possible?

I find some recommendations aka “manual start of installation” for the LTE stick, but that does not work. Just flash up of a window and disappearing in fractions of a second. No device recognized after that.

And I can’t find even a single one LTE / 4G / 5G stick for sale that is advertised as compatible with WIN11.

Just some silly comments like comparing surf sticks with outdated floppy disk technology. Advising for more modern solutions like dedicated routers (most of them runnign skd of linux under the hood) or mobile tethering (e.g. on adroid - beeing a linux, too).

For me that reads like
Windows dropped the connectivity to contemporary mobile network connectivity and requires a linux layer inbetween
:man_shrugging:

… so I picked an old GL.inet GL-MT300N-V2 from the shelves, installed an up to date OpenWrt 24.10.1 and tried my best with the Vodafone stick.

In the end, it boils down to WLAN connect to the router to get internet - no less boxes than with tethereing on a mobile.
Can’t configure SIM PIN permanently, so I have to enter it on a browser window after every restart of the router.

Only get 4G, no 3G or 2G. With a look on the coverage maps of my fields, this worries me a little bit.

Ordered a Huawei E3372H-320 now. This has two connectdors for external antennae, which I might mount on the tractors roof. Hope it will improve RTCM continuity. Or go for sth like the RUT241. But that’s beyond the “minimalistic” scope of this thread.

You seem to go a long way to get ntrip to your system. There is another way: lefebure ntrip app on your phone and Bluetooth to your gnss receiver.

Sure, the phone is the easiest mobile access.
At least for quick 'n dirty.

What’s the advantage of a dedicated ntrip (like lefebure) compared to using AgOpenGPS builtin ntrip client capability and accessing the internet by WLAN / mobile tethering?

My first system was before UDP and with a ublox co99 with built in Bluetooth.
Another reason is I don’t have to do any settings to prohibit windows from doing an update while on mobile connection.
And my second system with ardusimple F9P , just added a xbee Bluetooth in the slot on F9P

Are you kidding?
I admit I am a WIN-moron. Stepped out at WIN2000 because I was so embarrased.
Looks like this state of affairs is not far in the future, again :see_no_evil_monkey:

Just found a button in AgIO “Linux only”
really curious about the idea behind…

different way of working for broadcasts, nothing exciting.

Crop is in the bins (or on the wagon, at least…).
Stubble cultivation with the disc harrow looks like a fine chance to test and learn AgOpenGPS in real live.

  • I’m impressed by the enhancements of this real simple setup
  • stepping up the learning curve in leapfrog speed
  • some critical questions get sorted out

Running with a Quectel LC29HEA (10Hz) now.
Antenna is a W70C, which looks similiar in sice and rigity to ublox ANN-?? series.

Some silly newbie mistakes to avoid:

  • be sure to turn off simulation mode
  • the “E” variant of LC29 runs at 460800 baud by default.
    uprecise does autbaud, AgOpenGPS / AgIO does not - manual setting is required.
  • If you set the the Com port in AgIO, you have to confirm by tick the green mark
  • test your setting out in the fields when you have time, since settings may differ from what works at home…
  • my own RTKbase base station seems to drop out at whatever occasions, don’t know why :face_with_peeking_eye:
  • If you need secret credentials for fail-over out in the fields, be sure to have them available.
    And a real keyboard and mouse greatly enhances the job of cut&paste them …
    F for unknown reasons, I used to start with my tractor shown in reverse direction.
    Lot of stuff is turned around and weard, then.
    Reverse drive is indicated by an yellow arrow.
    Just (double?) click the tractors image to reverse.

Any of this issues may look like a now-brainer in their own, but if 3 or more hit you at the same time, and you’re under stress, you (I) may get lost, give up and start stubble cultiviation without GPS assistance.

After managing the newbies challenges, I’m impressed:

  • even with a single antenna and no IMU, at RTK fix, heading of the tractor is quite realistic
  • the task of disk harrowing is largley improved in conditions of dust, dirty windows, twilight, darkness…
  • AgOpenGPS window providing a second view to reality
  • in row-by-row operation, I manged straight and even processing with 0% overlap
  • in preplanned spaced tracks at 20 % overlap, even if single tracks may look really awful when implemented by an untrained light-bar-slave, the final work result looks convincing
  • I’d prefer the distance of track line to tool center above the light bar instructions.
    May be the human brain (at least of experienced farmers) already has a PID circuitry built in?
  • the capabilities of AgOpenGPS seem to outperform the available documentation by quite some amounts. Stubble cultivation may be a good chance to explore and learn, without any damage to established crops.
  • wanna have autosteer

Sad to say, the antenna just survived two kicks by branches from its magnetically mounted place at the ground plane.
After the third kick, I get AGIO error.
Uprecise reports empty NMEA messages - like no antenna connected.
Haven’t done thourugh testing, but seems like the receiver has no signal any more.
Maybe it’s just the cable, or something inside.

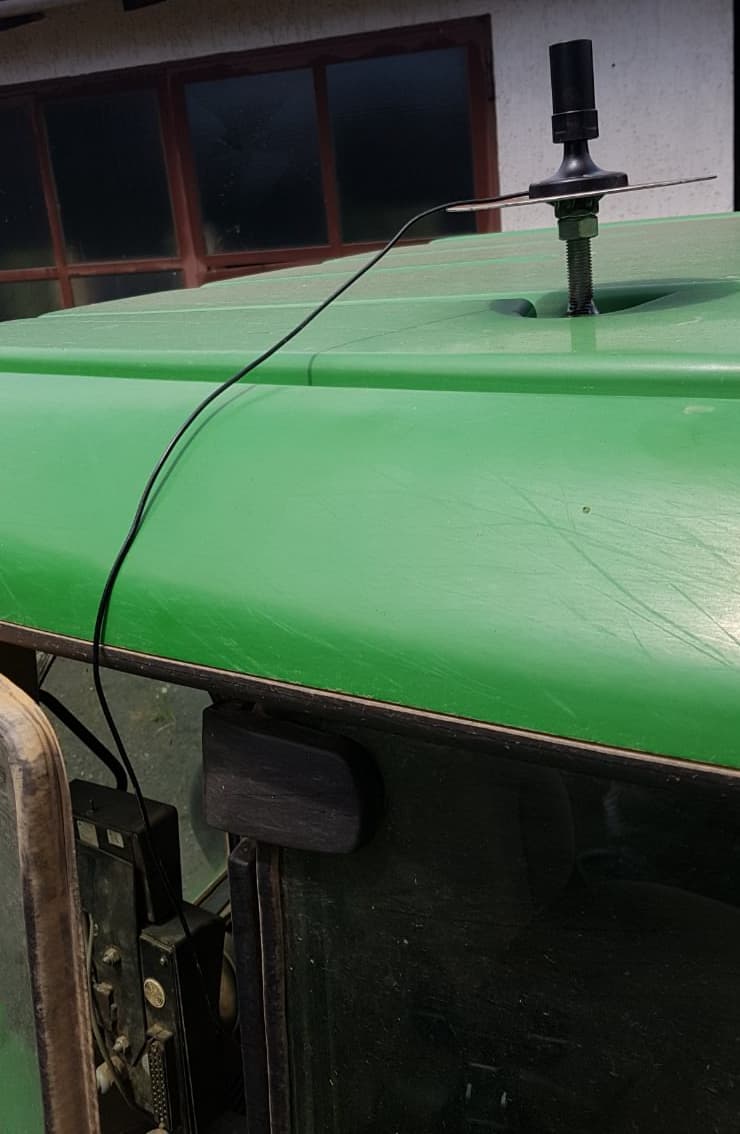
Replaced the broken antenna by an AG-30 from my shelves.
Budget limit stressed beyond hope :man_shrugging:

AG-30 has a threaded TNC antenna connector, so I hope that I can easily change cable just in case same accdient happens again.
Works again :smiling_face_with_sunglasses:.
Take to my notes that protection of antenna and cabling on rooftop may be an important issue albeit budget killer.

Go ploughing.
5 body Kverneland EG 85 V, three-point hitch, reversible, variable width.
Be impressed.
Had not expected that much advantage by a simple lightbar system (which is of little use in plouging, anyway)

In falling priority:

  • precise lifting of the plough at imaginary parallel to headland line
    (independent of view conditions such as daylight, slope, drivers mood and person, headland angle…)
  • assistance in ploughing headland outwards (so I hope, still to be tried) in ± parallel tracks
  • assistance in straightening curved tracks (curved start borders, distorted tracks)

Would-be-nice:
Approach arbitrary angled or curved target end border from whatever current line.
I think it boils to the same algo than ploughing parallels in a headland - just much more deviation to be spread over much more tracks.
However, following lightbars is a strenous task. We may follow it for a couple of headland tracks, but nor for a field hundreds of tracks in width. For sure, this is the point where automagic tool steering might come handy. Let’s see…

Back to the low hanging fruits.
Start with straightening curves, since this is what my field started with …

  • choose two outmost points (think of a line touching the courve from outisde)
  • set an A-B-line on those points (while ploughing the first track)
  • continue ploughing, set it at max width at the outmost points
  • set the plough (close) to min width when driving in parallel to the AB line
  • interpolate by experience and gut feeling

In my first trial, I was too keen in approaching the straight line as early and as long as possible.
Ended up in acute kinks when coming closer to the max width points.
Better keep a ~ constant (albeit growing) radius.
You don’t loose time by missing min-tracks - yust some more tracks until straight line.
You loose time, however, by missing max tracks.
You loose work quality by acutes kinks and by long travel at max or min width.

Imaginary headland lift mark

  • from my eyperience and stepping along tractor + plough, I decided for 15 m headland width
  • My plough makes 5 x (12 … 16 … 20 ") = 1,50 … 2 … 2,5 m
    On headland, I go for the median = 2m, so I have maximum margin to correct in both directions.
  • 8 x 2 m = 16m - so I set a 16 m Headland around the field
  • tried different tool configurations, but be sure that the tool image on the screen matches the longitudinal position of the last shear of the plough
  • lift the plough as soon as the tool picture passes the headland line

My preferred ploughing width is 18 " per shear = 2,25 m in total. This yields still perfect quality at best performance. Anything lower decreases performace. Below 14 " = 1,75 m quality decreases as well (forrow is not turned cleanly). Above 18 ", shear does not cut completely, leaving deep rooted weeds (thistle, sorrel, couch…) alive.

My first trials ran with a symmetric tool of 2,25 m. This works fine for obtuse headland angles. For acute angles, this produces significant error, since the tool displayed (symmetrically) is ~ 50 cm off the real plough.

Now I try tool settings with 5 sections:
50 + 50 + 125 + 50 + 50 cm

In normal operation, I set the 3 mid sections to “green”.
Thus they are logged as covered, as soon as the tool crosses the headland.
I still see the (disengaged) outer sections (in red) to determine the correct lift point at acute headland angles.

Predicted ha/hr is wrong, but I think & hope that really covered area is OK.
Covered area as logged is off by ~ 50 cm from the real place.
This is OK in the fields. Track-by-track distance ist shown fine.
However, it may cause confusion at the headlands towards the final borderline.

Btw: To lower the plough, I still rely on experience, gut feeling and the picture of how fast it enters the soil.

May be there is an even better way to work with nudging and a single section of 2,25 m.
Still have to plough the headlands - perfect chance to test and learn.

Another issue comes from the lack of roll and yaw correction (single antenna, no IMU yet).
Antenna on roof top is dancing as the tractor passes furrows (I like changing directions between subsequent operations). AOG interprets this as wiggling track, and places the tool (assumed to fixed to the tractor) onto an oversteering wiggling track. Visual image of track distance is destroyed.

We know that a plough is to be operated with loose side constraints on the link.
So I replaced tool setting by a trailed tool, 6 m long, zero pivot distance.
Actually, the effective pivot of a loose 3-point is far before the rear axle, but AOG does not like negative numbers, as it seems. Never mind.

Now I get smooth tracks, and the overlap / distance of adjacent tracks seems to resemble the real situation quite perfectly.

Only after turning, the image gets weird.
Well - it does as told: compute the plough as it were pulled by a pivot at the mid of the tractors rear axle :speak_no_evil_monkey: - even while turning - :see_no_evil_monkey: :man_shrugging:
I don’t see any option in AOG to tell it that on turning, the tool behaves as fixed, but as soon as it is lowered, it behaves as trailed (within narrow but realistic limits).

Since the first 50 m after lowering the plough are guided by intuition anyway, I refrain from issuing a feature request - yet.

Headland plouging has a steep learning curve :face_with_peeking_eye:

4 sections:

The fist one outward, so I start at the border and work inwards manually and try to understand the dance of AOG lines. Expected to predict working with at least - no chance.

The second one is inward, at a curved border.
At least I manage to follow a precise parallel to the border for my first track.
I neither managed to to equally separate the strip nor to set proper guidelines.

The third one was close to a desaster. :see_no_evil_monkey: :hear_no_evil_monkey: :speak_no_evil_monkey:
Inward, straight, so I thought it was easy at least to find the starting parallel to the border.
But there were kinks in the drive-in line of the border, where I passed markstones.
Looks like the acerbated at extrapolation inwards and triggered the system of me trying to steer and AOG to chaotic oszillation.
Finally, I got it ploughed ending straight at the border - but just by strictly avoiding any look at the AOG screen.

Headland section No 4.
Try to get a hold on the choreography of the dancing lines.
Set the tool with to 2,25 (3/4 of max width), forget all nudging, overlap, section and other tricks still a somewhat opaque to a beginner like me.

Set the plough to 2,25 m and position the tractor parallel to the border, such that the final share just cuts the border, as intended when ploughing the last furrow.
Press the button with the red line and two arrows and find that I get a line parallel to the edge, trough the center of my tractor.

Then I move inward to the field and find equidistant paralles at 2,25 m spacing. Great.
I choose the one best fitting as start and try to follow the lightbar / arrow indicators.
Would be better to train this at an easier Job than ploughing… :man_shrugging:
Without kinks in the border triggering to jump between parallels, the result was close to fine.

In the next lines, I can’t follow the lightbar, since the tractors’s wheels are bound to the previous furrow. Instead, I read the cm-offset-value beneath the light bar, add / subtstract this to the 2,25 cm tool width and try rougly to set the plough to that width by playing the SCV.
Poor man’s tool steering, so to say :smiling_face_with_sunglasses:

Alas: the furrows get more straight and parallel to the border at every pass.
Only in the last track, I have to set it to full 2,50 m instead of planned 2,25.
Thus I’m out of correction margin and leave some tiny strips unploughed.
Seems like the real work with is a little bit less than calculated, may be due to side hill.
Next time I’ll plan with 2,0m, i.e. the mid of the adjustable width range.

But at least, I’ve understood the principle of one option. May be there are more?

Mount the seed bed combination.
6m, trailed.
Nobrainer. Perfect for training.
Sadly, thre is little sense in tilling a field before ploughing it, however :wink: :man_shrugging:

4 rounds inwards from the border, using the adjacent track button and 20 cm overlap.
Slowly get used to follow the light bar. Prefer the arrows, however.

For the area, I decided for an heading angle and started at a corner - setting an A-angle line there.
Increased the the overlap to 30 cm, since for preplanned paths, error’s square roots add up.

The arrorws are dancing like crazy.
Foud that to be due to roll artefacts when crossing ploughed furrows at an angle.
Tried not to follow their jumping, but keep them symmetrically distributed to left and right.
Takes some time to abandon thinking and incorporate intutive moving.
In the end - night already - I felt quite relaxed and comfortable.

15 ha with no single unprocessesd strip.
Although the cm offset figure somtimes exceeds ± 50 cm.
Assume this referes to tractors position, so the trailed tool may iron this out.

I thought it might be necessary to mount the screen in front view for permanent light bar steering.
But in the end, I got used to side view. After all, it’s easier to look at some side monted screen than to look back over the shoulder at the tool, as I did without GNSS.

I think 30 cm precision are the limit without roll compensation, at least on ploughed land.
But with roll compensation (IMU or dual antenna) I’d expect room for improvement for light bar steering. Lets try.

Arrows are also dancing with an IMU. Try to set look ahead and distance between fix very high to calm down the heading. Must admit that with an IMU you can also set to full 95 percent IMU to smooth out the heading.