My mouse connects to the PC automatically for more than 20 years now, but GPS, etc. in AgIO doesn’t. It’s an open source project, so let’s go!
In this short video you can see, how it is working in general. Sorry, poor qualitiy - driving, filming and speaking English was too much.
Also added is sensor fusion BNO085 (in RVC mode) and GPS and dual-heading GPS. Both don’t need any further Arduino board, etc!
My spoken explaination is quite poor, so let me say some words here:
1st GPS is already connected and running in the beginning (would be detected automatically as well)
BNO085 with a simple USB-Serial (TTL)-cable is connected. Initial heading value is always 180° (in RVC mode, the BNO085 only does relative heading, but nevertheless absolute roll)
after driving some meters, the correction value is determinated; from that point on, it does a fusion between GPS and BNO (very likely not perfect right now)
after unplugging the BNO, a 2nd Ardusimple board is connected via USB
after a while, AgIO calculates the heading and roll
With this extensions, no additional hardware is needed for heading (dual or IMU). Only the readily available modules from Ardusimple and Adafruit, etc.
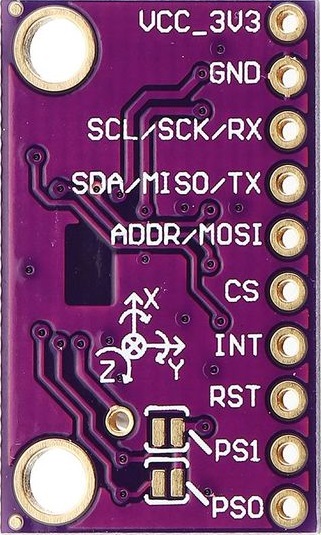
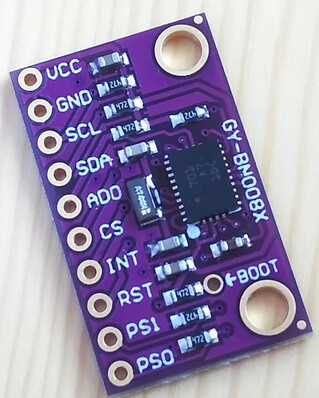
“PS0” must be connected to “VCC_3V3”. In your case, a solder joint on the jumper associated with PS0 will do that job.
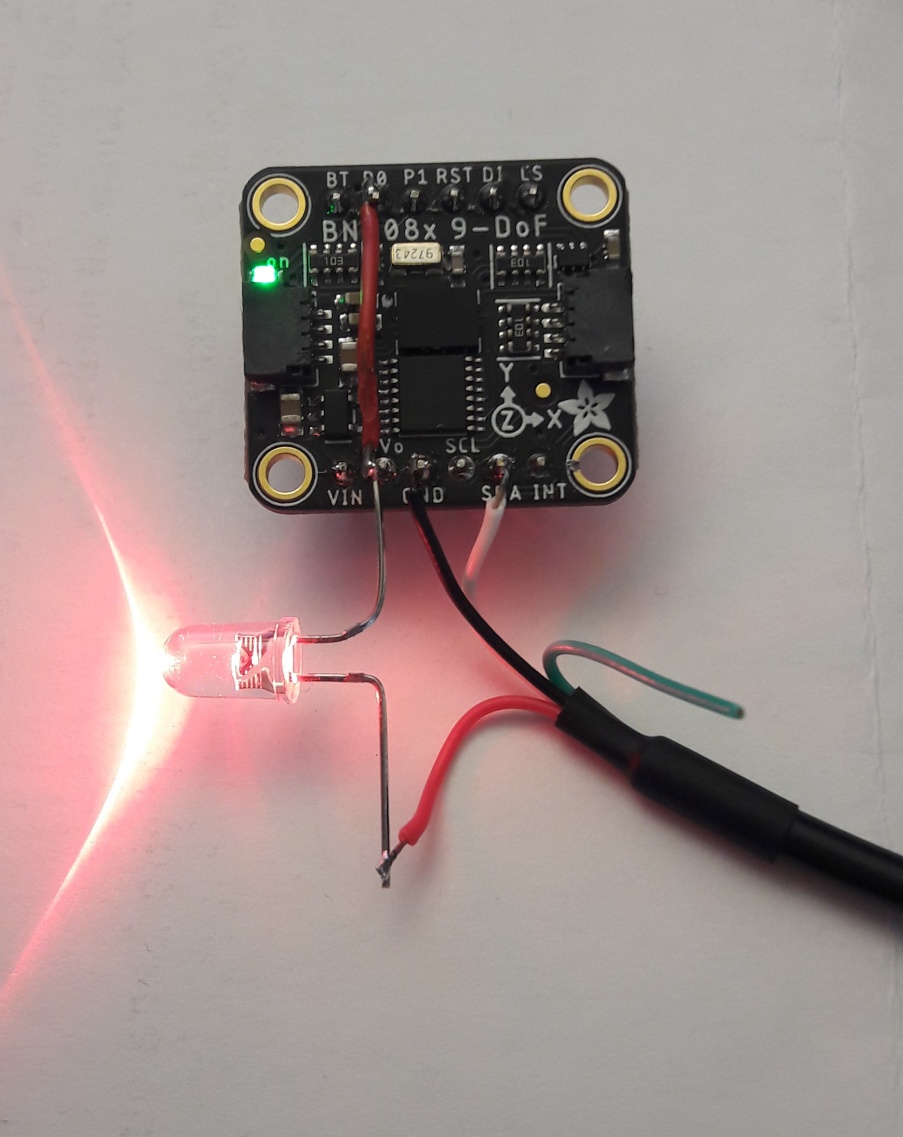
It’s a 3.3V-only board, so be sure to use a Serial-USB-cable with 3.3V supply output. When using a simple cable like this, just daisy-chain a red LED in the supply line of the cable. Connection is like that:
“GND”: GND (often a black wire)
“SDA/MISO/TX”: RxD of cable (often a white wire)
“VCC_3V3”: supply like descibed above (often a red wire, mind the voltage!)
That’s all. After that, you can check the data flow with any terminal program like HTERM. Setting is 115200 baud, 8N1.
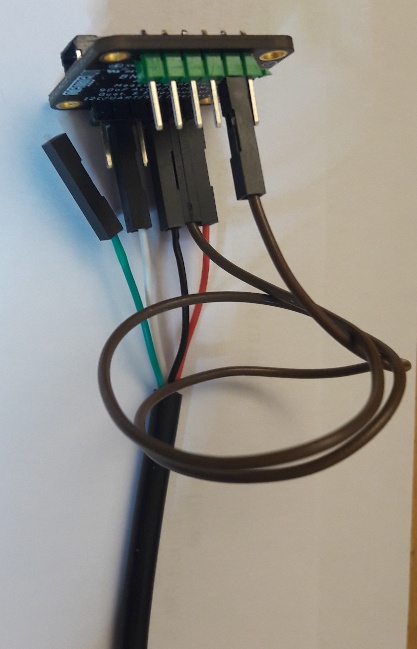
I don’t recomment cables based on CP2303 clones, because Win10 is causing trouble and don’t use CP2303 originals, because Prolific is the reason of that trouble. For the same reason, avoid FTDI cables. Suggestion: CH340-based cables like shown here with an Adafruit board (has an onboard voltage regulator):
Finally it should be part of AgIO - I don’t want to fork it. I’m in contact with the main actors. I added a lot of new stuff, but of course, there will likely be some additional bugs, too. So, not easy to merge and feedback is welcome of course!
That looks great! Very simple! One more thing that would be nice in Agio, is another com port to send nmea (after roll has been corrected) back out to 3rd party monitor. Thank you for your work!
there is one problem: AgIO doesn’t know the level of the antenna above ground. So finally, AgOpenGPS would have to calculate that (or provide that value)
no, that one fries your BNO, when connected directly! It has a fixed 5V power output acc. to what I can see on the webpage - just the TxD signal may be switched, which is unconnected here anyway.
Connection of USB-Serial-Cable to BNO085 in RVC mode: 1st pic shows USB cable supplying board with 5V, if there is a voltage regulator on it; 2nd pic shows the same cable w/o using the voltage regulator. The 1st is prefered for this Adafruit board, the 2nd is for all boards w/o voltage regulator. Supply voltage is about 3.05V in that case
The BNO085 is difficult to buy these days, so it’s worth having a look at the Arduino Nano RP2040 Connect board with its integrated IMU I think.
A prototype implementation using this one for AgOpenGPS can be found in my Github repo. The IMU itself is as good the the Bosch sensor of the BNO, but there is no magnetic sensor and so a continuous calibration of the heading isn’t possible so far. A certain drift is remaining, but may be eliminated in combination with AgIO one day.
With the Python script, the sensor emulated an BNO085 in RVC mode being compatible with the AgIO mod described in these posts here.
it’s a dual core - so, yes, I wouldn’t expect preformance issues. One core can do the IMU, the other one the communications. But I don’t need PANDA, because I simply connect both to USB. The only advantage would be, that the NMEA can continuously calibrate the heading. Furthermore, the RP2040 has two xtra UARTS, so also dual is an option Wifi would be possible as well.
And it’s really another level of development - not the moldy Ardusimple IDE. It behaves like an USB stick and you can connect via debug wire alternatively. That’s really up-to-date now.